The Yale forklift brake adjustment procedure is more than just turning a wrench. It’s what keeps your operator safe and your warehouse from grinding to a halt. When that brake pedal gets spongy, it's a neon sign screaming that the guts inside the drum need attention, and you need to get on it before a simple fix turns into a disaster you can't afford.
Why That Spongy Pedal Is A Ticking Time Bomb
Let's get one thing straight: that spongy brake pedal isn't an "operator complaint." It's a ticking time bomb parked in the middle of your floor.
Out here, we wrestle with "Yellow Iron" every day. We know the pain of a JCB throwing a code because its AdBlue/DEF system got a bad thought, or waiting for some suit with a "Dealer Laptop" to show up and "bless" the machine before it will even regen. A simple mechanical brake job is one of the few things we can still control without their permission. Ignoring it is just asking for trouble.
This isn't about passing an OSHA inspection. This is about preventing that gut-wrenching moment when a lift can't stop at the end of an aisle. We're talking about smashed pallets, ruined product, and the kind of downtime that has managers breathing down your neck. Forget waiting for the dealer; this is a field fix we handle ourselves.
The Real Cost of Neglect
I got a call about a 3.5-ton Yale rig with "lazy brakes." The operator had been grumbling for weeks, but it kept getting pushed off. One afternoon, he's coming down a ramp, fully loaded, and the pedal hits the floor. He swerved, dumped the load, and took out a whole section of pallet racking.
The damage report:
- A thirty-thousand-dollar mess of trashed inventory and bent steel.
- Two days of downtime to fix the racking and the forklift.
- An operator who was shaken and pissed off—and rightfully so.
When I finally tore it down, it was exactly what you'd expect: brake drums packed solid with crap and an adjuster that was completely out. It was a two-hour fix that turned into a catastrophe because nobody listened. That’s the reality of putting off a real brake job.
The difference between a routine adjustment and a major incident is often just a few millimeters of shoe travel. A firm, responsive pedal is your first line of defense against inventory loss and, more importantly, injury.
More Than Just Stopping Power
A proper brake adjustment is about control. In this game, that's everything. Statistics show that brake failures contribute to about 22% of all forklift accidents reported to OSHA between 2018 and 2023. That’s not a number from a sales brochure; that’s real metal getting bent and real people getting hurt.
That's over 1,200 incidents a year in the U.S. alone, and most of them are preventable with the kind of basic maintenance we're talking about, especially on workhorse models like the Yale 35UX 3.5T forklift.
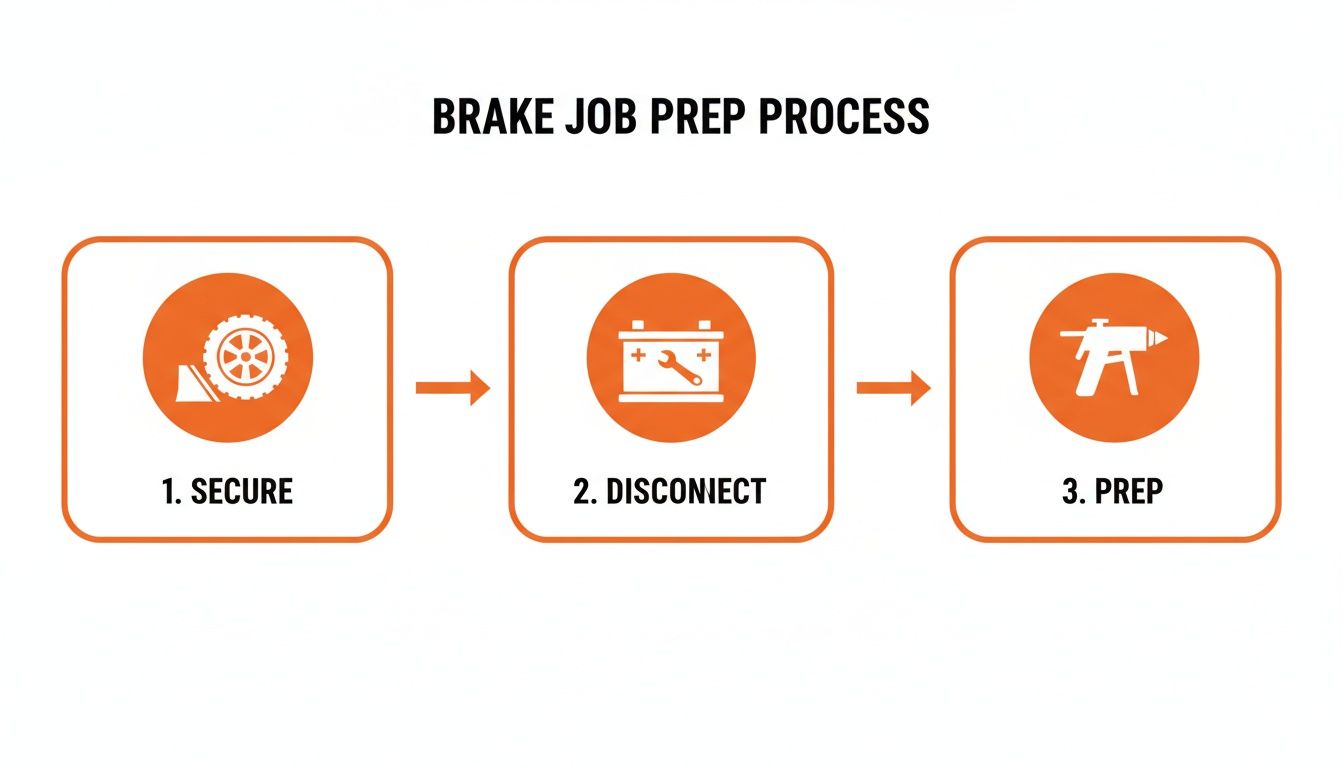
Signs Your Yale Brakes Are Begging For An Adjustment
Don't dismiss what the operator tells you; they're your early warning system. This table translates their complaints into what you need to fix, so you can stop guessing and start wrenching.
| Symptom | What The Operator Is Complaining About | What It Means For The Technician |
|---|---|---|
| Spongy Pedal | "The pedal goes almost to the floor before it grabs." | The brake shoes are too far from the drum. The pedal has to travel a long way to close the gap. |
| Pulling To One Side | "When I hit the brakes, the whole machine jerks left." | One side is adjusted tighter than the other, causing uneven braking force. It could also mean contamination (oil/grease) on one side. |
| Grinding Noise | "It sounds like rocks in a blender when I stop." | The brake shoes are likely worn down to the metal backing plate. This is an urgent "stop and fix now" situation. |
| Poor Stopping Power | "It just doesn't stop like it used to, especially with a heavy load." | The shoes are glazed, worn, or the drums are out of adjustment. Not enough friction is being generated. |
Knowing these signs lets you get ahead of the problem. A machine that works is a machine that makes money. A spongy pedal is a direct threat to both. Before we touch a tool, understand this isn't just another repair—it's keeping your operation running and your crew safe. You can check out our guide on forklift safety standards to learn more.
This guide will walk you through the entire process, field-style, so you can get those brakes dialed in right the first time, without waiting for the dealer.
The Right Tools And Safety Checks For The Job
Walking into a brake job blind is a rookie move. It's the fastest way to turn a simple adjustment into an all-day nightmare. Forget the pristine tool list in the dealer's manual; we’re talking about what you actually need on a greasy shop floor.
First, your jack stands. Don't even think about using those flimsy auto parts store specials. A forklift is a dense chunk of iron with a screwy center of gravity. You need heavy-duty jack stands rated for the machine's actual weight. I’m talking at least 3-ton stands per corner, on solid, level concrete. No exceptions.
Next, your brake spoon. Get a quality, forged steel one. The cheap ones snap the first time you put some real ass on a stubborn star wheel. A few extra bucks here saves you a world of pain later.
Essential Gear For The Field
This is the stuff you have ready before you even pull a wheel. It's the difference between a smooth job and a circus of running back and forth to the toolbox.
- Heavy-Duty Wheel Chocks: Not bricks. Not 2x4 scraps. Real, rated rubber chocks for the wheels staying on the ground.
- Brake Cleaner: At least one full can. Brake dust is nasty, and it hides cracks and leaks. You can't inspect what you can't see.
- High-Temp Brake Grease: Not optional. It's for the contact points on the backing plate so the shoes can actually move.
- A Bright Paint Marker: Pro tip. Before you touch that star wheel, make a small mark on it and the backing plate. This "index mark" is your starting point, making the final adjustment way easier.
Non-Negotiable Safety Protocol
Follow this sequence. Every. Single. Time. This isn't about being paranoid; it's about going home at the end of the day.
This isn't dealer-mandated paperwork. This is the hard-learned process that keeps you safe when you’re working alone, miles from the shop. Rushing this is gambling with your life to save a few minutes.
First, kill all potential for movement. Chock the wheels that are staying on the ground—front and back. Next, disconnect the negative terminal on the battery. This kills any chance of the machine lurching or an electrical short starting a fire.
Finally, clear your workspace. Get rid of the clutter. You need room to move, especially if you have to get out from under the machine in a hurry. For a deeper dive, you can learn more about our forklift safety protocols. Doing this right sets you up for a safe, successful brake adjustment.
The Teardown And Adjustment Process Step-By-Step
Alright, let's get greasy. This is where we get past the manual and into the real work. The first, and most critical, step is getting that forklift safely in the air.
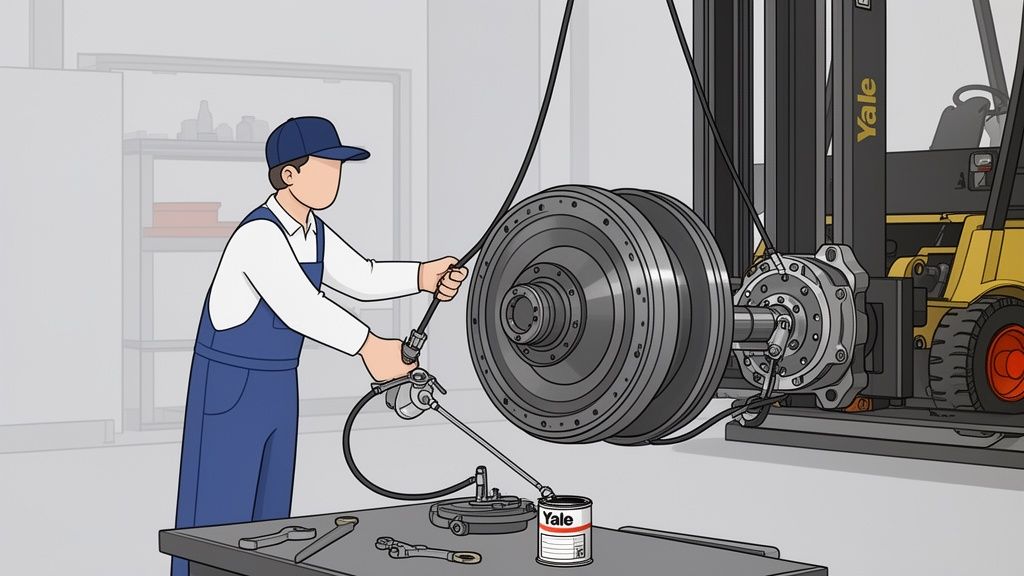
Once it’s up and secure on heavy-duty jack stands, pull the wheels. A breaker bar works fine; I always finish by hand to feel for stripped threads. With the wheel off, you're looking at the brake drum. If you're lucky, it slides right off. You probably won't be.
A few solid hits with a dead-blow hammer between the wheel studs usually breaks the rust loose. If it’s really stuck, there's a wear ridge on the inside catching the shoes. You'll have to find the access slot on the backing plate and back that star wheel adjuster all the way off before the drum will even think about coming off.
Before you grab a hammer, this prep work is non-negotiable.
This sequence—secure, kill power, get parts ready—is the foundation of a safe brake job. It stops the machine from rolling and prevents nasty electrical surprises.
Inspecting The Guts
With the drum off, the brake assembly is exposed. Time to play detective. Besides being out of adjustment, the number one killer of brakes is contamination. That filth of brake dust, grease, and grime is your enemy.
Blast everything with brake cleaner until it's spotless. Now you can actually see what you're working with.
Key Inspection Points:
- Wheel Cylinder: Look at the rubber boots. See any wetness? That's a leak. A leaking cylinder will soak your new shoes in brake fluid, ruining them instantly. Find a leak and this job just got bigger. At Flat Earth Equipment, we stock the sensors, solenoids, and filters you need right now, so you aren't stuck waiting on a dealer.
- Brake Shoes: Check the friction material thickness. For most Yale models, 1/16th of an inch (about 1.5mm) is the minimum. If it’s close, or the surface is shiny and glazed, just replace them. It's cheap insurance.
- Return Springs: Are they stretched, rusty, or weak? A tired spring won't pull the shoes back, causing drag and premature wear. Swap them out.
- Hardware: Check all the small parts—pins, clips, posts. Make sure nothing is bent or broken.
On some older Yale models, you might have to pull the axle to get the drum off. Don't sweat it. It's usually just a few bolts on the axle flange. The whole assembly slides out, giving you full access. It’s an extra step, but the inspection inside is the same.
Dialing In The Star Wheel Adjuster
This is the heart of the job. With everything clean and checked, put the drum back on. Now, using your brake spoon through the access slot, start turning the star wheel.
Your goal is a slight, consistent drag as you turn the drum by hand. It shouldn't lock up, but you should hear and feel the shoes just barely kissing the drum. That’s the sweet spot.
Once you find that drag, back it off just enough for the wheel to spin freely with minimal noise. A good rule of thumb is to back the star wheel off about 5 to 8 clicks. This creates the perfect running clearance, preventing drag that builds heat and wears out your parts.
A classic rookie mistake is adjusting until the wheel is hard to turn. That’s way too tight. You want a faint whisper of contact, then you back it off. The brakes self-energize under load; over-tightening just cooks everything.
This isn't just about making the pedal feel good; it’s a critical safety procedure. Resources like the Yale Lift Truck Brake Maintenance Guides confirm that proper adjustment is essential for the parking brake. Data shows correctly set brakes can cut wear by 35% over 10,000 hours. The real test is making sure the parking brake holds the machine on a 15% incline—a non-negotiable standard.
Reassembly And Tuning The Parking Brake
You’ve torn it down, cleaned it out, and dialed in the star adjuster. Don't get lazy now. Putting it all back together right is what separates a solid brake job from a comeback next week.
This isn't just reversing the steps. Before that drum goes on for the final time, grab your high-temp brake grease. There are small raised pads on the backing plate where the brake shoes ride. A light smear of grease on these spots is non-negotiable. It lets the shoes move smoothly and retract fully.
Now, slide the drum back on. It should go on smooth. If you have to fight it or beat it on, your adjuster is still too tight. Back it off a few more clicks until the drum seats flush against the hub without a fight.
Dialing In The Parking Brake
A lot of guys get the service brakes right and forget the parking brake. They're connected. A properly adjusted parking brake is your final check that the service brakes are set right, and it's a major safety item inspectors love to check.
With the drum and wheel back on, it’s time to tune the cable. You'll usually find the adjustment nut on the cable assembly under the frame. The goal is to have the parking brake lever engage firmly within three to five clicks.
If it pulls all the way up with no resistance, the cable is too loose. If it’s rock-solid on the first click, it’s too tight and you're dragging the brakes.
Parking Brake Tensioning Steps:
- Release the Lever: Make sure the parking brake handle is all the way down.
- Locate the Adjuster: Find the threaded rod and adjustment nut on the brake cable.
- Tighten Gradually: Tighten the nut to take up slack. Do it in small turns, checking the lever inside the cab after each adjustment.
- Test the Clicks: Pull the lever up, counting clicks. Aim for that 3-5 click range for full engagement. It should feel solid.
Once set, the real test is to see if it holds the machine on an incline, fully loaded. This isn't a suggestion—it's a core safety requirement.
Bleeding The System If Necessary
If you opened any hydraulic lines—like replacing a leaky wheel cylinder—you now have air in the system. A spongy pedal after a brake job is almost always air. No amount of adjustment will fix it. You have to bleed the brakes.
Start at the wheel furthest from the master cylinder. Have a helper pump the pedal a few times and then hold it down hard. While they're holding pressure, crack the bleeder screw open just enough to let fluid and air out. Close the screw before they release the pedal. Repeat until you get a solid, bubble-free stream of fluid.
A critical mistake is letting the master cylinder run dry. Keep it topped off. If it sucks air, you’re back to square one, bleeding the entire system all over again.
Field Fix For Imperfect Parts
Here’s a real-world problem. You get new brake shoes, but the drum won't fit over them, no matter how much you back off the adjuster. Classic aftermarket parts being slightly out of spec.
Don't pack up and wait for another parts delivery. Take the new shoes to a bench grinder. With a light touch, just chamfer the leading and trailing edges of the friction material. You’re just taking off a tiny bit to create a bevel.
This little trick is often all it takes to let the drum slide on smoothly, saving you from a costly delay. This is a field fix that gets the machine moving, not a shortcut that compromises safety.
Testing Your Work And Troubleshooting Headaches
Alright, the wrenches are down, but the job ain't done. A real tech proves the work is solid before handing back the keys. This is where you separate a quick fix from a lasting repair.
First, with the forklift still on jack stands, reconnect the battery. Get in the cab, turn the key, and pump the brake pedal a few times. It should feel high and hard, not like it’s sinking into the floor. If it's spongy, you've still got air in the lines. Back to the bleeder screws you go.
If the pedal is solid, spin each drive wheel by hand. You should hear a faint whisper of the shoes on the drum, but the wheel must turn with minimal effort. If it's tough to turn, your star adjuster is too tight. Leave it like that and you'll cook the new brakes on the first run.
The Controlled Test Drive
Now for the proof. Get the machine off the stands, pull the chocks, and find an open area. Don't test drive in a crowded aisle. You're going to do a series of slow, deliberate stops.
Start by moving at a walking pace and gently applying the brakes. Pay attention.
- Does it pull sharply to one side? One brake is grabbing harder. Either you adjusted one side tighter, or you've got grease or oil on the shoes of the weaker side.
- Do you hear any squealing or grinding? A little squeal can happen as new shoes bed in, but a harsh grind is a red flag. A spring might be misaligned or hardware is rubbing the drum.
- Is there any chattering or grabbing? This often points to a warped drum or hot spots on the friction surface.
After a few gentle stops, try a more aggressive one from a jogging pace. The forklift should stop smooth and straight, without locking up the wheels. This is the final confirmation that your Yale forklift brake adjustment procedure was a success.
Fixing The Problems That Always Pop Up
Even when you're careful, things go wrong. Don't panic. Field experience is knowing how to diagnose the problem without tearing it all down again. This is where you earn your keep—fixing the headaches that stump the parts-swappers.
This isn't just about feel; it's about safety. OSHA records show that bad brake adjustments are a serious problem, factoring into 15% of the 35,000 annual forklift injuries in the U.S. Properly adjusted brakes can improve stopping distance by a massive 28% from 10 mph. Yale’s own procedures stress this because it cuts incident rates by 42% in trained fleets. You can find other seasoned techs talking about this in forums like Practical Machinist.
When a brake job goes sideways, the problem is rarely the new parts. It’s almost always something that was overlooked during teardown—a seized adjuster, a tiny leak, or trapped air. Your symptom is the roadmap to the real cause.
Let’s run through the common post-adjustment failures and how to nail them down fast.
Post-Adjustment Troubleshooting Guide
This is your field guide to saving time and avoiding the tail-chasing that drives every tech crazy.
| The Problem You're Seeing | What's Most Likely Causing It | The Fix That Actually Works |
|---|---|---|
| Pedal Sinks To The Floor | You have a hydraulic leak. It could be a failing master cylinder (leaking internally) or a tiny, weeping leak at a wheel cylinder or line fitting. | Check every fitting for wetness. If they're all dry, the master cylinder seals are shot. Bleeding won't fix a leak. |
| One Wheel Locks Up First | That side is adjusted too tightly, or the opposite side has contaminated shoes (grease/oil) and isn't providing any stopping power. | Back off the adjuster on the aggressive wheel by 2-3 clicks. If that doesn't work, pull the drum on the lazy side and check for contamination. |
| Brakes Feel "Wooden" or Hard | The shoes and/or drum are glazed over from overheating. This creates a rock-hard surface with zero friction. | You have to pull it apart. Use sandpaper or a scuff pad to break the glaze on the shoes and drum, creating a fresh surface. |
| Spongy Pedal Returns After Bleeding | There's still a pocket of trapped air, or you're using old, water-contaminated brake fluid that's compressing. | Re-bleed the system, tapping the lines and wheel cylinders with a wrench to dislodge stubborn air bubbles. Use fresh, sealed fluid. |
Troubleshooting is a process of elimination. Start with the simplest cause. Getting this final step right is what proves your skill and ensures the machine is safe and ready for work.
Answers To Questions From The Shop Floor
When you're covered in grease and a brake job hits a snag, you don't need a manual. You need straight answers. Here are the common questions we hear from guys on the floor to get you unstuck and back to work.
How Often Should I Really Adjust The Brakes On A Yale Forklift?
Forget the hour meter. It depends on the job site.
A forklift running hard up and down ramps all day in a dusty hellhole? Check those brakes every 250-300 hours. A machine doing light duty on a clean, flat floor? Maybe 500 hours. The best practice is to make it part of your routine PM service.
The real rule? Listen to your operator. If they report a soft pedal, a change in feel, or the parking brake isn't holding, you adjust the brakes right then. Never wait for the next service when safety is on the line.
Can I Just Use Automotive Brake Parts On My Yale?
No. Absolutely not. It’s a tempting shortcut, but it’s a massive mistake that can have serious consequences.
Forklift brakes are built to stop thousands of pounds of steel and product, dozens of times an hour. The materials and heat tolerance are worlds apart from car parts. Using auto parts is a huge safety risk that can lead to catastrophic brake failure and opens up your company to massive liability. Always use OEM-spec parts designed for your Yale model.
What's The Difference Between Drum Brakes And Wet Disc Brakes?
They're two different animals. The drum brake procedure we've covered is a hands-on, mechanical adjustment. You're physically turning a star wheel to close the gap as the friction material wears.
Wet disc brakes, found on newer or bigger Yale models, are enclosed, oil-cooled systems that are mostly self-adjusting. You don't "adjust" them the same way. Servicing them involves changing special hydraulic oil and replacing internal discs—a much bigger job. This guide is only for standard drum brakes.
What If The Brake Drum Is Seized And Won't Come Off?
Classic problem. Nine times out of ten, a wear ridge has formed on the inside of the drum, catching the brake shoes.
First, make 100% sure you've backed the star adjuster all the way off. If it’s still stuck, look for two threaded holes on the face of the drum. Thread two bolts (often M8 or M10) into them and tighten them down evenly. They'll act like a gear puller, pressing against the hub and forcing the drum off. A few solid hits on the face of the drum with a dead-blow hammer can also help break the rust bond. Just never use a steel hammer directly on the drum—you’ll crack it.
If you get stuck and need more specific guidance, contact our team of technicians. We're out here in the field, just like you, and we've got the parts and the know-how to get you through it.