When your Hyster ignition switch craps out, it's a simple failure that can chain your whole operation to the floor. The first instinct is to call the dealer, but that's a sucker's bet. You know the drill: long waits for a part number they control and a price that makes your eyes water. Forget that noise. There’s a better way.
Swapping that failed OEM part for a universal switch is how you get back in the fight. It's about getting your lift running today, not whenever the parts guy gets around to it. This isn't rocket science. You'll find your B+, Ignition, and Start wires, slap in a tougher, common-sense part, and get back to making money.
Why A Universal Switch Is The Only Real Choice
Let's cut the crap. The dealer's business model is built on one thing: controlling the parts supply to keep you on the hook. When a simple switch dies, they see dollar signs. It’s an excuse to sell you a "special" part at a ridiculous markup. Then you get to wait. And wait.
This is the same game they play with the big yellow iron. I spend my days wrestling with JCBs where a simple AdBlue sensor fault throws the machine into limp mode, demanding the magic "Dealer Laptop" just to clear a code and escape a forced regen. It’s the same playbook with forklifts: make a simple part proprietary to lock you into their service bay. A universal switch is you telling them to go pound sand.
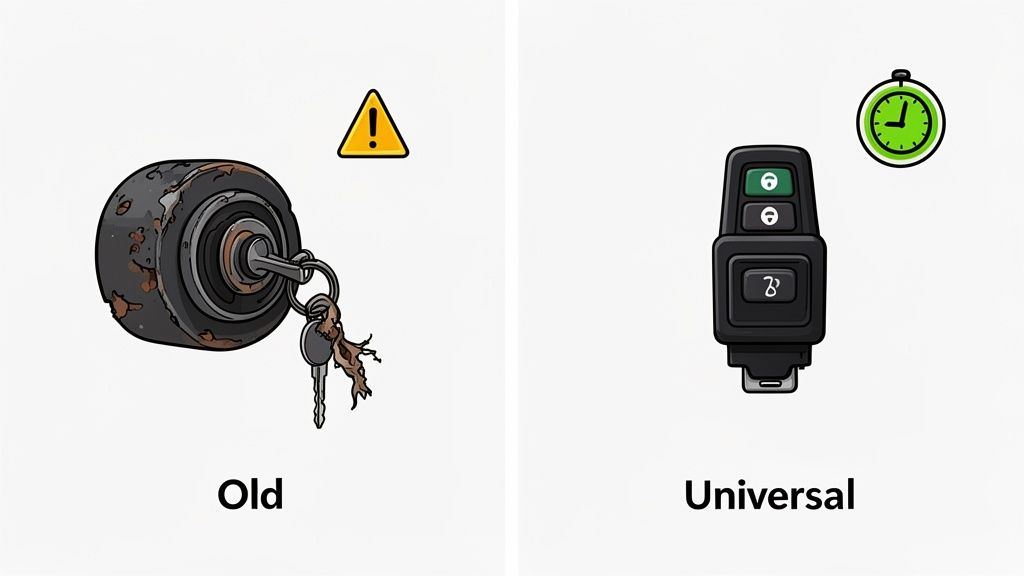
The Problem With OEM Switches
Factory-installed Hyster ignition switches are built cheap. They aren't designed for the brutal reality of a job site or a dusty warehouse. They're usually flimsy plastic junk with weak contacts that can't handle the vibration, dirt, and abuse we throw at them every day.
Here's how they usually die:
- Worn Internal Contacts: The cheap copper points inside get pitted and worn. One day it fires up, the next all you get is a click. It's an unreliable mess.
- Key Tumbler Failure: Dust, grease, and general wear jam the tumblers. The key won’t turn, or worse, it snaps off in the switch.
- Cracked Housing: The pot-metal or plastic casing gives up and cracks, letting in moisture and grit. That leads to corrosion and a dead short.
A good universal switch is built tougher because it has to be. This isn't about being cheap; it's about installing a smarter part that won't leave you stranded.
Out here, uptime is the only thing that matters. Waiting for a dealer to ship a specific part number for a damn ignition switch is just insane. A universal switch gets the machine moving now, not next week.
When you're tired of being held hostage by the dealer's parts counter, a universal part from a supplier like Flat Earth Equipment gets you what you need without the runaround.
Dealer OEM Switch Vs Universal Key Switch: The Cage Match
Here's the no-BS breakdown of why going universal is the only move that makes sense for your schedule and your wallet.
| Factor | Dealer OEM Part | Universal Switch Solution |
|---|---|---|
| Cost | Obscenely high thanks to the brand markup. You're paying for their logo. | Affordable. You pay for solid engineering, not a sticker. |
| Availability | "It's on backorder." You'll need a VIN and a lot of patience. | In stock, ships today. Get back to work tomorrow. |
| Simplicity | Requires an exact, often superseded, part number. A total headache. | Fits dozens of models, ends the part number chaos. |
| Fleet Mgmt | A different key for every damned machine on the lot. | Allows for one key for the whole fleet, simplifying everything. |
The choice is a no-brainer. The universal solution saves you time, money, and a hell of a lot of frustration.
Taking Back Control
This shift to universal parts is a rebellion against the OEM stranglehold. The data backs it up—universal ignition switches are having a huge impact. The 272041 model, for example, has become a go-to because it fits Hyster, Yale, Clark, and a half-dozen other brands. Industry analysis from places like Leaf Data Systems shows it's already used in 28% of global Hyster/Yale fleets.
By replacing the Hyster ignition switch with a universal key, you get real-world wins:
- Fleet-Wide Keying: One key for all your lifts. No more giant, confusing key rings. Life just got simpler for you and your operators.
- Immediate Availability: You get a universal switch from a real supplier like Flat Earth Equipment shipped the same day. The dealer can't touch that.
- Serious Cost Savings: A universal switch is always cheaper than the OEM part, and it's usually built better.
This isn't just a repair; it's a declaration of independence. You stop letting a dealer dictate your uptime. A solid electrical system is everything, which is why keeping your batteries juiced is just as critical. Check out our info on a Hyster remanufactured 24v battery charger to keep your entire system ready for battle.
Gearing Up For The Ignition Switch Swap
Alright, pump the brakes. Before you start cutting wires, let's get organized. Rushing this is how a 30-minute job turns into an all-day electrical fire drill. This isn't brain surgery, but you have to be methodical.
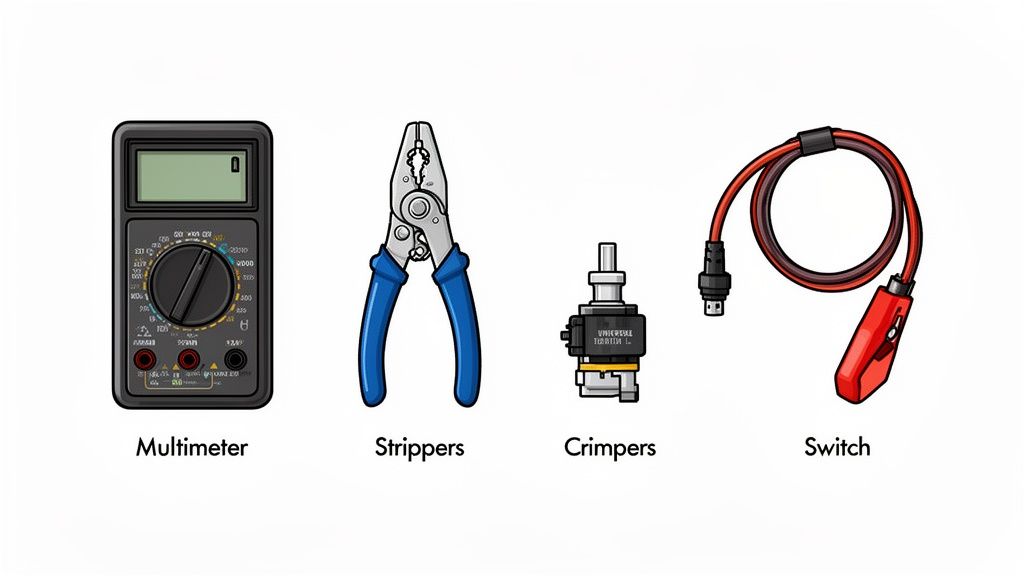
First, get your tools. You don't need a Snap-on truck, but you need gear that won't fail you.
- A good multimeter: This is non-negotiable. Don't trust wire colors. They're faded, covered in grease, or were wrong from the factory. Your meter is the only thing that tells the truth.
- Quality wire strippers and crimpers: Cheap tools mean weak connections that will fail under vibration. Get a solid set for a clean strip and a death-grip crimp.
- Basic socket set and screwdrivers: For getting dash panels off and unbolting the old switch.
- Heat shrink tubing and a heat gun: Electrical tape is for amateurs. It gets gummy, unravels, and lets moisture in. Heat shrink makes a permanent, waterproof seal that protects your work.
This whole idea of using universal parts isn't new. It exploded after the '08 recession when everyone's budget got torched. Demand for OEM-equivalent parts like the Hyster 262161 shot up by 35% between 2009 and 2012. Techs needed faster, cheaper fixes to keep iron running.
Choosing The Right Universal Switch
Not all universal switches are created equal. Grabbing the first one you see at the auto parts store is asking for trouble. Match the switch to your Hyster’s system or you'll fry the controller.
Pay attention to three things:
- Terminal Count: Does your Hyster have lights or a fan? You'll need a 4-terminal switch (BATT, IGN, ACC, START). Bare-bones machine? A 3-terminal switch will do.
- Amperage Rating: The starter pulls a huge load. Your switch needs to handle it. Check the specs and get one rated for heavy-duty use.
- Physical Fitment: Simple, but guys screw this up all the time. Measure the hole in the dash and the depth behind it. Make sure the new switch actually fits.
Pro Tip: Before you touch a single wire, take a clear picture of the back of the old switch. Your memory sucks, especially when you're upside down under a dash. That photo is your get-out-of-jail-free card.
Critical Safety First Steps
This should be obvious, but I'll say it anyway: disconnect the battery. Negative terminal first, always. This stops you from welding a wrench to the frame if you slip. A simple arc can blow fuses, fry the ECU, or start a fire.
Once the battery is dead, you can work. This isn't just about not getting shocked; it's about protecting the machine's brain from a stupid, expensive mistake. We take this seriously, and you can learn more from our comprehensive forklift safety resources.
With your tools ready, the right switch in hand, and the power dead, you're ready to yank that old switch. All this prep work feels slow, but it's what ensures this is a one-and-done repair.
Yanking The Old Hyster Ignition Switch
Alright, time to get dirty. Pulling the old switch isn't complicated, but doing it without creating a new electrical nightmare means you have to be methodical. It reminds me of tearing into a JCB's AdBlue system—start unplugging stuff without knowing what it does, and you'll be chasing codes all damn day.
Getting Access and Mapping The Wires
First, you gotta get to the switch. Dash panels and steering column covers can be a real pain, held on with a mix of screws you can see and plastic clips you can't. Take it slow, feel for the clips, and use a trim tool. Never force it.
Once the panel is off, you'll see the back of the switch. Before you put a wrench on anything, grab your multimeter. This is the most important step.
You cannot trust wire colors. They fade, they get caked in grease, or some other guy has been in here before you with a roll of tape and a bad attitude. Your multimeter tells the truth.
With the battery still connected for this test (be careful!), find out what each wire does:
- Find the Battery (B+) Wire: Set your meter to DC volts. Black probe to a good ground on the frame. Touch the red probe to each terminal. The one with a constant 12V (or 24V) is your B+ wire. That's your main power feed.
- Identify the Ignition (IGN) Wire: Now, turn the key to "ON" (don't start it). Probe the other terminals. The one that now has voltage is your Ignition (IGN) wire.
- Locate the Accessory (ACC) Wire: If your Hyster has lights or a fan, it has an accessory circuit. Turn the key to the "ACC" position. The terminal that comes alive now is your ACC wire. Not all machines have this.
- Pinpoint the Start (S) Wire: Get a helper to turn and hold the key to "START." The terminal that only gets voltage in this position is your Start (S) wire.
As you find each one, label it. Masking tape and a marker. Write "B+", "IGN", "ACC," and "S." This simple step is your insurance policy against screwing up the new install.
The Final Disconnection
Now that every wire is tagged, you can finally kill the power. Disconnect the negative battery terminal first. This prevents any accidental sparks while you're working.
With the power dead, disconnect the labeled wires from the old switch. Note what kind of connectors they are—spade or ring terminals. You might need to crimp new ones on to match your universal switch.
Don't get lazy here. Skipping the labeling and testing step is why a simple swap turns into a 3-hour migraine. It's the difference between a quick fix and a total electrical meltdown.
Once the wires are off, unscrew the retaining nut on the front and pull the old switch out. Compare it to your new one—check the diameter and length to make sure it's a good fit. Now you're ready to wire it up with zero guesswork.
Wiring The Universal Switch The Right Way
This is where it counts. Screw this up and you're not just blowing a fuse, you're frying a controller. I've seen guys torch expensive electronics on JCBs by rushing the wiring. A Hyster is no different. Precision is everything.
Forget the dealer's wiring diagrams. They never match the faded, greasy wires you're actually holding. We're wiring this based on function, not color.
A standard universal switch is simple: terminals are marked B, I, A, and S. Sometimes BATT, IGN, ACC, and START. Same thing. Your job is to map the Hyster wires you identified to these terminals. You're just putting in a new, tougher gatekeeper for the electricity.
The Standard Wiring Cross-Reference
Here’s the blueprint for 90% of the Hyster lifts out there. This is what each letter means and where your labeled wire goes.
- B (Battery): Main power in. Your B+ wire connects here. This feeds the whole switch.
- I (Ignition): Powers the machine's brain—the controller, fuel pump, dash lights. Your IGN wire goes here. It's only live when the key is "ON."
- S (Start): Sends the signal to the starter solenoid. Your START wire connects here. It only gets power when you turn the key to "START."
- A (Accessory): For your lights, fan, or radio. Your ACC wire goes here. If your Hyster is a bare-bones model, you won't use this. Leave it empty.
Never double up wires on the Ignition terminal. If you have a separate accessory wire, use the ACC terminal. Overloading the ignition circuit is how you melt wires behind the dash.
This infographic shows the basic removal steps before you start wiring.

It's simple: get access, label everything, then disconnect. A methodical approach here saves you from a world of pain later.
To make it even clearer, here’s a quick reference table. This maps Hyster functions to the universal switch terminals and tells you how to confirm you've got the right wire.
Hyster Wire To Universal Switch Mapping Guide
| Hyster Wire Function | Typical Wire Color | Universal Switch Terminal | How To Verify |
|---|---|---|---|
| Main Power | Red (often thick) | B (Battery) | Has constant 12V+ with the key off. |
| Ignition | Red w/ Stripe | I (Ignition) | Shows 12V+ only when the key is in the "ON" position. |
| Starter Solenoid | Purple or Yellow | S (Start) | Shows 12V+ only when the key is turned and held in the "START" position. |
| Accessory | Orange or Brown | A (Accessory) | Shows 12V+ only when the key is in the "ON" or "ACC" position. |
Remember, wire colors are lies. Trust your multimeter, always.
Real-World Hyster Wiring Scenarios
Out in the dirt, things are never textbook. In the forklift world, swapping an OEM Hyster switch like the 2035830 with a universal model like the 272041 is standard operating procedure to kill downtime.
These universal switches fit over 15 Hyster models, including the S55XLS and XL series, and even cross over to Yale, Clark, and Crown lifts. It's a field-proven fix. You can see how widespread this practical fix has become across the industry.
Here's a common one: you're on an older S50XM. You've got your B+, IGN, and START wires, but there's a fourth small wire. This is usually for an hour meter or a warning light. Connect it to the ACC terminal. This keeps it powered when the key is on but isolates it from the critical engine-run circuit.
Verifying Your Connections with a Multimeter
Once the wires are on the new switch, don't mount it yet. Leave it hanging. Reconnect the battery negative cable. Now, grab your meter for a final check.
- Check the B Terminal: Key OFF. Red probe to the B terminal, black probe to ground. You should have full battery voltage. If not, your main power feed is bad.
- Test the I and A Terminals: Key to "ON" or "ACC." Test the I and A terminals. They should both have battery voltage. The S terminal should be dead.
- Confirm the S Terminal: Turn and hold the key to "START." The S terminal should now have voltage. The I and A terminals should stay live.
If all that checks out, you nailed it. Disconnect the battery again, mount the new switch, and get ready for the final test. This is what separates a professional from a parts-changer.
Testing Your Work And Troubleshooting Issues
The new switch is in, but you're not done. This is the moment of truth. Slapping the dash back together before a full systems check is a rookie move. It’s like firing up a JCB after a DEF sensor swap without seeing if it'll throw a code and force a regen cycle. You have to verify the fix works.
Reconnect the negative battery terminal. Now, let’s go through a deliberate power-up sequence to make sure everything works like it should.
The Initial Power-Up Sequence
This isn't just about starting it. It's about confirming each key position does its job. A swapped wire can create all kinds of electrical gremlins.
Here's my field-tested checklist:
Key to "ACC" Position: First click. Do your lights or fan turn on? If you have a 4-terminal switch, this is a critical check.
Key to "ON" Position: Next click. Dash lights and buzzers should come on. You might hear the fuel pump prime. This confirms your ignition circuit is good.
Key to "START" Position: Now, crank it. The starter should engage cleanly. As soon as it fires, let go of the key.
If it all works, you're golden. Let it run for a minute, then shut it down and restart it a couple of times to make sure your connections are solid.
Common Problems And Quick Fixes
Sometimes, it doesn't go right. Don't panic. Most problems after a switch swap are simple. It's almost always a swapped wire.
You turn the key and get nothing. That dead silence feels the same whether it’s a Hyster or a half-million-dollar JCB telehandler. The difference is, on this forklift, you don't need a dealer's laptop to fix it. You just need logic.
Here are the common screw-ups and how to fix them in the field.
Symptom: Nothing Happens At All
You turn the key and it's dead. No dash lights, no click, nothing. This is a main power problem.
- The Cause: Your B+ (Battery) wire is on the wrong terminal, or the connection is loose.
- The Fix: Grab your multimeter. Key off, check for constant voltage at the B terminal on the switch. No power? Trace that wire back. You've got a loose connection or a blown main fuse.
Symptom: Dash Lights Work But No Crank
Key to "ON," the dash lights up. Turn to "START," and you get silence or a weak click.
- The Cause: Your starter circuit is the problem. The S (Start) wire is on the wrong post or the connection is bad.
- The Fix: Kill the power. Make sure your starter wire is tight on the S terminal. Check your crimp.
Symptom: Accessories Don't Work
The engine runs, but your lights, horn, or fan are dead.
- The Cause: Your ACC (Accessory) wire is in the wrong place or isn't connected.
- The Fix: Check that your accessory wire is on the A terminal. If you put it on the I terminal by mistake, it will only work when the key is "ON," not in the "ACC" position.
Fixing these snags is what makes you a real tech. It's about thinking through the circuits, trusting your meter, and making a solid repair. When you need the right sensors and solenoids to keep your iron running without the dealer wait, check the inventory at Flat Earth Equipment. We've got the parts that keep you in the field and out of the shop.
Common Questions From The Field
Out here, I get the same questions from guys just trying to get a machine running. They don't want a textbook answer. They want to know if a fix will hold up. Here are the straight answers for replacing a Hyster ignition switch.
Will A Universal Switch Work With My Hyster's Safety Features?
Yes, it will. Safety systems like the neutral safety or seat cutoff switches are wired into the starter circuit itself, after the ignition switch. They act as a gate between your switch and the starter solenoid.
As long as you correctly wire the S (Start) terminal, those safety interlocks will work exactly as they did from the factory. The key is to test them after you're done. Sit in the seat, try to start it in gear—make sure it all still works.
What Is The Difference Between A 3-Terminal And 4-Terminal Universal Switch?
The Accessory (ACC) circuit. That's it.
A 3-terminal switch is the bare minimum: Battery (power in), Ignition (engine run), and Start. It’s for no-frills machines.
A 4-terminal switch adds that separate ACC terminal. This lets you run lights or a fan without the engine running. If your Hyster does that, you need a 4-terminal switch. Trying to cram the accessory wire onto the ignition terminal is asking for trouble.
One of the biggest wins with a universal switch is key management. It's a practical way to end the chaos of a dozen different keys for a dozen machines.
Can I Use The Same Key For Multiple Forklifts?
Hell yes. This is one of the best reasons to do this across your fleet.
You can order "keyed-alike" universal switches, meaning one key starts every machine you've converted. For a busy yard, this is a game-changer. It eliminates downtime from lost or broken keys.
Just make sure you order a matched set. If you've got questions about setting up your fleet, the crew on our contact page can get you sorted.