When your JCB telehandler's parking brake decides to lock up out in the muck, it's a good bet the parking brake solenoid is the culprit. Forget calling the dealer. This guide is your field-tested plan to diagnose the electrical side of things, get the brake released so you can move the damn machine, and even swap out the solenoid yourself—no "Service Master" laptop required.
Your First Moves When the Parking Brake Wont Budge
So, the machine's dead in the mud, that parking brake light is glowing, and the dealer's fix is a week away and a grand out of your pocket. This is where you earn your keep. But before you even think about grabbing a wrench, let's walk through the critical safety steps that make the difference between a quick fix and a trip to the ER.

This isn't about just flipping a switch. It’s about making sure ten tons of yellow iron doesn't turn into an uncontrolled battering ram. Skipping these next few steps is the fastest way to have a multi-ton machine roll away on you. The goal is to secure the scene so you can fix the problem without creating a much, much bigger one.
Lockout Tagout The Right Way
Before your hands go anywhere near that transmission or brake assembly, the machine needs to be completely dead to the world. A proper lockout/tagout isn't just for the shop; it’s a non-negotiable step out in the field.
- Kill the Power: Disconnect the battery. Don't just turn the key off. Pull the negative terminal so no stray current can energize a circuit while you're wrenching on it.
- Tag the Controls: Slap a big, obvious "DO NOT OPERATE" tag on the steering wheel and ignition. The last thing you need is a well-meaning operator trying to "help" by firing it up.
- Secure the Key: Take the key with you. Put it in your pocket. This is the ultimate guarantee that you are the only one who can bring this machine back to life.
Following this process puts you in complete control of the machine's energy sources. For a deeper dive on job site protocols, check out our comprehensive guide to construction equipment safety.
Chocking Wheels on Unforgiving Ground
We rarely get the luxury of a flat concrete floor. Out on a real job site, you're up against mud, gravel, and nasty grades. Just kicking a spare 2x4 under a tire isn't going to cut it.
You need to chock the wheels properly to prevent any movement. This is especially true since you’re about to manually release the only thing holding the machine still—the parking brake. Place heavy-duty wheel chocks on the downhill side of both front and rear tires. If the ground is soft, throw a solid piece of dunnage or a thick steel plate under the chocks to give them a firm base to bite into.
Don't ever trust the hydraulics to hold the machine. Lower the boom and plant the bucket or forks firmly on the ground. This creates another mechanical point of contact that adds a critical layer of stability.
The Real Dangers of Brake Failure
This isn't just theory. A failed parking brake system is a killer. Solenoid-release failures on telehandler parking brakes have led to serious roll-away incidents and fatalities.
Regulators have noted at least six deaths worldwide linked to driveshaft parking brake systems where the brake either released unexpectedly or just plain failed to hold. These tragic events prompted major safety warnings across the globe. You can read more about these driveshaft parking brake failures and learn from the hard lessons they provide.
Getting this first part right is everything. It’s the foundation for a safe and successful repair. Once that machine is secured like Fort Knox, and only then, can you start hunting down the actual problem with the parking brake solenoid.
Hunting Down the Gremlins: Electrical vs Mechanical
Alright, the machine is chocked, tagged, and isn't going anywhere you don't want it to. Now it's time to play detective. The dealer's first move is always to plug in their precious laptop, hoping an error code points them to a pricey ECU they can sell you. It’s a racket.
But nine times out of ten, the real problem is a five-dollar fault you can find with a ten-dollar multimeter. This is where we separate the parts-swappers from the real mechanics.
We're going to find the actual root cause, not just what a computer screen tells us. JCBs, for all their strengths, are notorious for finicky electronics. The parking brake circuit is a prime example of where a simple electrical gremlin can bring an entire job site to a grinding halt. Forget the software—let's trace the wires.
Tracing the Power from Cab to Solenoid
That parking brake solenoid needs a clean 12-volt signal to do its job. If it doesn't get it, that brake stays locked on tight. Our mission is to follow that signal from the moment you flip the switch in the cab all the way down to the solenoid itself, looking for any interruption along the way.
You'll need a good multimeter for this. Don't leave the shop without one.
- Start at the Switch: Pop the panel and get to the back of the parking brake switch. With the key on, you should see 12 volts on one side. Flip the switch to "release" and check the output wire—you should see that same 12 volts heading out. If you've got power in but nothing out, you've found your culprit right there in the cab.
- Check the Fuse Box: Before you start tearing into the main harness, pull the fuse for the parking brake circuit and check it for continuity. Sometimes the simplest fix is the right one.
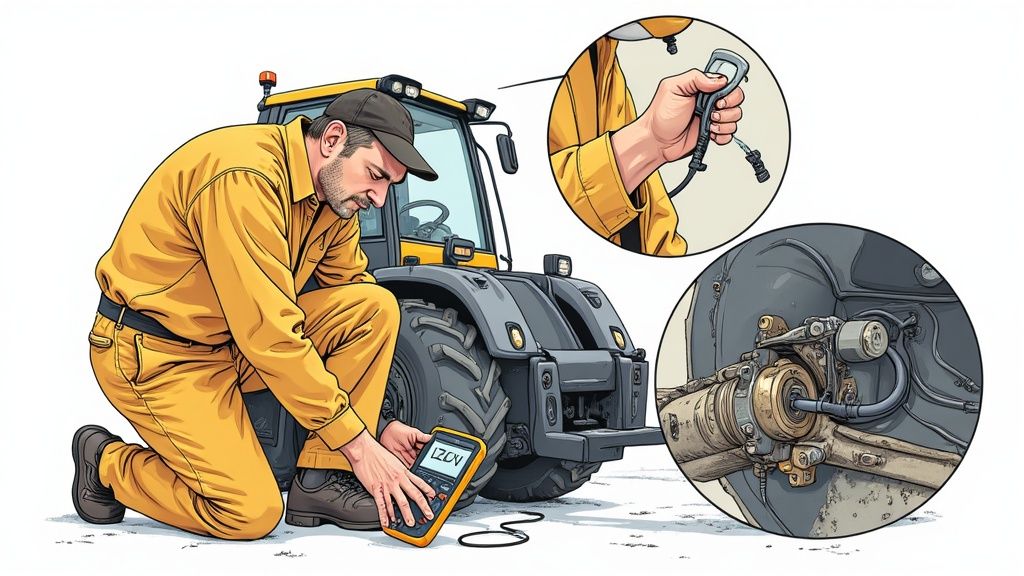
- The Solenoid Connector: This is the moment of truth. Unplug the connector at the parking brake solenoid. With a helper in the cab flipping the switch, probe the pins on the harness side. You should see a solid 12 volts appear and disappear as the switch is operated.
If you have 12 volts at the connector, the wiring from the cab is good, and your problem is almost certainly the solenoid itself. No voltage? Then the problem is upstream—a broken wire, a blown fuse, or that switch you just checked.
Classic JCB Wiring Headaches
JCB wiring harnesses take a beating from vibration, heat, and mud. Over the years, I've seen the same failure points crop up again and again. These are the spots to inspect with a fine-tooth comb before you condemn a major component.
Look for chafed wires where the harness runs over the transmission housing or near sharp frame edges. You should also pull apart any major connectors in the circuit. They might look perfect from the outside, but moisture can get inside and turn the pins to green dust, killing your connection.
This is where the real work is done. Don't be lazy. Wiggle the harness while you have your meter probes on the connector. A wire can be broken internally and only lose connection when it's flexed a certain way. I’ve spent hours hunting a ghost only to find a single broken strand inside an otherwise perfect-looking wire.
Testing the Solenoid Coil Without Removal
So you've confirmed 12 volts are reaching the solenoid connector, but you still hear nothing—no click, no hum, no action. This strongly points to a dead solenoid. The good news is you can confirm its demise without even unbolting it from the transmission.
Switch your multimeter to the ohms (Ω) setting. Probe the two pins on the solenoid itself, not the harness connector. You're now measuring the resistance of the internal coil.
A healthy solenoid coil will have a specific resistance value. You'll want to check the service manual if you have it, but you're generally looking for a reading between 10 and 30 ohms.
- If you get a reading of "OL" (Open Line) or infinite resistance, the coil wire is broken internally. The solenoid is junk.
- If you get a reading of near-zero ohms, the coil is shorted out. The solenoid is junk.
This simple resistance check is a definitive test. It's also a key step outlined in most manufacturer service literature. Independent repair guides stress that solenoid (electro-mechanical) release procedures are crucial because a huge number of stuck parking brakes are caused by these electrical faults. Procedures to check the 12–24V supply and measure coil resistance are standard practice before recommending replacement.
Don't forget the basics, either. A weak battery can cause all sorts of phantom electrical issues by preventing the solenoid from getting the full voltage it needs to actuate. Before you order parts, make sure your power source is solid with reliable heavy-duty battery chargers. By following the power and testing the components, you can diagnose the problem with certainty—all without a single call to the dealer.
A Field Technician's Guide to the Parking Brake Solenoid
So, you've chased the power, your multimeter has confirmed it, and the trail ends right at the solenoid connector. It's official—the parking brake solenoid is our prime suspect. This isn't some phantom ECU glitch the dealer loves to blame; this is a hard part failure, and frankly, it's a known weak link on these machines.
This little component is the gatekeeper for your machine's movement. Think of it as a bouncer at a club door. When it gets the right signal—12 volts—it moves a pin, releasing the spring-applied brake. Cut the power, and that spring slams the brake back on, locking the machine down tight.
Locating the Prime Suspect
On most JCB telehandlers, you’ll find this solenoid mounted directly on the transmission or axle housing. Let's be clear: JCB didn’t put it there for easy access. Expect it to be tucked away, usually caked in a lovely mix of dirt, grease, and hydraulic fluid. Grab a rag and a scraper, because you'll have to clean the area just to see what you're working on.
It usually looks like a small metal cylinder with a two-wire electrical connector sticking out, held in by a couple of bolts. The location is great for function but terrible for longevity. It lives right in the path of constant heat cycles and vibration, a perfect recipe for failure.
How This Solenoid Fails in the Real World
Forget what the service manual might suggest—these solenoids don’t just fail gracefully. They die a hard death out in the field, and almost always at the worst possible moment. The constant vibration from the drivetrain is notorious for fracturing the internal coil windings, creating an open circuit.
Heat is the other big killer. The solenoid gets hot during normal operation, and after thousands of cycles, the insulation on the coil windings breaks down and shorts out. This is exactly why a simple resistance check is so definitive. An open circuit or a dead short tells you the electrical heart of the solenoid has given up the ghost.
The most frustrating failure is the intermittent one. The solenoid works perfectly when the machine is cold, but as soon as the transmission heats up, the expanding metal causes a broken coil wire to lose contact. The dealer will chase this ghost for days with their laptop, but a tech with a multimeter can spot the resistance reading change as the unit gets hot.
Tell-Tale Signs of a Failing Solenoid
Before you even reach for a tool, your own senses can often point you right to the problem. A healthy solenoid makes a distinct, audible "click" or "thunk" when it’s energized. If you have a helper cycle the parking brake switch in the cab and all you hear is silence down at the transmission, that's your first major clue.
Your other senses can help, too:
- Look for Leaks: The solenoid body is sealed with O-rings. If you spot hydraulic fluid weeping from the base where it bolts to the transmission, the internal seals have likely failed from heat and age.
- Check for Overheating: A shorting coil generates a lot of heat. If the area around the solenoid is discolored or the plastic connector looks melted or brittle, it’s been running dangerously hot for a while.
- The "No-Click" Confirmation: This is the most reliable symptom. If you've confirmed power at the plug but get no audible actuation, the internal mechanism is either electrically fried or mechanically seized.
Once you’ve confirmed the symptoms and tested the coil, you know exactly what you're dealing with. There’s no need to second-guess or start thinking about a trip to the dealer. This is a clear-cut component failure. Now you can confidently get the right replacement solenoid on order from Flat Earth Equipment and get this machine ready to move.
How to Manually Release the Solenoid and Move Your Machine
Alright, the diagnosis is in. You’ve confirmed power is getting to the plug, but the solenoid itself is dead to the world—no click, no action, nothing. The new part from Flat Earth Equipment is on the way, but that multi-ton paperweight is currently blocking the only access road on site. Leaving it there simply isn't an option.
This is the skill that separates the pros from the parts-swappers. We're going to manually override that failed solenoid to get this machine moved to a safer, more convenient spot. Just remember, this isn't a long-term fix; it's a critical field procedure to keep the entire job from grinding to a halt.
What’s Happening When You Manually Override?
Before you put a wrench on anything, it’s crucial to understand why this works. That parking brake is a spring-applied system. By design, a heavy-duty spring is actively clamping the brake on by default—it’s a powerful fail-safe. The solenoid’s only job is to use electromagnetic force to push back against that spring pressure, releasing the brake.
When you perform a manual release, you're not fixing a single thing. You are just using a screw or bolt to physically and mechanically force the brake release mechanism against that spring. You're doing the solenoid’s job with brute force. This is exactly why the safety precautions we covered earlier are completely non-negotiable. Once you back that override screw out, the only thing holding that machine is gravity and your wheel chocks.
Your Field Fix Toolkit
This is one of those jobs where you don't need the whole toolbox, but you absolutely need the right tools. Having these on hand will get you out of a jam without a frustrating trip back to the shop.
| Tool | Job | Field Pro Tip |
|---|---|---|
| Wrench Set | Loosening lock nut & turning override screw | Bring both metric and SAE. You never know what a previous mechanic might have used. |
| Allen Key Set | For override screws with an internal hex | A T-handle Allen key gives you better feel and control than a standard L-shaped one. |
| Pry Bar/Screwdriver | Removing protective caps | Use a plastic pry tool if you have one to avoid marring the housing. |
| Brake Cleaner & Rag | Cleaning the solenoid area | You can't find what you can't see. A clean surface prevents dirt from entering the system. |
| Flashlight/Headlamp | Illuminating the work area | It's always darker and dirtier under a machine than you think it will be. |
Don't get caught out. A small kit with these basics can turn a day-ending problem into a 20-minute fix.
Locating the Override Mechanism
JCB has used a few different solenoid designs over the years, but the principle is always the same. You're hunting for a specific bolt or screw directly on the solenoid body or the valve block it's mounted to. It’s often a small hex-head bolt or an Allen screw, sometimes with a lock nut cinched up against it.
Don’t just start turning random bolts on the transmission—that's a recipe for a much bigger problem. The correct one is almost always located on the end or the side of the solenoid assembly itself. On some models, it might be hiding under a plastic or rubber cap you’ll need to pop off first. Give the whole area a good cleaning to get a clear view of what you're dealing with.
This infographic breaks down the simple diagnostic flow to confirm the solenoid is the culprit before you go any further.
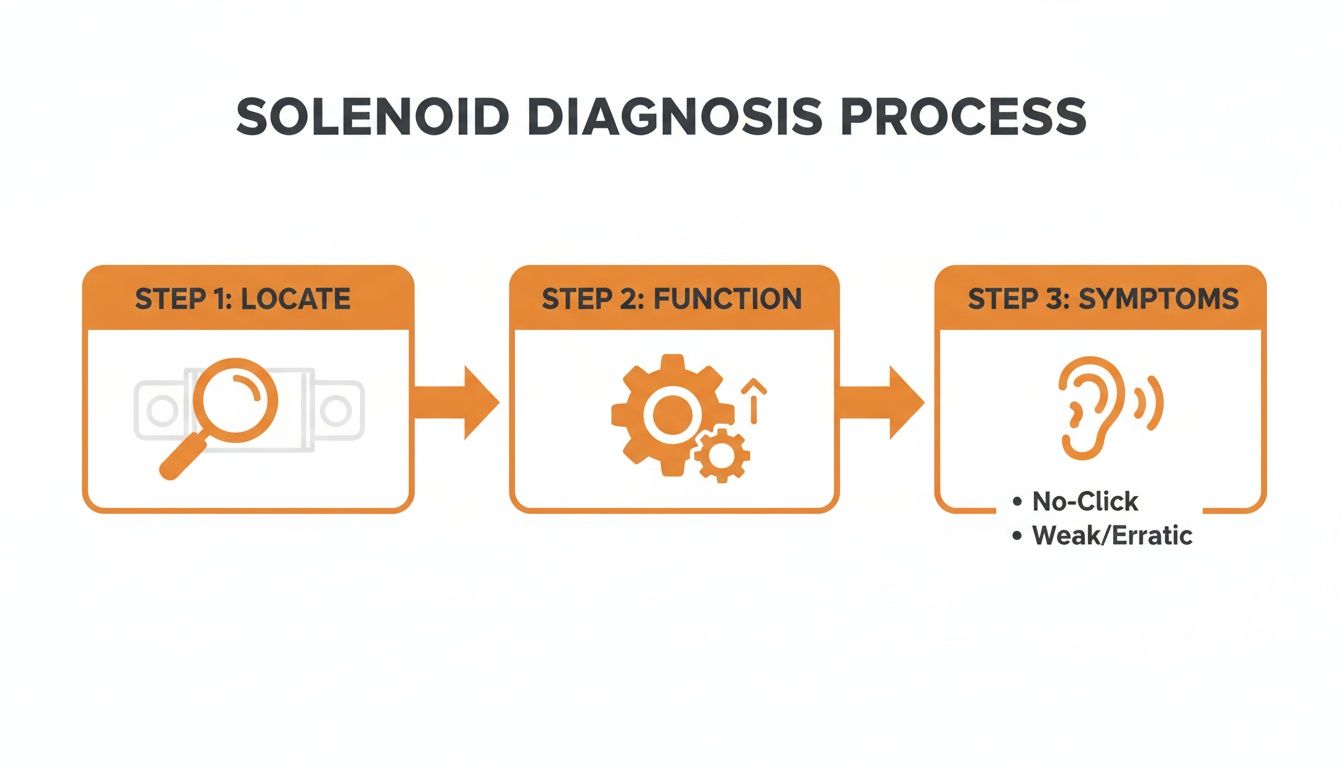
This visual guide just reinforces the core steps: find the component, know its job, and listen for the symptoms that confirm it has failed.
Executing the Manual Release Safely
Once you’ve positively identified the override screw, the process is straightforward but demands your full attention. Double-check your wheel chocks. Confirm the boom is fully lowered and the machine is as stable as you can possibly make it.
Loosen the Lock Nut: If there's a jam nut on the override screw, use a wrench to back it off a few turns. You don't need to remove it completely.
Turn the Override Screw: With the correct wrench or Allen key, slowly begin turning the override screw. On most systems, you’ll be turning it counter-clockwise (backing it out) to release the brake. You will feel resistance almost immediately as you start to fight that heavy internal spring.
Count Your Turns: This is important. Pay close attention to how many rotations it takes. You'll typically turn it 2-4 full rotations. You should feel the resistance suddenly lessen, and you might even hear a faint "clunk" as the brake pack disengages. Do not overdo it or remove the screw completely.
Confirm the Release: With the engine off, have a spotter watch the chocks as you gently try to rock the machine. If it feels free, the brake is released.
Crucial Field Tip: Whatever you do, do not use an impact wrench for this. You need to feel the spring tension build and release. An impact gun can easily damage the internal valve mechanism or strip the threads, turning a simple solenoid job into a catastrophic transmission repair. Do this by hand.
Moving the Machine and Final Steps
With the brake manually released, you can now start the machine and carefully move it to a proper repair area—a level spot, out of the way of site traffic. Drive slowly and rely on the service brakes for all stopping. Remember, you have no parking brake.
Once parked, immediately shut it off, lower the boom, and re-chock the wheels securely.
Before walking away, tighten the override screw back to its original position (using the number of turns you counted earlier) and snug up the lock nut. This re-engages the parking brake mechanically, making the machine safe until you can install the new solenoid. Leaving the brake manually released is just asking for a roll-away incident. View this procedure as a temporary lifeline, not a permanent fix.
Replacing the Solenoid and Getting Back to Work
Alright, your new parking brake solenoid from Flat Earth Equipment just landed on your doorstep. It's time to get this telehandler off the injured list and back on the job. This isn't a complex repair, but paying attention to the small details is what makes the difference between a permanent fix and a repeat failure in a few weeks.
We'll walk through this swap, step-by-step. The focus here is on doing it right: keeping the hydraulic system spotless, torquing the bolts correctly, and ensuring a solid electrical connection. This is about solving the problem for good, not just patching it.
Removing the Old Solenoid
First things first, double-check that your machine is still chocked and properly locked out. Safety never takes a break. You'll want a clean drain pan and a handful of shop rags handy. A little hydraulic fluid will inevitably escape, and you don't want it making a mess or contaminating your system.
Give the area around the old solenoid a final, thorough blast with brake cleaner. The goal is a surgically clean mounting surface before a single bolt comes loose. Any dirt or grit that finds its way into the transmission housing is just a future problem waiting to happen.
Next, carefully unplug the electrical connector. Take a moment to inspect the harness side for any signs of corrosion or damaged pins. If it's looking green and crusty, now's the time to clean it up with some contact cleaner and a small wire brush. A brand-new solenoid is useless if it's getting a garbled signal.
With the wiring disconnected, you can start unbolting the old unit. Loosen the mounting bolts in an even pattern, just a few turns at a time, to keep the solenoid from binding up. As you pull it away from the housing, be ready with your rags to catch that bit of fluid. Most importantly, look closely at the O-ring or gasket. Make absolutely sure the old one comes out in one piece and doesn't leave any fragments behind.
Proper Installation of the New Solenoid
This is where precision really counts. A sloppy install is a guaranteed leak.
Start by doing a quick side-by-side comparison of the new solenoid and the old one. Confirm the part number is a match and the electrical connector is identical. It’s a simple check that can save you a world of frustration.
- Prep the O-Ring: Dip your finger in some clean hydraulic fluid and lightly lubricate the new O-ring. This is crucial for helping it seat correctly and preventing it from getting pinched or torn when you slide the solenoid in.
- Seat the Solenoid: Gently guide the new solenoid into the housing. It should slide in without a fight. If you feel any real resistance, pull it back out and check for an obstruction or a misaligned O-ring. Don't force it.
- Torque the Bolts: Thread the mounting bolts in by hand first to make sure they aren't cross-threaded. Then, grab your torque wrench and tighten them to the manufacturer's spec in a star or crisscross pattern. Whatever you do, don't just hammer them down with an impact wrench. Over-tightening can warp the housing and cause a leak just as easily as leaving them too loose.
Don’t skip the torque wrench. I’ve seen guys snap bolts off in a transmission housing because they were in a hurry. That turns a 30-minute solenoid swap into a full-day extraction nightmare. Do it right, do it once.
The Final Function Test
With the new solenoid securely bolted down, plug in the electrical connector. Listen for that satisfying "click" as it locks into place. A loose connection will vibrate free within a week, and you’ll be right back where you started.
Now for the moment of truth.
Remove your lockout/tagout gear and reconnect the battery. Hop in the cab, fire up the machine, and listen. As the engine runs, flick the parking brake switch on and off a few times. You should hear a sharp, distinct "click" from the new solenoid as it does its job.
Check that the parking brake light on the dash comes on and goes off as it should. Finally, with the brake released, gently test forward and reverse movement. The telehandler should roll smoothly with zero drag.
If you hit a snag or have questions about your specific JCB model, don't hesitate to give us a call. The team at Flat Earth Equipment has pretty much seen it all. You can get in touch with our support technicians for practical, no-nonsense advice. This is one of those straightforward repairs that puts you back in the driver's seat, saving a pile of cash on dealer labor and, more importantly, eliminating costly downtime.
Frequently Asked Questions From the Field
We get calls all the time from guys stuck in the mud with a locked-up parking brake. These aren't questions you'll find answers to in a pristine service manual. This is the stuff you learn from busted knuckles and the pressure of getting a machine running before the foreman loses his mind.
Can I Just Drive with the Brake Manually Released?
Let me be crystal clear: absolutely not. The manual release is an emergency procedure only. It's there for one reason—to get your machine out of a bad spot and move it to a safe place for repairs. That's it.
Operating any piece of heavy equipment without a working parking brake is a massive safety violation and just plain reckless. The moment you shut that machine down on even the slightest grade, it becomes a runaway hazard. Get the new solenoid from Flat Earth Equipment and get it installed before that machine goes back into service.
I Have Voltage at the Solenoid but It Still Won’t Click. Is It Bad?
Almost certainly, yes. If you've got a solid 12 volts right at the connector pins and that solenoid is staying silent, its internal coil is fried. The power is making it to the front door, but nobody's home.
For final confirmation, check the coil's resistance with your multimeter. If you get an open circuit (infinite ohms) or a dead short (near zero ohms), it’s toast. At that point, stop diagnosing and start ordering. That component has failed, and no amount of wishing is going to bring it back to life.
This is the exact scenario where the dealer loves to blame a "software glitch." They'll charge you a fortune to plug in their laptop, run a useless diagnostic, and tell you what your multimeter already proved in five minutes—the hard part is dead.
The Dealer Says I Need a Software Update. Is This True?
That's their go-to answer for everything from a dead solenoid to a flat tire, and it's their favorite way to get you on the hook for an expensive service call. While control modules can fail, it's far more common for the actual field components to be the problem—the switch in the cab, a chafed wire in the harness, or the solenoid itself.
Dealers rely on the laptop because it's their system, and it keeps you locked out. By following the real-world diagnostic steps of tracing power and testing components, you pinpoint the actual failed part. You fix the problem, not the symptom, and you avoid a massive bill for a five-minute software flash that fixes absolutely nothing.
When you've done the real work and found the real problem, Flat Earth Equipment has the parking brake solenoid you need to get back on the job. We ship fast from our Western U.S. hubs so you can bypass the dealer's wait times and inflated prices. Get the right parts and technician-led support at https://flatearthequipment.com.