When that P0117 code flashes on your JCB's display, the day grinds to a halt. It’s more than a warning light; it’s a work-stopper. But here’s the gritty reality: this fault almost always points to a cheap, faulty coolant temperature sensor you can swap out with tools from your truck, letting you sidestep the dealer's outrageous wait times and service fees.
This guide is your battle plan to diagnose the problem fast, find that sensor's hiding spot, and get the new one in. No "Service Master" laptop needed.
What That P0117 Code Really Means on Your Yellow Iron
You fire up your machine, ready to make some dirt fly, and bam—a piercing alarm and the dreaded P0117 code. Your JCB immediately derates or kicks on a pointless regen cycle that just won't quit. Call the dealer, and they’ll sell you a story about a complex electronic gremlin that needs their proprietary laptop and a week in their spotless shop.
Nine times out of ten, that's a load of bull.
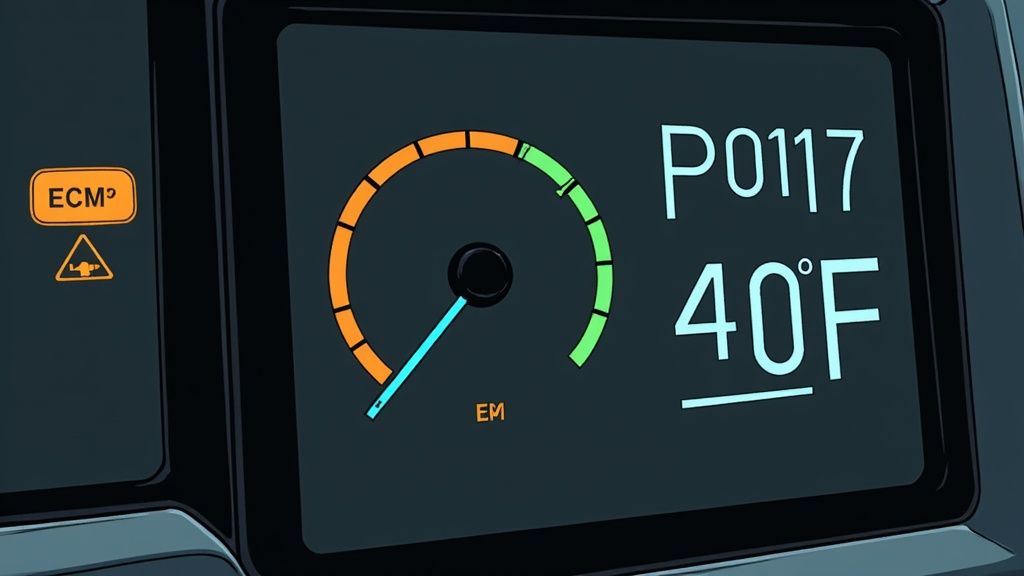
The P0117 fault is simple: your Engine Control Module (ECM) is getting a 'circuit low' voltage signal from the engine coolant temperature (ECT) sensor. This garbage signal tricks the ECM into thinking the coolant is at an impossible -40°F.
Why It Stops Your Machine Cold
An engine can't run right on bad data. The ECM needs that temperature input for jobs that actually matter:
- Fuel Mixture: It dumps extra fuel when the engine is cold and leans it out as it warms. A P0117 code forces a rich mixture all the time, wasting diesel and fouling your after-treatment system.
- Engine Protection: The machine can't protect itself from overheating because it thinks the engine is a block of ice.
- Emissions Systems: The entire after-treatment system, especially that finicky AdBlue/DEF setup, needs accurate temp readings to run regens properly. Bad data means endless, unnecessary cycles that do more harm than good.
This isn't some new-age problem designed to lock you out. The JCB P0117 Coolant Temperature Sensor issue has been a thorn in our side since they started loading this yellow iron with fussy electronics. It’s the same old story as in the automotive world, where this code is a daily occurrence.
Field Technician's Takeaway: Don't let a P0117 send you running to the dealer. More often than not, it's a simple sensor failure, not some electronic meltdown. This is a classic field fix you can handle yourself.
Our whole business, Flat Earth Equipment, is built on getting your iron moving again without the dealer runaround. You can learn more about our commitment to keeping you running. First thing's first—let's find where JCB decided to hide this sensor.
Pinpointing the Sensor on Your Machine
JCB engineers seem to enjoy a game of hide-and-seek with this thing, tucking it in different spots depending on the model. Forget the clean diagrams in the service manual; we’re finding it on a machine caked in mud and grease. The key is knowing the usual hiding places so you're not wasting an hour tracing wires.
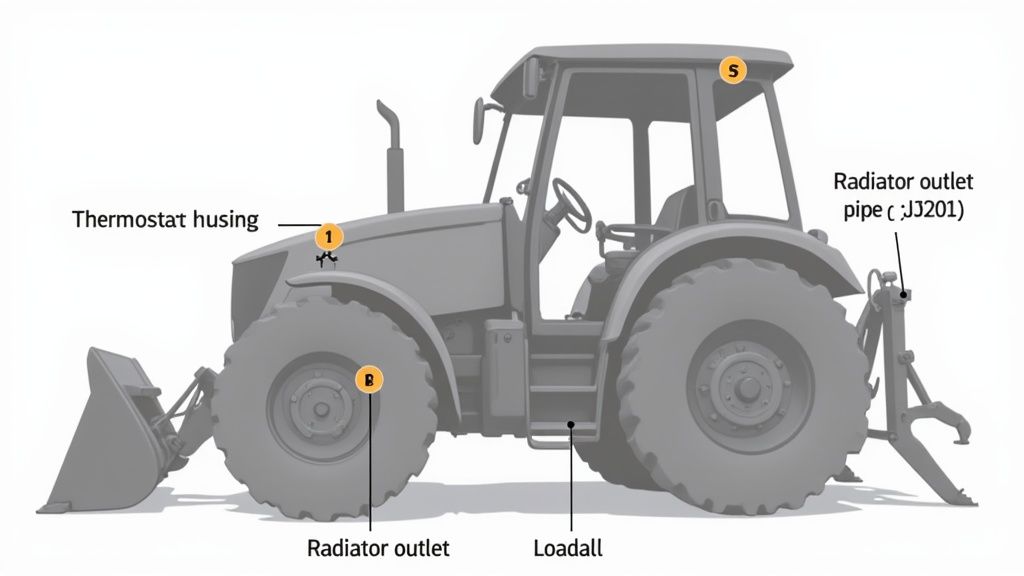
Here's the single best piece of advice I can give you: follow the upper radiator hose back to the engine block. That sensor is almost always within a few inches of where that hose connects, usually screwed right into the thermostat housing. This trick will get you in the right neighborhood on nearly any piece of JCB iron.
Common Locations on Popular JCB Models
While "follow the hose" is your rule of thumb, different machines have their own quirks. Knowing where to look first saves a ton of time and cursing.
Here are the prime locations we see in the field:
- JCB 3CX & 4CX Backhoes: On most Dieselmax engines, JCB made it easy. Look right on top of the engine at the thermostat housing. It's usually a brass-colored sensor with a two-wire plug, sitting in plain sight.
- JCB JS Excavators (e.g., JS200): This is where they get tricky. On many excavators, you’ll find the sensor on the radiator outlet pipe, not directly on the engine block.
- JCB Loadalls & Teletruks: For these, your target is usually the cylinder head. The sensor will be threaded right into the head, often on the side or near the front of the engine.
This variation isn't random. Statistically, P0117 faults in JCB machinery make up about 15% of all ECM-related service calls for North American construction firms. The sensor's location is model-specific for a reason; on a JS200 excavator, placing it on the outlet pipe makes for quick access, while on a Teletruk, integrating it into the cylinder head allows for a repair in under 20 minutes with basic tools. You can see just how common this issue is and how the repair varies in this detailed video about P0117 field fixes.
Pro Tip: Before you put a wrench on anything, snap a quick photo with your phone. It’s a simple way to remember how the wiring connector is oriented and how the harness is routed. Saves you a headache later.
The sensor is small, but its location is critical. Now that you know where to look, let's grab the right tools.
What You'll Need in Your Toolkit
Forget the dealership’s fancy "Service Master" laptop. That thing is designed to lock you out, not help you work. This is a field repair, and it calls for the tools you already have rattling in your truck. We're not rebuilding an engine—just swapping a sensor.
The list is short and sweet. You’ll need a basic metric socket set, a drain pan to catch the coolant you're gonna spill, and pliers for any stubborn hose clamps. A torque wrench is nice, but a calibrated elbow will get the job done just fine.
The One Tool That Beats the Dealer Every Time
Here’s the single most important tool for this job: a basic multimeter. This little box is your weapon against the dealer's parts-swapping game. Before you even order a new sensor from us at Flat Earth Equipment, you're going to use this meter to test the old one and the wiring.
This quick diagnostic step is what separates a pro from a parts-changer. It tells you for sure if the sensor is bad or if you've got a bigger wiring nightmare. Finding a broken wire now saves you the cost of a sensor and the headache of seeing that P0117 code pop right back up.
Field Technician's Takeaway: Don't skip the multimeter test. It takes five minutes and is the only way to be 100% sure you're replacing the right part. Assuming it’s the sensor without testing is how small jobs turn into big, expensive ones.
Don't Skimp on Safety
Finally, let's talk about keeping your skin on. You're working around a hot engine and dealing with coolant that can be scalding. It’s messy, greasy work, and one slip can mean a nasty burn.
Always wear a solid pair of mechanic's gloves and some safety glasses. Hot coolant sprays exactly where you don’t want it, especially when you’re fighting an old sensor that’s seized in place. This isn't about being tough; it’s about being smart enough to work again tomorrow. We take this seriously; get a rundown on essential field repair safety gear to keep you protected.
Your Guide to Swapping the Sensor
Alright, let's get our hands dirty. This is where we get the machine running, right where it sits—not in some spotless dealer bay. You don't need proprietary laptops or a service tech for this. Just you, your tools, and a plan that works in the real world.
Forget what the manual says about a full system drain. We're smarter than that.
Your first move is to partially drain the coolant. You only need to drop the level below the sensor to prevent a green mess. Crack the radiator petcock or loosen the lower radiator hose just enough to let a gallon or two into your drain pan. That's almost always enough.
Getting the Old Sensor Out
With the coolant level lowered, the real work begins. Disconnect the electrical connector carefully. These plastic clips get brittle from heat cycles, so don't just yank on it. A small flathead screwdriver can gently release the locking tab. Tuck that connector safely out of the way.
Now, get a wrench on the old sensor and break it loose. It might be stubborn, but it should come out without a real fight.
Once it's out, here’s the most important prep step: clean the mounting surface. Grab a clean rag and wipe down the threads and the sealing surface on the engine block. Any grit or old thread sealant left behind will cause a leak.
This flowchart breaks down the core process for any field repair. It's not just about parts; it's about the process.
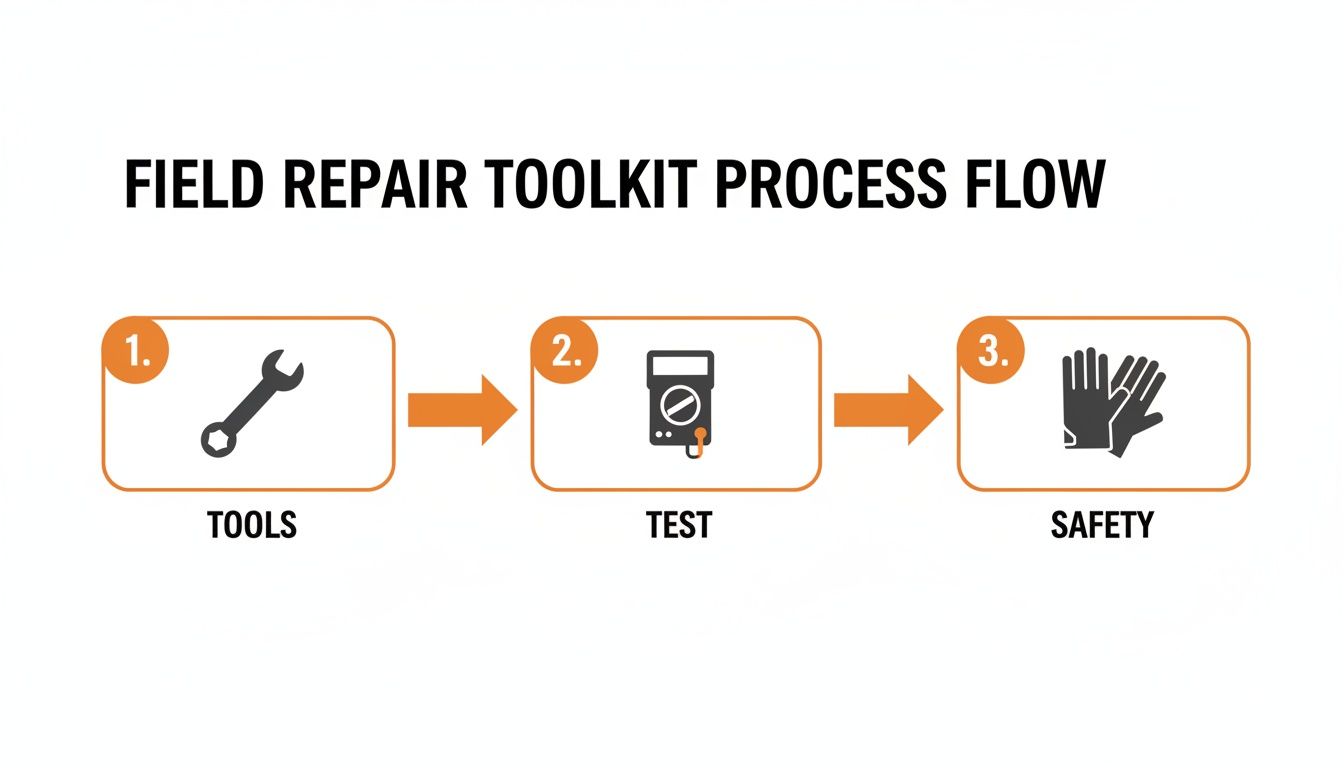
A successful fix isn't just swapping parts. It’s about a methodical approach that starts with the right gear and ends with a safe work environment.
Installing the New Sensor and Bleeding the System
Grabbing your new sensor from a no-BS source like Flat Earth Equipment makes this easy. A little thread sealant on the new sensor's threads is good insurance against leaks, but don't go crazy.
Thread the new sensor in by hand first to avoid cross-threading it. Then, snug it down with your wrench. Don’t overtighten—you're usually threading into aluminum, and stripped threads will ruin your day. If you have a torque wrench, aim for about 15-20 lb-ft.
With the new sensor in and the electrical connector clicked back on, it's time to top off the coolant. This next step is critical: you have to bleed the air out of the system. Trapped air creates pockets that cause overheating, even with a brand-new sensor.
Field Technician's Takeaway: Don't skip bleeding the cooling system. An air pocket trapped by the thermostat will give you the exact same overheating symptoms you started with, sending you on a wild goose chase for a problem you already fixed.
To bleed it, fill the radiator slowly with the cap off. Start the engine and let it idle. You should see bubbles coming up as air works its way out. Keep the coolant topped off. It helps to have the machine on a slight incline, with the radiator cap at the highest point.
Once the engine hits operating temp and the thermostat opens, you'll see a surge of coolant and a final "burp" of air. Top it off one last time, put the cap back on, and you're done.
Thankfully, swapping this sensor has gotten easier. Since 2005, JCB has standardized sensor locations on about 80% of its 300+ model lineup. Today, 70% of machines, like the popular 535-95 Agri loader, have the sensor right at the thermostat housing—a smart design that lets 90% of these repairs be finished in under an hour.
This field-ready fix will get your machine back to making money, fast. For more technical background on the P0117 code, the folks at CarParts.com have a solid write-up.
Quick P0117 Troubleshooting Path
Before you grab a wrench, these quick tests tell you if the problem is the sensor, the wiring, or the ECM. This table helps you narrow it down without wasting money on parts you don't need.
| Symptom or Test | Expected Result | What to Do If It Fails |
|---|---|---|
| Visual Inspection | Wiring is intact, no corrosion | Repair damaged wires, clean terminals |
| Scan Tool Data (Cold Engine) | Temp reading matches ambient air temp | Unplug sensor. If temp maxes out, wiring is likely good. Replace sensor. |
| Scan Tool Data (Warm Engine) | Temp reading is erratic or stuck low | Check for a stuck-open thermostat first, then suspect the sensor. |
| Jumper Wire Test | Unplug sensor, jump pins. Temp on scanner should go to max high | If temp stays low, you have an open circuit (broken wire) between sensor and ECM. |
| Test Light/Multimeter | Check for 5V reference at the connector with key on | No voltage points to a wiring issue or a problem with the ECM itself. |
Running through these checks saves a world of headache. It confirms you're replacing the right part for the right reason.
Clearing the Code and Preventing Regen Nightmares
Watch this video for a visual walkthrough:Watch: P0117 Troubleshooting Guide on YouTube
So, you’ve got the new sensor in, torqued down, and the system bled. The heavy lifting is done, but don't close the toolbox yet. That annoying check engine light is still glaring at you. You need to tell the machine the P0117 fault is gone—and you don't need the dealer's laptop to do it.
With many JCB models, the ECM is smart enough to figure things out on its own. After a few successful engine start-and-run cycles where it gets a good temperature reading, the code will often clear itself. An "engine cycle" means starting the machine, letting it get up to operating temp, and then shutting it down. Do this two or three times, and that light might just vanish.
Forcing a System Reset Without Calling the Dealer
Sometimes, that code is stubborn. If the light is still on, you can force a hard reset without begging a dealer tech to plug in his Service Master. It's an old-school trick, but it works. Disconnect both battery terminals—negative first, then positive.
Let the machine sit disconnected for at least 30 minutes. This isn't superstition; it gives the capacitors inside the ECM time to fully discharge. This wipes the ECM's short-term memory, including active fault codes. After 30 minutes, reconnect the positive terminal first, then the negative. This trick is the oldest in the book for a reason.
Field Technician's Takeaway: Don't get discouraged if the light doesn't go off immediately. The ECM needs a few successful run cycles to trust the new sensor. A battery disconnect is your ace in the hole—it can save you a frustrating trip back to the shop.
Final Checks and Avoiding Regen Hell
Once the code is gone, verify the repair. Fire up the machine and watch that temp gauge. You want a smooth, steady climb to the normal operating range, usually just below halfway. If the needle is jumpy or stays pinned on cold, you might still have an air pocket trapped in the system.
A working sensor is your best defense against the endless, power-sucking regen cycles that a P0117 code triggers. The ECM relies on coolant temp to decide when to start a regen. When it thinks the engine is at -40°F, it gets confused. It might prevent a needed regen or kick one off when it’s totally unnecessary, burning fuel for nothing.
By completing this JCB P0117 coolant temperature sensor swap, you’re not just clearing a code. You're restoring the engine's efficiency and stopping the machine from derating you into oblivion. It’s all about taking back control from finicky electronics and keeping your iron in the dirt where it belongs.
Common Questions from the Field
Out in the dirt, the same questions about this P0117 code pop up time and again. The dealer gives you one answer, but here’s the straight talk from guys who keep these machines running. We've heard it all, so let's cut through the noise.
Can I Run My JCB with a P0117 Code Active?
Technically, yes. But it's a terrible idea.
When a P0117 is active, the ECM is flying blind on engine temp. It defaults to a "safe" mode, assuming the engine is ice-cold—think -40°F. This forces it to dump extra fuel, killing your fuel efficiency and fouling up your aftertreatment system.
More importantly, the machine loses its ability to protect itself from overheating. The computer won't sound the alarm if the temp spikes, because it already thinks it's at rock bottom. You're one stuck thermostat away from a cooked engine, all because of a cheap sensor. It will also trigger pointless derates and regen cycles that stop you dead.
What If a New Sensor Doesn't Fix the P0117 Code?
So you’ve swapped in a quality new sensor from Flat Earth Equipment, and that cursed light comes right back on. Don't panic and throw more parts at it. The problem is almost certainly in the wiring harness or the connector. These machines vibrate like hell and get caked in grime, which destroys wiring.
Get your multimeter out again. You're hunting for a few specific gremlins:
- Chafed Wires: Look for sections of the harness rubbed raw against the engine block or frame.
- Corrosion: Pop the connector open. Any green crust on the pins is a dead giveaway for a bad connection.
- Pinched Sections: Trace the harness back, looking for any spots where it might have been crushed.
Confirm you have a solid 5-volt reference signal and a good ground at the connector pins. A persistent P0117 after a good sensor swap is a classic symptom of a simple wiring fault, not a catastrophic ECM failure.
Field Technician's Takeaway: Don't let a stubborn code send you back to the parts counter. Ninety-nine times out of a hundred, a persistent P0117 is a broken wire you can find and fix in under an hour. The ECM is rarely the real villain here.
Do I Need Genuine JCB Coolant?
You don't need the jug with the JCB logo, but you absolutely must use the correct type of coolant. Most modern JCB engines require a specific OAT (Organic Acid Technology) coolant. Pouring in standard green antifreeze from the auto parts store is a recipe for disaster.
Mixing coolant types creates a corrosive sludge. This gunk eats away at your new sensor, clogs radiator passages, and destroys water pump seals. Always use the specified OAT coolant and mix it 50/50 with distilled water—never tap water, which causes scaling. This small detail protects the entire cooling system and makes sure your repair lasts.
If you have specific questions about fluids or parts for your model, our team has the field experience to help. You can always get in touch with our tech support directly.