When that P0107 code pops up on your JCB's dash, it’s more than just an annoying light. It’s a direct threat to your uptime, and it's almost always a faulty atmospheric pressure sensor tricking your machine's brain. This guide cuts through the dealer-speak to show you what's really happening and, more importantly, how to fix it yourself out in the dirt.
What That P0107 Code Is Really Costing You
Let's get one thing straight: a P0107 code is the ECU screaming for help. It means it can no longer trust the data coming from the atmospheric pressure sensor, often called a Manifold Absolute Pressure (MAP) sensor. When this little plastic gremlin goes bad, it usually defaults to sending a dead-low voltage signal back to the engine's computer.
The ECU interprets this low signal as if the machine was instantly teleported to the top of Mount Everest where the air is thin. To "compensate" for this phantom altitude change, the ECU starts making a series of terrible decisions that tank your performance and burn up your fuel. It dumps in extra diesel to make up for the "thin" air, retards the engine timing, and slashes power to protect itself from what it thinks is a dangerous operating environment.
This is exactly where good operators get led down a rabbit hole. The symptoms—black smoke pouring from the stack, no power, and hard starts—look just like a bad turbo, a clogged DPF, or a failing EGR valve. I've seen guys waste an entire day chasing ghosts and tearing into perfectly good components, all because of one little sensor that's lying to the ECU.
The Real-World Impact on Your Machine
The dealer's first move? They'll tell you to haul it in for a "diagnostic session" with their precious Service Master laptop. After hooking it up and charging you a few hundred bucks, they’ll tell you exactly what the code already did. That's a few days of downtime and a bill you don't need.
While your machine is down, here’s what’s actually happening in your engine bay:
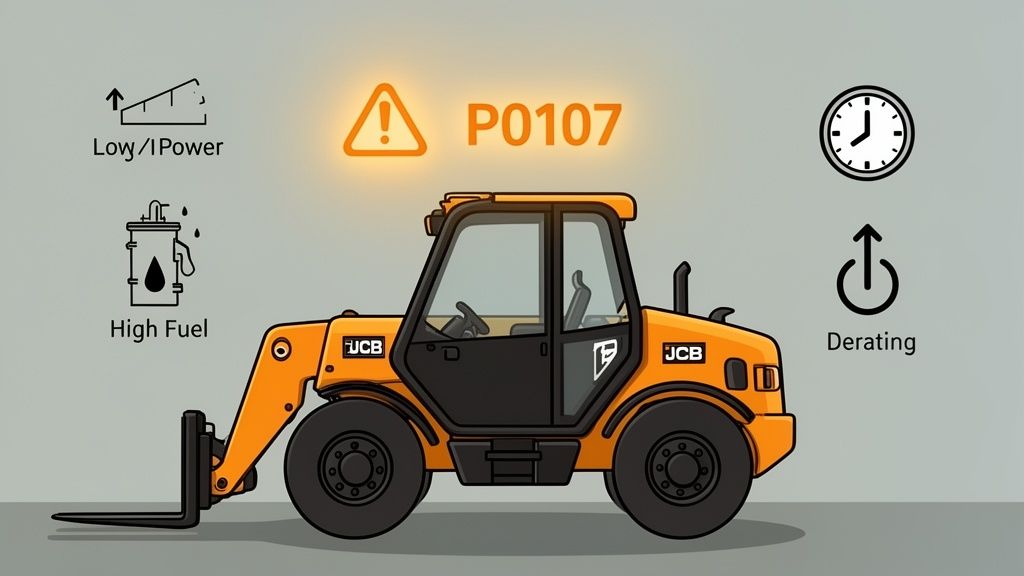
- Engine Derate: The ECU will slash your engine power by as much as 40%. Your powerful telehandler suddenly feels like it's dragging an anchor.
- Fuel Waste: The engine is forced to run rich, pouring unburnt fuel out the exhaust and clogging up your expensive emissions system—and that damn DPF—with excess soot.
- Hard Starts: The machine will fight you every time you try to fire it up because the fuel-to-air mixture is completely wrong for your actual altitude.
- Forced Regen Cycles: All that extra soot triggers more frequent and annoying DPF regen cycles, stopping you dead in your tracks when you need to be working.
From a fleet perspective, these sensor faults are killers. For a JCB telehandler on a job site billed at $250–$350 per day, a three-day outage for a simple sensor swap can erase over $1,000 in revenue, not to mention the hit to your project schedule.
You bought that yellow iron to move dirt and make money, not to sit in the weeds waiting for a dealer technician. Knowing how to diagnose and fix these common electronic gremlins yourself is the key to keeping your operation profitable.
Understanding the Faulty Logic
It's a classic case of bad data in, bad decisions out. The ECU is doing exactly what it was programmed to do, but its primary source of atmospheric data is feeding it lies. This fundamental disconnect is the root of the problem and why simply clearing the code does nothing. The fault will come right back the next time you cycle the key.
This table breaks down the real-world symptoms you'll experience versus the faulty logic the ECU is using because of the bad sensor reading.
JCB P0107 Symptoms: What You See vs What The Machine Thinks
| Field Symptom (What You See) | ECU Logic (What It Thinks) | The Real Problem |
|---|---|---|
| Black smoke from the exhaust | "The air is thin, I need more fuel to make power." | Over-fueling, creating soot. |
| Engine has no power | "I'm at high altitude, so I must protect the engine." | Power is cut by up to 40%. |
| Hard starts or won't start | "The fuel mix must be rich for this 'thin' air." | Incorrect air/fuel ratio for starting. |
| Constant DPF regens | "Why is the DPF filling with soot so fast?" | The rich fuel mixture is the cause. |
Ultimately, the ECU is just a computer following flawed instructions. You have to fix the source of the bad data.
That’s why we’re here. The team at Flat Earth Equipment was founded on the idea that the guys turning the wrenches shouldn't have to wait on a dealer to get the job done. This guide is about giving you the knowledge to bypass the system, get the right part in your hand, and get your machine back to earning its keep. Read more about our mission here.
Finding the Atmospheric Pressure Sensor on Your JCB
Alright, let's track down that pesky atmospheric pressure sensor. JCB has a habit of tucking this little plastic troublemaker in different spots depending on the machine. The location on a 3CX backhoe won't be identical to a 535 Loadall, but the logic is always the same—it has to be somewhere it can read the air pressure heading into the engine.
Instead of just poking around with a flashlight, we'll use some common landmarks in the engine bay to pinpoint its location. Your prime hunting ground is always on or very near the intake manifold or the large piping running from the intercooler. The sensor’s job is to tell the ECU the pressure of the air before it gets hit by the turbo, so it’s always placed somewhere between your air filter and the turbo inlet.
Just be sure you don't confuse this with the boost pressure sensor, which lives after the turbo. The atmospheric sensor is all about establishing a baseline from the ambient air, which is why a P0107 code is so critical—it messes with the very foundation of the engine's fueling calculations.
Common Hiding Spots on JCB Machines
The easiest way to find it is to start at the air filter housing and follow the path of the air. As you trace that large intake hose toward the engine, keep an eye out for a small, usually black plastic sensor with a three-wire electrical connector plugged into it. It’s either threaded directly into the intake manifold or pushed into a rubber grommet on the intake piping.
Here are the most common places I find it:
- On the Intake Manifold: This is where it lives most of the time. Look for it bolted right onto the cast aluminum manifold, typically held in by a single 8mm or 10mm bolt.
- In the Intercooler Piping: On a lot of telehandlers, you'll find it pushed into a port on the big pipe running from the air-to-air intercooler to the engine intake.
- Near the Air Filter Housing: This is less common, but some compact models have it very close to the air filter box on the main intake tube.
Look for a small electrical harness branching off the main engine loom that ends in a three-pin connector. That little branch is almost always the wiring for your atmospheric pressure sensor. Following that wire is often the fastest way to get your eyes on the target.
To give you a better idea, this diagram shows a common JCB engine layout.
See how the sensor (highlighted) is positioned right on the intake manifold? That gives it a perfect spot to read incoming air pressure. This is your roadmap—your machine will have the same basic parts, just arranged a little differently.
Model-Specific Location Tips
While the general area is pretty consistent, here are a few pointers based on the machine you're working on. These are the kinds of small differences that can save you a ton of time in the field.
- JCB 3CX/4CX Backhoes: On these, it’s usually a straight shot. Pop the hood and look directly at the top of the engine's intake manifold. It's often right there, easy to get to, and held on with one bolt.
- JCB Loadall Telehandlers (535, 541, etc.): Things can get a bit more cramped here. The sensor is often tucked lower down on the side of the intake manifold or into the ducting from the intercooler. You might need to pop off a small side panel for better access.
- J JCB Excavators (JS Series): On the excavators, this sensor is almost always mounted on the cold-side intercooler pipe. Just trace the big hose running from the intercooler (that small radiator at the front of the engine) back to the engine intake elbow. The sensor will be plugged right into that pipe.
A field tech's pro-tip: Before you even grab a wrench, take your phone and snap a few pictures of the area. It helps you remember exactly how the harness was routed and saves you from fighting to plug things back in later. It’s a two-second step that can save you twenty minutes of frustration.
Once you’ve found the sensor, don't just rip it out. You need to prove it’s actually the problem. The guys who just throw parts at a problem are the ones who end up with a machine showing the same code, only now it has a new, perfectly good sensor installed. Don't be that guy. Next, we’ll do a quick voltage check to confirm our diagnosis—and you won't need the dealer's expensive laptop to do it.
Field Diagnostics Without the Dealer's Laptop
Forget about the dealer's laptop. That proprietary Service Master software is designed to keep you on their hook, forcing you to pay up just to read a code you already know is there. You don't need their permission to fix your own machine. For a P0107 code, all it takes is a decent multimeter and a few minutes of your time, right there in the dirt.
This is the most critical part of the whole job. Anyone can throw a new part at a problem, but a real technician proves the old part is bad first. This quick diagnostic check separates the pros from the parts-swappers and saves you from wasting money on a new sensor when the real culprit is a chafed wire in the harness. We're going to test the entire circuit—power, ground, and signal—to get a definitive answer.
This diagram traces the path of air from the filter to the sensor, giving you a logical map of the system. The sensor is always located downstream from the air filter, right on the intake manifold, which is exactly where we'll be working.
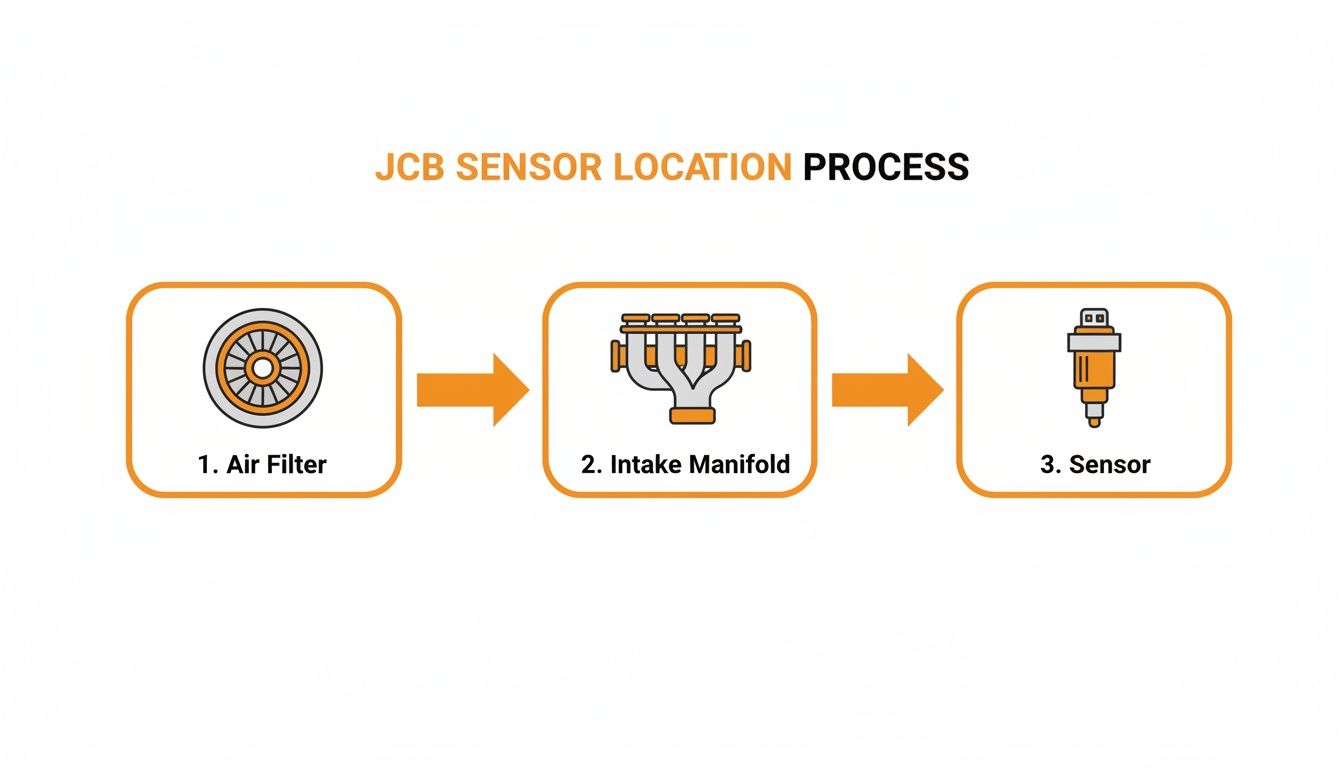
This visual guide gives you a clear mental picture before you even pop the engine bay open, showing you exactly where to look.
Backprobing the 3-Wire Connector
The atmospheric pressure sensor runs on a simple three-wire setup. To test it properly, you need to backprobe the connector while it’s still plugged in. Never unplug the sensor to test voltages; the circuit has to be complete and under load to give you an accurate reading. Gently slide your multimeter probes into the back of the connector where the wires enter until they make solid contact with the metal pins inside.
Here’s a breakdown of what those three wires do:
- 5-Volt Reference: This is the steady power supply coming from the ECU.
- Ground: This is the sensor's return path, completing the circuit.
- Signal Wire: This wire sends the variable voltage reading back to the ECU.
Set your multimeter to DC Volts. If you have T-pins or a dedicated backprobing kit, now’s the time to use them—they make getting a clean connection way easier than fumbling with bulky probe tips.
The Key-On, Engine-Off Test
With the machine's master switch on and the key in the "on" position (engine OFF), you’re ready to test. This static test reveals precisely what the ECU is seeing from the sensor before the engine even turns over.
Checking the 5-Volt Reference
First, let's confirm your power supply. Place your multimeter's red probe on the 5-volt reference wire and the black probe on a known good ground, like the negative battery terminal or a clean bolt on the engine block. You should see a rock-solid 5.0 volts, give or take a tenth. If you get 0 volts, you've got a wiring issue or a problem with the ECU. If the reading is low, like 3 volts, you're likely dealing with a short in the harness.
Confirming a Solid Ground
Next, verify the ground connection. Keep the red probe on the 5-volt reference wire and move the black probe to the ground wire in the connector. Once again, you should see a steady 5.0 volts. If this reading is different from your first test, you have a weak or floating ground, which is just as bad as having no ground at all.
A bad ground is the silent killer of electronic components. The ECU can't make sense of a signal if its reference point is unstable. Always check your ground before condemning a sensor.
Reading the Signal Voltage
Finally, the moment of truth. Move the red probe to the signal wire and keep the black probe on a good chassis ground. This voltage reading tells you what the sensor is reporting to the ECU about the current atmospheric pressure. And this is where your physical location—your altitude—plays a huge role.
From what we've seen across mixed fleets in the Western U.S., JCB machines often use a combined MAP/BARO sensor with a 3-wire, 5-volt reference circuit. OEM service data from sources like Presights shows the signal should read roughly 3.8–4.2 V at sea level, dropping to 3.3–3.7 V by 1,200 m (3,937 ft) as pressure decreases. The P0107 code is typically triggered when that signal voltage drops below 0.5 V for about 10 seconds.
If your meter reads below 0.5 volts, you've found your culprit. The sensor is dead. A reading that’s completely out of line for your altitude also confirms it’s faulty. A healthy sensor will output a stable voltage that makes sense for where you're parked.
With this data, you're not guessing anymore. You have proof. Now you can confidently order that new sensor from Flat Earth Equipment and get ready to swap it out.
Executing the Sensor Swap: A Field Guide
Alright, your multimeter confirmed it—the sensor is toast. Now for the easy part, as long as you don't get sloppy. This isn't a complicated job that demands a trip back to the shop or any specialized dealer tools. A basic socket set, some common sense, and the right part from a supplier like Flat Earth Equipment are all you need to knock this out in under 30 minutes.
This is exactly the kind of field repair that keeps your machine earning its keep instead of sitting in a dealer's bay. The key is to be methodical. Pay attention to the small details now to prevent big headaches later.
Gearing Up for the Swap
Before you even think about putting a wrench on anything, get yourself set up for success. This isn't just about grabbing the right tools; it’s about working smart and safe. The last thing you want is to turn a simple sensor swap into a bigger electrical issue.
First, kill all power. Turn off the master switch or, better yet, just disconnect the negative battery terminal. It’s a simple move that prevents any accidental shorts while you're fiddling with connectors. Our guide on field repair safety fundamentals digs deeper into these must-do basics.
Here’s what you'll want in your toolbox:
- Socket and Ratchet Set: You'll most likely need an 8mm or 10mm socket for the single mounting bolt. A small extension bar can be a real lifesaver if the sensor is tucked into an awkward spot.
- Small Flathead Screwdriver or Pick: Absolutely essential for gently releasing the locking tab on the electrical connector without breaking that brittle plastic.
- Shop Rags and Brake Cleaner: Have these on hand to clean up the mounting surface and the sensor port.
- Your New Sensor: Get the replacement part from Flat Earth Equipment out of its box and ready to go.
Removing the Old Sensor
With your tools laid out, it’s time to pull the failed sensor. This is where a little patience goes a long way, especially with that electrical connector.
Disconnecting the Electrical Harness
This is the number one spot where people mess up. After thousands of heat cycles, that little plastic locking tab on the connector gets incredibly brittle. If you just yank on the harness, it’s guaranteed to snap. Instead, use your small screwdriver or pick to gently lift the locking tab while you pull the connector straight back. You should feel a slight click as it lets go.
Never, ever pull on the wires themselves. You can easily pull a pin right out of the connector and create a whole new electrical nightmare. Always grip the body of the connector.
Unbolting the Sensor
Once the connector is safely off and tucked aside, use your socket to remove the single mounting bolt. It shouldn't be torqued down like a lug nut, but engine grime can sometimes make it a bit sticky. With the bolt out, the sensor should pull straight from its port. You might need to give it a gentle twist back and forth to break the old O-ring's seal.
Preparing for the New Sensor
This is the step most people skip, and it's a critical one. Don't just slap the new sensor in there and call it a day. A couple of minutes of prep ensures a clean installation and a perfect seal.
Grab a clean shop rag and a quick shot of brake cleaner to wipe down the mounting surface where the new sensor will sit. You want to remove any dirt, grease, or remnants of the old O-ring.
Next, peek inside the sensor port itself. It's not uncommon to find some oily residue or even a little carbon buildup. Use a rag wrapped around your screwdriver to gently wipe out the inside of the port. You want the new sensor to have a clean home so it can get an accurate pressure reading from day one.
This type of sensor became a common failure point when JCB first rolled out its electronically controlled diesel engines. By 2015, industry teardowns showed that over 70% of compact telehandlers in major markets used an intake-mounted MAP sensor that also handles barometric pressure, making a clean install essential. You can find more history on the P0107 fault code over at RepairPal.
Installing Your New Part
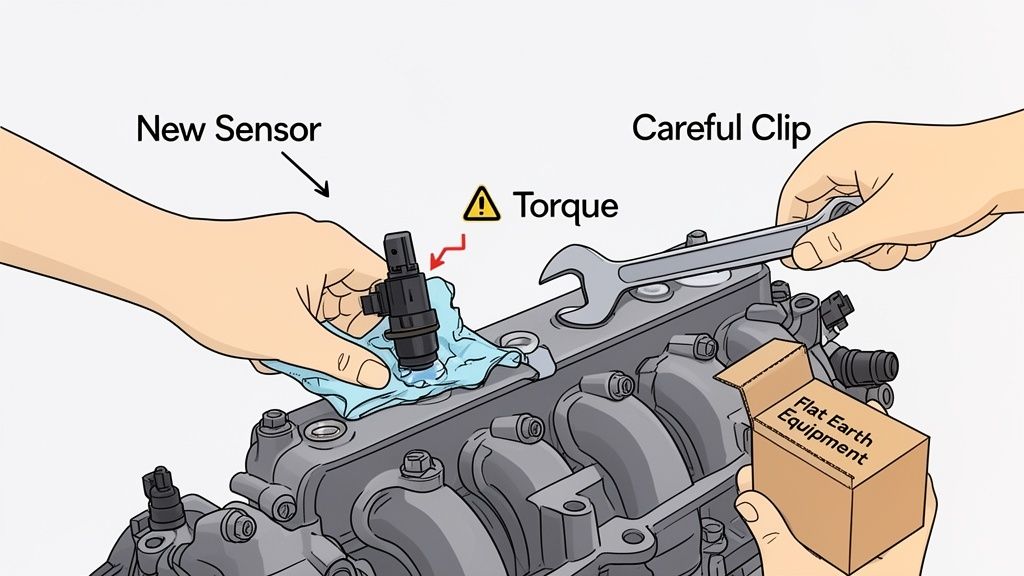
Now you're ready for the new sensor from Flat Earth Equipment. Give it a quick inspection, making sure the new O-ring is seated properly. A little dab of clean engine oil on the O-ring will help it slide in smoothly and create a perfect seal.
Gently press the new sensor into the port until it sits flush against the mounting surface. Thread the mounting bolt in by hand first to make sure you don't cross-thread it, then snug it down with your ratchet. There’s no need to go crazy here—just tighten it until it’s snug. Overtightening can easily crack the sensor's plastic housing.
Finally, plug the electrical connector back in. Listen for that distinct "click" as the locking tab engages. Give the connector a gentle tug to be sure it's secure. That's it—the physical swap is done.
Post-Swap Verification and Clearing the Code
Getting the new sensor bolted on is a great feeling, but the job's not quite done. Don't even think about putting your tools away yet. The next steps are the most important: proving the fix actually worked and wiping that P0107 code from the machine’s memory for good. Skipping this is just asking for a comeback.
You need to confirm the new sensor is sending a sane signal to the ECU and then force the machine to forget the old fault. This isn't just about turning off a light on the dash; it's about confirming the entire system is healthy before you send the machine back out to earn its keep. A couple of extra minutes here will save you hours of head-scratching later.
Re-Running the Key-On Voltage Check
Before you even fire up the engine, we’re going right back to the multimeter. It’s time to repeat the same key-on, engine-off voltage test we did on the old, failed sensor. This is your proof that the new part from Flat Earth Equipment is doing its job right out of the box.
Reconnect your battery, turn the master switch on, and pop the key to the "on" position. Head back to that three-wire connector and backprobe the signal wire exactly like you did before.
What you're looking for now is a stable voltage reading that makes sense for your current altitude. If you’re near sea level, that reading should be right around 3.8 to 4.2 volts. Working up in the mountains? It should be a bit lower, maybe in the 3.3 to 3.7 volt range.
A logical, steady voltage from the new sensor confirms your hardware fix is solid. But if you're still seeing a reading below 0.5 volts, you've got a wiring problem between the sensor and the ECU that needs to be traced.
This simple check gives you 100% confidence in the repair. Now, we can move on to dealing with the ghost of the old code still haunting the ECU.
Clearing the P0107 Fault Code for Good
That P0107 code is now stored in the ECU's memory as a "historic" or "inactive" fault. Even with the root cause fixed, the check engine light will likely stay lit until you manually clear it. This is where the dealer would love to hook up their laptop and charge you for a five-second button press. We're not doing that.
You don't need their proprietary Service Master software. A good-quality, generic heavy-duty scanner can handle this job perfectly. Plug your scanner into the machine’s diagnostic port, power it up, and navigate to the engine control module.
Here’s the process:
- Read Fault Codes: First, have the scanner pull all active and inactive codes. You should see P0107 listed as an inactive or historic fault.
- Clear Fault Codes: Find the "Clear Codes" or "Erase Faults" function in your scanner's menu and hit it. The scanner will tell you when the process is complete.
- Cycle the Key: Turn the key completely off, wait about 10 seconds, then turn it back on. This lets the ECU reboot and recognize that its fault memory has been wiped clean.
The Final Test Run
With the code cleared, it’s time for the final proof. Start the engine. The check engine light should be gone. Let the machine idle for a few minutes while you watch the live data stream on your scanner.
Find the parameter for "Atmospheric Pressure" or "Barometric Pressure." The reading should be stable and reflect your local conditions—around 14.7 psi or 29.9 inHg at sea level. Now, take the machine for a quick spin. Lift a load, drive it around, and keep an eye on that data. You want to see that pressure reading hold steady, not drop out.
If the light stays off and the live data looks good, you've officially won. You diagnosed the problem, executed a clean JCB atmospheric pressure sensor swap, and verified the repair without ever needing to call the dealer.
Field Questions on the JCB P0107 Code
Out in the field, you run into the same questions time and again. When a machine is down with a stubborn P0107, theories start flying. Let’s cut through the noise with straight answers to the stuff I hear most often from guys trying to get their JCB back to work.
Can I Just Clean The Old JCB Atmospheric Pressure Sensor?
Don't waste your time. I've seen guys try to hit it with brake cleaner, thinking a little oil or soot is the problem. It rarely, if ever, works.
The P0107 code is almost always triggered by an internal electronic failure inside the sensor, not surface gunk. The delicate circuitry has failed, and no amount of cleaning will fix a fried component. The only reliable fix is a full replacement. Trying to clean it just delays the inevitable and keeps your machine down longer.
What Happens If I Ignore The P0107 Fault Code?
Ignoring it is the fastest way to turn a small problem into a big, expensive one. The machine will immediately derate its power, making it sluggish and useless on a job site. You'll also burn through a ton of extra fuel as the ECU dumps diesel to compensate for the bad reading.
Over time, this rich condition will hammer your expensive emissions components, especially the DPF, leading to more forced regens. Eventually, the ECU will put the machine into a severe limp mode or, worse, prevent it from starting altogether. It’s a guaranteed path to bigger bills and more downtime.
Does The New Sensor Need Dealer Calibration?
Absolutely not. The ECU is smarter than they give it credit for. It automatically calibrates itself to the new sensor every single time you cycle the key.
This is a myth pushed by dealers to keep you coming back to them. The atmospheric pressure sensor is a 'plug-and-play' part that requires zero dealer intervention.
When you turn the key to the 'on' position—before the engine starts—the ECU takes a snapshot reading from the sensor. It uses that static voltage as its baseline for the current atmospheric pressure. As long as you install a quality sensor, the machine handles the rest. No dealer laptop, no special software, and no calibration fees.
If you still have questions or run into a unique problem on your specific machine, you can always reach out to a real technician for advice.
When that P0107 code strikes, don't wait on the dealer. Get the right atmospheric pressure sensor shipped today from Flat Earth Equipment and get your machine back on the job tomorrow. Shop Now