That puddle of gear oil under your machine’s house isn't just a mess on the ground; it's a critical warning sign that your job is about to grind to a halt. A JCB JS Excavator slew motor gearbox leak isn't a simple seal job for the dealer's service bay. It’s about digging in to find the real cause before that gearbox grenades itself and strands you in the field.
Diagnosing That Puddle Under Your Slew Motor
You see that growing stain every morning. The service writer at the dealer might call it a quick seal replacement, but anyone who's turned wrenches in the dirt knows that's just the start. That drip means downtime, an angry foreman, and the gnawing feeling your slew gearbox is about to eat itself.
Let’s cut the fluff. Here's why your JCB is bleeding gear oil.
This isn't a seal problem. The seal is just the victim. The real culprit is almost always the output shaft bearing buried deep inside the slew gearbox. After thousands of hours swinging heavy buckets, that bearing develops just a tiny bit of play. It’s not much, but it’s enough to let the main output shaft wobble—and that wobble absolutely destroys the delicate lip of the output seal.
Just slapping a new seal in there without touching the bearing is a guaranteed comeback job. You'll button it all up, feel good about it for a minute, and then two months later, that same dark puddle will be back to greet you. You have to fix the root cause, not just the symptom.
Pinpointing The Real Failure
First thing's first: confirm exactly where the leak is coming from. Are you dealing with thick, stinky gear oil from the slew gearbox, or is it the thinner hydraulic fluid from the slew motor itself?
Grab a can of degreaser and clean the entire area around the motor and gearbox until it's spotless. Then, run the machine for a few minutes, slewing the house back and forth. This simple test tells you everything.
- Leak from the gearbox weep hole: This points directly to a failed gearbox output seal and, by extension, the shot bearing behind it.
- Leak between the motor and gearbox: This is likely the motor shaft seal. That means hydraulic fluid is leaking down into the gearbox.
- Leak from a hydraulic line: Don't overlook the simple stuff. Check all your fittings—sometimes the easiest fix is the right one.
The slew gearbox oil leak is one of the most common headaches on these machines. The failure almost always happens right at the output seal. In most cases, the breakdown starts with bearing misalignment, which creates a perfect path for oil to escape. For popular JCB JS series excavators like the JS220 or JS260, that gearbox holds 5 liters of a specific JCB HD90 Gear Oil (API-GL-5). You can learn more about the common failure points of excavator swing motors from other industry experts.
You’re not just a parts changer. A real tech understands the chain of failure. The worn bearing creates shaft play. The shaft play kills the seal. The dead seal causes the leak. Fix the bearing, and you fix the leak for good.
Symptoms vs. Root Causes on Your JCB
It's easy to get tunnel vision and just focus on the drip. This quick table helps you connect what you're seeing in the field to what's actually broken inside the gearbox. Thinking this way saves you from doing the same job twice.
| What You See (The Symptom) | What's Actually Happening (The Root Cause) | A Field Tech's Takeaway |
|---|---|---|
| Gear oil dripping from the weep hole. | The output shaft bearing has failed, causing shaft wobble that destroyed the output seal. | Don't just replace the seal. The bearing is the real problem. A seal-only fix is temporary at best. |
| Hydraulic fluid leaking between the motor and gearbox. | The slew motor's main shaft seal has failed, allowing hydraulic oil to contaminate the gearbox. | You need to pull the motor and replace its shaft seal. Also, drain and flush the gearbox to remove contaminated oil. |
| The machine has a "spongy" or jerky swing motion. | The bearing and/or internal gears are so worn that there's excessive backlash. | This is a major internal failure. The gearbox needs to be pulled for a complete teardown and inspection. |
| Metallic glitter in the drained gear oil. | Bearings, gears, or other internal components are grinding themselves to pieces. | The gearbox is likely toast. You're looking at a full rebuild or a complete replacement unit. |
Before you pick up a wrench, think about the why. Did the bearing fail due to high hours, or is something else going on? Contaminated gear oil will accelerate wear on every single internal component. Did an operator top it off with the wrong fluid? Always check the simple stuff first. The dealer wants you to come back for another repair; we want to get your machine back on the job and making money.
Your Real-World Repair Loadout: Tools and Parts
Let's be realistic. The pristine, foam-lined toolbox the dealer tech rolls out isn't what we're working with. We're in the dirt, often kneeling in the mud, and our tool loadout needs to match. This isn't a clean-room operation; it's about having the right heavy iron to break loose seized bolts and the finesse to seat a new seal perfectly.
The first thing you absolutely need is some serious torque. A standard ratchet isn't going to cut it against years of corrosion and grime. For this job, a heavy-hitting 3/4" or 1" drive impact wrench is non-negotiable. It's the only way you're going to win the argument against those stubborn mounting bolts. Make sure you have a solid set of impact sockets to go with it.
The Essential Hand Tools
Beyond the big gun, your success hinges on a few other key pieces of gear. This is no time to rely on cheap tools that will bend, snap, or let you down when you're putting your weight into them.
- Heavy-Duty Gear Puller: To get the old bearing off the shaft without scarring the surface, you need a quality three-jaw puller. The cheap ones just flex and slip, wasting hours of your time.
- Pry Bars and Brass Drifts: A good set of pry bars is essential for carefully separating the gearbox housing. Brass drifts are just as critical for tapping new bearings and seals into place without damaging the precision-machined surfaces. Never use a steel hammer directly on a bearing.
- The Small Stuff That Saves the Day: Don't get caught without the details. Grab a tube of high-strength thread sealant for the mounting bolts, some fine-grit emery cloth to polish up any minor nicks on the output shaft, and a ridiculous amount of shop rags. Trust me, you’ll use every single one.
The most expensive tool is the one you don't have when you're halfway through a job. Making a second trip to town because you cheaped out on a puller or forgot sealant costs you way more in downtime than the tool ever would.
Sourcing Parts That Actually Work
This is the most critical part of the entire JCB JS excavator slew motor repair. The best tools in the world won't matter if your replacement parts are junk. When you crack open that gearbox, you aren't just swapping the main output seal—you're replacing the failed output bearing and all the associated O-rings and gaskets at the same time. Doing it halfway is just asking to do it again.
Steer clear of the mystery-metal kits on giant online marketplaces. They often use inferior materials, and the dimensions can be off by just enough to cause a catastrophic failure. You need parts built to meet or exceed OEM specs. That’s why Flat Earth Equipment offers the precision-fit seals and bearings you need to bypass dealer wait times. They get your machine out of the shop and back on the job without you having to worry about a callback.
Being prepared is everything. It's what separates a one-day repair from a machine being down for a week. Before you even think about turning the first bolt, clear your workspace and run through the basic protocols. It’s always a good idea to refresh yourself on some foundational heavy equipment safety guidelines to keep yourself out of trouble.
Pulling The Slew Motor And Gearbox From The Machine
Alright, time to get your hands dirty. We're done talking; now comes the heavy lifting. Pulling the slew motor and gearbox assembly isn't just about brute force—it's about doing it smart so you don't break something expensive or, worse, get yourself hurt.
This whole assembly is a greasy, awkward beast. If you don't plan your attack, you'll be fighting it every step of the way. Before you even think about putting a wrench on a bolt, get the machine into a safe and stable position.
Setting The Stage For The Big Lift
First, swing the house so the counterweight is parked directly over one of the track idlers. Next, use the boom to lift that side of the machine just enough to take the weight off the springs and lock the upper structure in place. This is critical—it stops the house from rocking on you when you finally break the gearbox loose from the slew ring.
Now, grab your degreaser and clean everything. And I mean everything. The mounting bolts, the hydraulic lines, the housing itself. Working clean is working safe, and it keeps dirt from dropping into open hydraulic ports—a simple mistake that will cost you a fortune down the road.
This flow chart nails the core of any field repair: getting your tools, parts, and supplies in order before you start is non-negotiable.
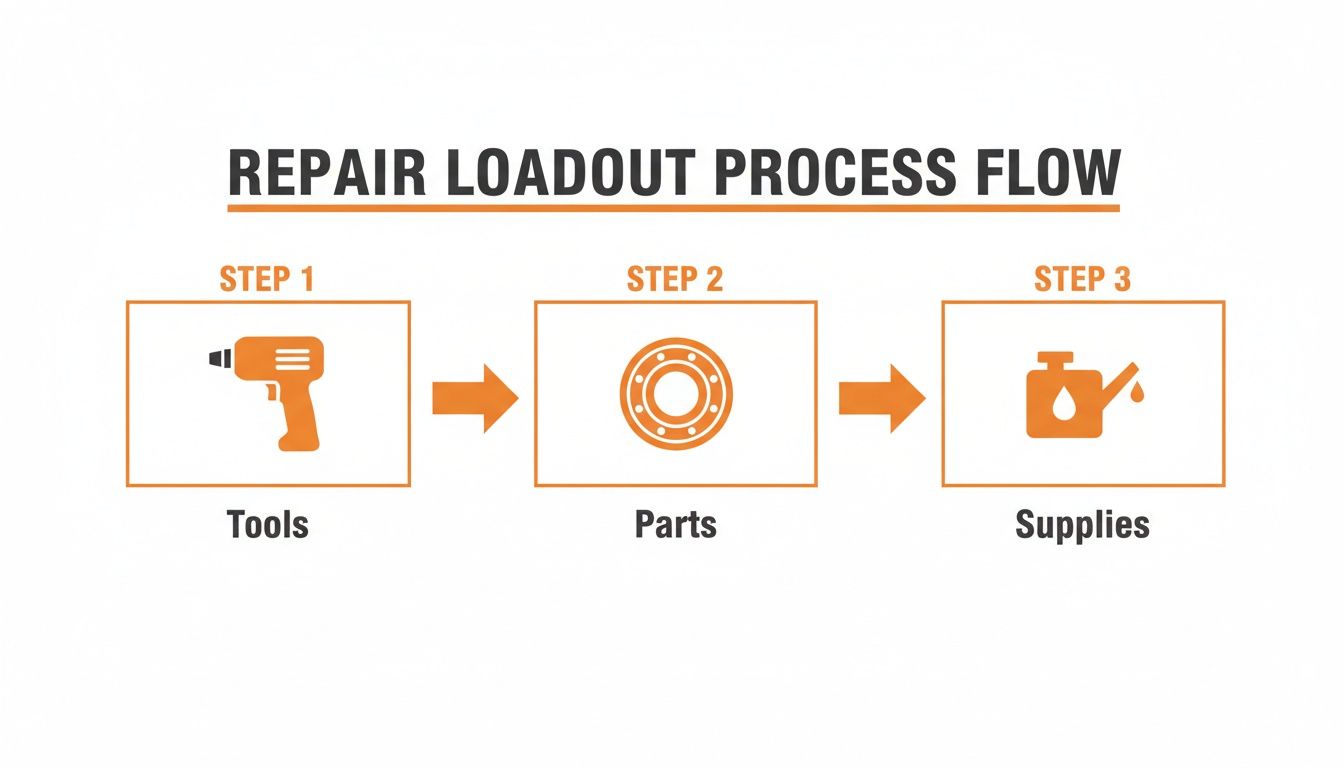
Seeing it laid out like this just reinforces a simple truth: a successful JCB JS Excavator slew motor gearbox oil leak repair depends on having the right gear before the machine is in pieces.
Disconnecting And Lifting The Assembly
With the machine stable and clean, the next step is managing the hydraulics. Get a big drain pan under there because you're going to make a mess. Before you disconnect a single line, use a paint marker or colored zip ties to label every hose and the port it came from. Don't trust your memory. Swapping a case drain line with a pressure line during reassembly will blow seals and could even crack the motor housing.
Pro Tip: As soon as you pull a line, immediately cap the hose and plug the port on the motor. Use proper hydraulic caps, not rags stuffed in the holes. This is the number one way to prevent the contamination that will absolutely kill your hydraulic system later.
Once the hydraulics are safely capped off, it’s time for the mounting bolts. This is where your heavy-hitting impact wrench earns its pay. Some of these bolts may not have budged in 5,000+ hours, so they will put up a fight. A little heat from a torch can help persuade the really stubborn ones, but be extremely careful around any residual hydraulic fluid.
Rig your lifting chains securely around the motor and gearbox assembly. Use a shop crane or the excavator's own bucket with a certified sling to take the weight. Slowly lift the unit straight up and out. It's heavy—we're talking several hundred pounds—so keep your hands and feet clear at all times.
Splitting The Motor From The Gearbox
With the whole unit on your workbench or a sturdy pallet, you can now separate the hydraulic slew motor from the planetary gearbox. This is a crucial step for a proper inspection. You'll see a ring of bolts holding the two halves together.
Remove these bolts carefully, and the motor should slide right out of the gearbox housing. Be ready for some residual oil to spill out. Once they're separated, you'll have a clear view of the splined motor shaft and the input side of the gearbox.
This is your chance to hunt for damage beyond the main output seal leak. Check the motor shaft seal for any tell-tale signs of leaking hydraulic fluid. Inspect the splines on both the motor shaft and inside the gearbox for any wear, chipping, or twisting. Finding this kind of damage now saves you from bolting a failing motor back onto your freshly rebuilt gearbox. This meticulous approach is what separates a professional JCB JS Excavator Slew Motor Gearbox Oil Leak Repair from a quick patch job that's guaranteed to fail.
Bench Work: Replacing The Failed Seals And Bearings
Alright, now for the real surgery. With the gearbox on your bench, you're looking right at the heart of the problem. This isn't just a quick parts swap; this is a meticulous rebuild. Doing it right separates a permanent JCB JS Excavator Slew Motor Gearbox Oil Leak Repair from a patch job that’s going to fail again in six months.

This detailed work is what you get paid for. Your attention to detail here prevents a costly comeback that wrecks your schedule and your reputation. The dealer might push for a whole new unit, but we're going to fix what's actually broken and make sure it stays fixed.
Tearing Down The Planetary Gearbox
Start by carefully disassembling the planetary gear set. Lay out every single component in the exact order you removed it. This is a perfect time to use your phone—snap a picture at each stage. It's not a rookie move; it's a smart one that ensures you don't have "extra" parts left over when you're done.
As you pull the gears, let the last of the old oil drain into a clean pan. Keep an eye out for the tell-tale signs of serious trouble: that glittery metallic sheen or, worse, actual chunks of metal. If you see that, the job just got bigger than a simple bearing and seal. You're likely looking at gear failure and need to dig deeper.
Get hands-on with every gear. Run your finger over each tooth, feeling for any chipping, pitting, or spalling. Even one damaged tooth can start a chain reaction that will eventually grenade the entire gearbox.
The old gear oil tells a story. Think of it as the machine's blood work. If it's clean, you caught the issue early. If it's full of metal, you're not doing a repair—you're doing an autopsy.
Pressing Out The Failed Bearing And Seal
Once the gearbox is stripped down, you can finally get to the culprits: the main output shaft bearing and the seal. This is a job for your heavy-duty press. Don't even think about using a hammer here unless you want to risk cracking the housing.
Get the gearbox housing supported securely on the press bed. You'll need the right size driver or a large socket that only contacts the bearing's outer race. Apply slow, steady, even pressure to push the old bearing and seal out. They can be stubborn, but brute force is not your friend.
With the old parts out, it’s time for the most critical inspection of the whole job. Check the output shaft itself, paying close attention to the machined surfaces where the bearing and seal ride. Look for scoring, grooves, or a polished "wear ring" from the old seal lip. A slight groove is all it takes to chew up a new seal in a few weeks. If you find anything more than light polishing, that shaft needs repair or replacement. Don't cut corners here.
Meticulous Cleaning And Reassembly
This is where the pros really shine. A quick wipe with a rag isn't cleaning. Every gear, every bearing race, and every nook and cranny inside that housing has to be spotless. Use a parts washer or a solvent tank, followed by compressed air, to get every last bit of grime and metal flake out of there.
When you install the new bearing, never press on the inner race. Use your press and a correctly sized driver to apply pressure only to the outer race. Make sure it goes in perfectly straight and seats all the way down in its bore. For the new seal, a light coat of grease on the outer diameter and the inner lip makes installation smoother. Gently tap it into place with a seal driver until it’s perfectly square and flush with the housing.
The economic reality here is stark. A full swing motor seal and bearing replacement on a modern JCB JS series excavator can easily run between $1,500 and $3,500 for parts and labor. For a fleet manager, an unexpected failure like this can derail project timelines and trigger financial penalties. You can find plenty of insights from fellow technicians on heavy equipment forums discussing these costs. This is exactly why getting the bench work right the first time is so critical—it turns an expensive, reactive crisis into a controlled, one-time fix.
Reassembly, Installation, And Final Testing
You’ve done the hard part. The gearbox is clean, the new parts are in, and everything is buttoned up on the bench. Now it’s time to get this unit back in the machine where it belongs and prove the fix is solid. Don't get sloppy on this last leg of the job—a rushed reassembly can undo all your careful work.
First up, let’s marry the hydraulic slew motor back to the gearbox. A light coat of grease on the motor shaft splines will help things slide together smoothly. Carefully align and guide the motor into the gearbox housing. Get all the bolts started by hand in a star pattern to make sure the motor seats evenly, then break out the torque wrench and bring them to spec. This little step is crucial for preventing a warped mounting flange, which could create a brand new leak.
Getting The Assembly Back In The Machine
With the motor and gearbox reconnected as a single unit, it's time for the big lift. Rig your chains securely and use your shop crane to carefully lower the whole assembly back onto the slew ring. This is pretty much a blind drop, so it's a two-person job. Have a spotter guide you in and keep your hands clear.
Once it's seated, start all the main mounting bolts by hand. These are high-grade bolts, and you absolutely need to use a thread-locking compound on them. Torque them down in a crisscross pattern to the manufacturer's spec. Whatever you do, don't just hammer them with an impact wrench until they stop turning. Uneven torque can put the entire gearbox in a bind and lead to catastrophic bearing failure down the road.
This is where patience pays dividends. Rushing the reassembly to get the machine back to making money is the fastest way to have it back in your bay next week. Take your time, use the right torque specs, and keep everything surgically clean.
Connecting Hydraulics And Filling With Oil
Time to hook up the hydraulics. Since you were smart and labeled every line during disassembly, this part should be a breeze. Remove your protective caps and plugs one at a time, wiping down each fitting just before you make the connection. This methodical approach is your best defense against pumping dirt straight into your hydraulic system.
With the hoses connected, you can fill the gearbox itself. Don’t just grab any old gear oil. These JCB gearboxes are specific and require JCB HD90 Gear Oil or a quality equivalent that meets the API-GL-5 specification. A JS220, for example, will take about 5 liters. Pour it in slowly until the oil level reaches the bottom of the fill plug opening.
Once you have the right components, the rest of the job is just labor. Finding those precision-fit parts without the dealer runaround is the real challenge. Flat Earth Equipment offers the sensors, solenoids, and filters you need to bypass the dealer wait times. Check out their extensive inventory at https://www.flatearthequipment.com/.
The Final Shakedown Test
Before you hand the keys back, you need to run a full system test. This is more than just a quick check for leaks; it's about verifying that the JCB JS excavator slew motor gearbox oil leak repair was a complete success.
- Bleed the Hydraulic Circuit: Fire up the machine at a low idle. It's almost guaranteed that some air got into the slew motor circuit. Gently slew the house left and right, just a few feet each way, to work that trapped air back to the tank. You might hear some groaning at first—this is normal and should quiet down as the air purges.
- Smoothness and Sound Check: With the air bled out, run the house through its full range of motion several times. Listen like a hawk for any grinding, popping, or whining from the gearbox. The swing should feel smooth and consistent, with no jerking or hesitation.
- Slew Brake Engagement: On level ground, get the house swinging and then let go of the controls. The slew brake should engage smoothly and bring the turret to a firm, clean stop without any harsh clunking.
- Load Test and Final Leak Check: Now for the real test. Pick up a full bucket of dirt or rock to put the system under a proper working load. Slew back and forth several times. After that, shut the machine down and do one last, thorough inspection around the gearbox and motor. Look for any sign of weeping oil.
If everything is quiet, smooth, and dry, you can finally call the job done. You’ve not only fixed the leak—you’ve diagnosed the root cause and saved your customer a small fortune compared to a trip to the dealer's service bay.
Common Questions From The Field
Out here in the dirt, you hear the same questions over and over from guys wrestling with a JCB slew motor leak. They're tired of the runaround from the parts counter and the vague answers from the service writer. Here are the straight-up, no-fluff answers to what other techs are asking.
Can I Just Replace The Main Seal And Not The Bearing?
You can, but I guarantee you'll be tearing this thing apart again in a few months. That leak you see dripping on the tracks is a symptom, not the disease. The real killer is the failing output bearing.
Once that bearing gets even a hair of play in it, the main shaft starts to wobble. That wobble, even if it's microscopic, is enough to destroy the lip of a brand-new seal in short order. It's a classic rookie mistake to treat the symptom instead of the cause. Save yourself the headache, the downtime, and the cost of another set of gaskets. Do the bearing and the seal together.
Don't be a parts changer. Be a technician. The seal didn't fail on its own; the bearing murdered it. Solve the real problem, and you won't have to do the job twice.
What Kind Of Oil Does My JCB JS Slew Gearbox Need?
Don't just walk into the auto parts store and grab the first bottle of 90-weight you see. The JCB JS series planetary gearboxes are picky. You need a high-quality API GL-5 gear oil, specifically something like JCB HD90 or an equivalent that meets the MIL-L-2105 spec.
Using the wrong stuff will cause premature wear because it lacks the right extreme pressure (EP) additives needed to protect those gears under thousands of pounds of force. A JS220 takes around 5 liters, so make sure you have enough on hand before you start. We can get you the right spec oil along with your seals and bearings, no dealer required.
Why Is My Slew Motor Weak After The Repair?
If the slew is weak but you don't have any leaks, the problem is almost certainly on the hydraulic side, not in the gearbox you just rebuilt. There are a few common culprits to chase down.
- Trapped Air: This is the most likely issue. You need to bleed the air out of the hydraulic motor circuit by slowly swinging the house back and forth.
- Contamination: A tiny piece of grit or a shred from a shop rag that got into an open line during reassembly can jam up a relief valve or mess with the motor's internals.
- Crossed Lines: It happens. Double-check that you didn't accidentally swap the pressure lines. It's an easy mistake to make when you're tired and covered in grease.
If you've gone through these checks and are still stumped, it's time to reach out. The dealer will just tell you to haul it in and hook it up to their precious "Dealer Laptop" that locks you out. If you need some real-world advice from technicians who actually work on this iron, you can always get in touch with our support team for guidance.
When you're ready to bypass the dealer's parts counter and get the right seals, bearings, and filters delivered to your shop, Flat Earth Equipment has you covered. Get the precision-fit parts you need to complete your JCB JS Excavator slew motor gearbox oil leak repair right the first time by visiting https://flatearthequipment.com.