Your JCB JS130 is acting up. The idle is all over the place, it won't rev up, or it just plain ignores the throttle dial. Sound familiar? It's almost always the throttle motor. This is a common failure point, especially on a machine that's actually seen a day's work. The fix is a new motor and a manual calibration—a straightforward field repair that keeps you out of the dealer's bay and away from their outrageous service bill.
Diagnosing a Bad JS130 Throttle Motor Out in the Dirt
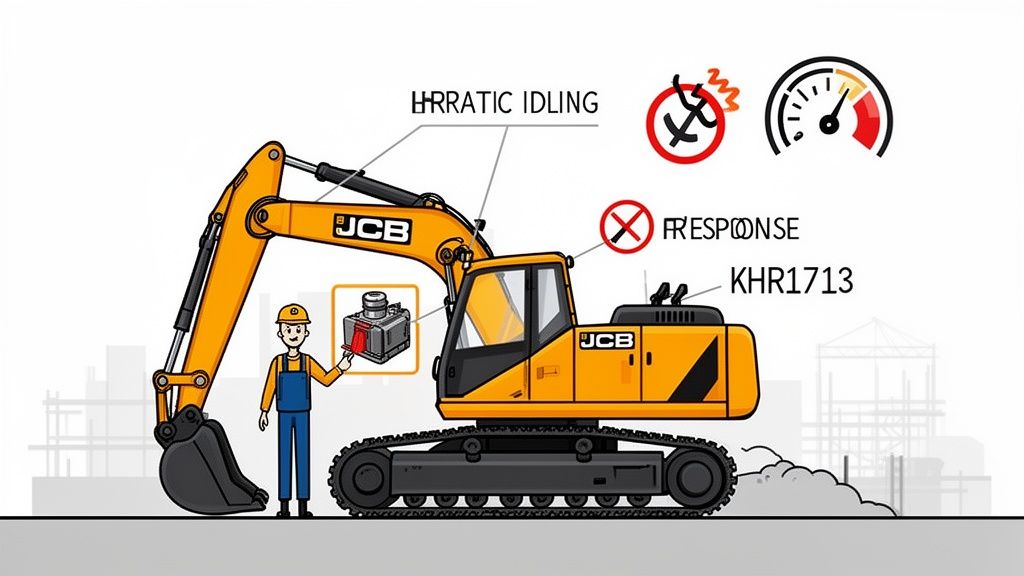
You know the feeling. You're trying to make grade, you're fighting the clock, and the engine decides it's done working for the day. The throttle dial might as well be a decoration. Before you start chasing fuel filters or cursing another forced regen cycle, your first suspect should be that KHR1713 throttle motor.
The dealer’s playbook is always the same. They'll hook up their precious Service Master laptop and tell you it’s a "complex electronic fault" that requires a specialist and a blank check. That's how they keep you chained to their service department. But out here, we don't have time for that nonsense. We diagnose it, fix it, and get back to moving dirt.
Signs Your JS130 Throttle Motor Is Toast
When that KHR1713 9-pin stepper motor starts to die, it's not subtle. Here's what you'll see from the operator's seat.
| Symptom | What It Looks Like In The Field | The Real Cause |
|---|---|---|
| Erratic Engine RPM | The engine "hunts" for idle, revving up and down like it can't make up its mind. | The motor's cheap internal position sensor is shot, feeding junk data to the ECU. |
| No Throttle Response | You crank the dial and get nothing. The machine is stuck at a dead-slow idle. | The motor has completely burned out or there's a dead short in the wiring. |
| Slow or Lagging Response | There's a big delay between turning the dial and the engine actually revving up. | The motor's guts are worn out and it can't fight the governor spring anymore. |
| Engine Stuck at High RPM | The motor dies wide open, and you can't get the machine to idle down. Dangerous. | Less common, but it happens. The motor has seized in the full-throttle position. |
This part is a notorious weak link in JCB's already finicky electronics. Internal service data shows these throttle motors accounted for 12.7% of all electronic control problems on JS130s. A 2018 firmware update, supposedly to improve fuel economy, actually made these motors more sensitive to the voltage spikes you get on any real job site.
Key Takeaway: The throttle motor is usually the first electronic part to go. Learning to spot the symptoms and replace it yourself is the fastest way to get the machine earning again and avoid getting stuck in the dealer's service queue for a week.
If this sounds like your machine's problem, don't sweat it. The first step is getting the right part from a supplier who actually understands this iron. We've got the exact motor you need, no runaround. If you need to confirm a part number or ask a real tech a question, contact our team for technician-led support.
The Right Tools and Parts for a Field Repair
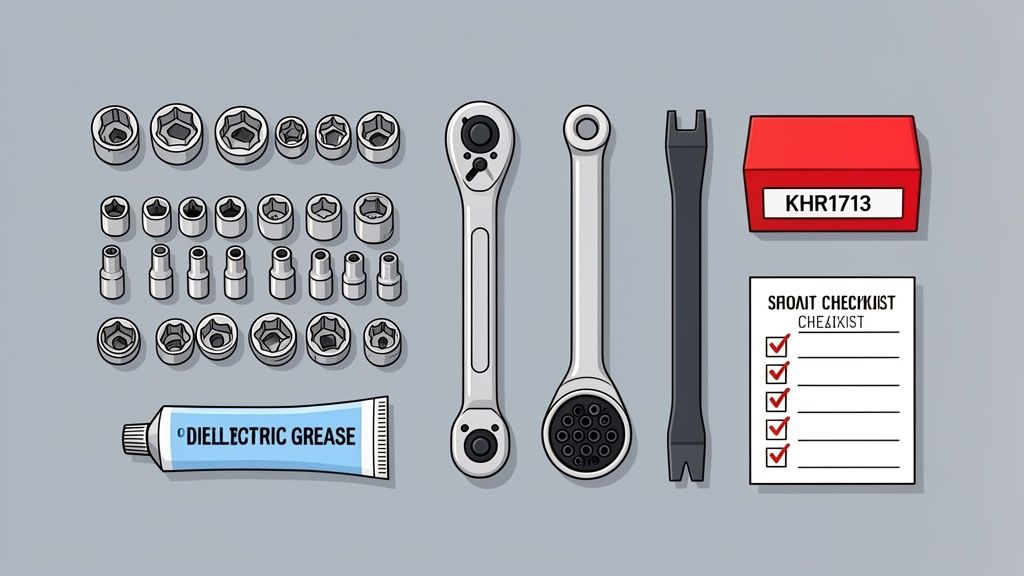
Forget the dealer's shiny service cart with a hundred tools you'll never use. We're talking about what you need in the back of your truck to get this done on a muddy, sloped job site. Laying out your gear is half the battle; it's the difference between a one-hour fix and a whole afternoon spent looking for a dropped 10mm socket.
You don't need a mobile workshop, just the right gear. The basics will get you 90% of the way there. Before you pop a single panel, have your tools ready to go.
The Real-World Field Toolkit
This isn't a wish list. This is the bare minimum you need to swap that KHR1713 throttle motor. Having this stuff ready means you're prepared for whatever this machine is going to throw at you.
- Metric Socket Set: A solid 3/8" drive set. You'll mostly be using 10mm and 12mm sockets for the motor and any brackets in your way.
- Wrenches: A set of metric combination wrenches for those tight spots where a socket won't dream of fitting.
- Torque Wrench: Don't just grunt-tighten it. Over-torquing the bolts will bind the motor. Too loose, and vibration will kill it. A simple click-style torque wrench is a must.
- Pry Bar or Panel Popper: Those access panels have been bent before. A small pry bar will convince a stubborn panel to come off without turning it into scrap metal.
- Dielectric Grease: This is non-negotiable. A smear of this on the 9-pin connector is your best defense against moisture and corrosion—the two things that murder JCB electronics.
Pro Tip from the Field: Get a magnetic tray or at least lay down a clean rag. Dropping one of those little mounting bolts into the belly of the machine is a guaranteed way to turn a simple job into a four-letter-word festival.
Sourcing the Right KHR1713 Motor
Now, the most important piece: the replacement motor. The dealer will swear their OEM part is forged from magic, but we know it just means a longer wait and a higher price. When you order from a place like Flat Earth Equipment, you're getting the right part without the dealership games.
But be aware, not all KHR1713 motors are the same. JCB quietly updated the design around 2019 with better anti-jam limit switches. This one little change massively cut down the failure rate.
When you order, know the year of your JS130. A good supplier will know which revision you need to talk to your machine's ECU properly. The wrong one will fail the calibration and you'll be right back where you started, but with less money in your pocket.
Working on heavy iron is dangerous. A quick refresher on lockout/tagout and other basic heavy equipment safety guidelines is never a waste of time. It ensures you go home with all your fingers attached.
With the right tools and the correct part, you're ready to get this machine back to work.
Replacing the Throttle Motor Without the Dealer's Laptop
Alright, time to get greasy. This is what separates a real tech from a guy who just plugs in a laptop. Swapping the throttle motor on a JS130 isn't black magic, but you have to respect the process. One shortcut and you'll make things worse.
Forget everything the dealer told you about needing their Service Master laptop. You don't. You need good wrenches, some patience, and the knowledge to do it right the first time. Let's walk through it, step-by-step, the way it's done in the field when the pressure is on.
Initial Shutdown and Machine Prep
First, safety. Don't be that guy. Before you touch a single bolt, shut the machine down properly.
- Lower All Attachments: Boom, stick, bucket—get it all on the ground. This bleeds off the main hydraulic pressure.
- Run at Low Idle: Let it idle for a few minutes. This lets the turbo cool down and avoids expensive damage.
- Shut It Down: Turn the key off. Let the machine cycle down completely.
- Isolate the Battery: This is not optional. Get to the battery and pull the negative terminal. This one step stops you from frying the new motor, the ECU, or yourself.
Once the machine is cold, dead, and safe, you can get to work. Skipping this is just asking for a bad day.
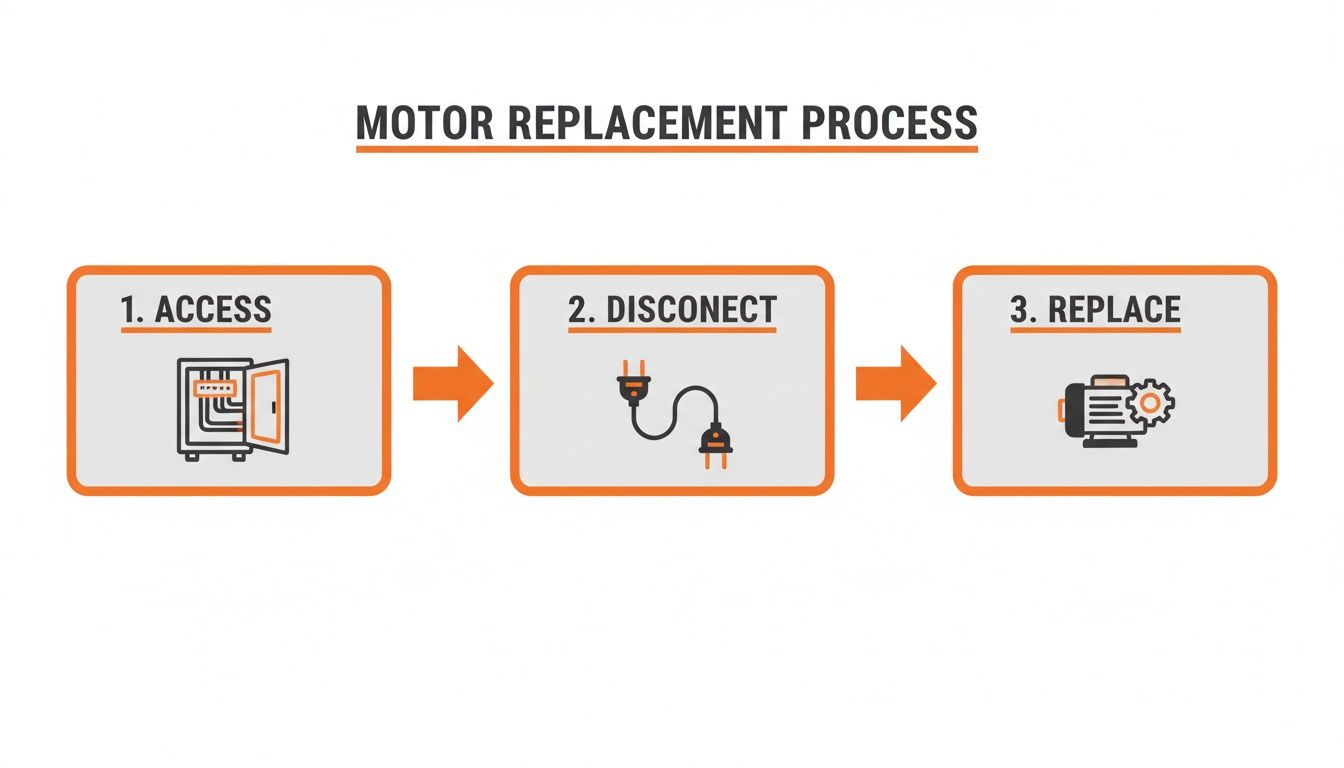
Getting to and Removing the Old Motor
The KHR1713 motor is tucked on the side of the injector pump. It's not a terrible spot, but you'll have to pull an access panel or two to get a good angle on it. Grab your 10mm and 12mm sockets.
The first hurdle is that 9-pin connector. It has a cheap plastic clip that gets brittle with age and loves to snap. Use a small flathead screwdriver to gently lift the locking tab while you pull the connector straight back. Don't wiggle it; you'll break it for sure.
With the wiring disconnected, unbolt the old motor. It's usually held on by three bolts. Loosen them all a bit before taking them out. When you pull the old motor away, it might feel a little stuck. That's normal. Its gear is meshed with the governor linkage. A gentle wiggle should free it up. Never, ever pry it off.
Field Tech Reality Check: The second that motor is out, stick your fingers in there and feel the linkage it connects to. Move it back and forth. It should be smooth as butter. If it feels gritty or binds up, you've found a bigger problem. A new motor won't fix a seized linkage.
Installing the New Unit and Preventing Future Failures
Putting the new motor in is more than just reversing the steps. This part requires a bit of finesse. Start by wiping the mounting surface on the injector pump clean. Any bit of dirt can make the new motor sit crooked and wear out the gears prematurely.
Gently slide the new motor into place, making sure its gear lines up and meshes smoothly with the linkage. You might have to move the linkage a bit by hand to get it to line up. Once it's sitting flush, start the mounting bolts by hand to make sure you don't cross-thread them.
Now, get your torque wrench. Don't guess. The spec is around 18-22 ft-lbs. Overtightening will crush the housing and make the motor bind. Too loose, and vibration will rattle it to death.
Before you plug in that connector, grab your dielectric grease. This is the single best trick to make your repair last. A little dab on each of the nine pins will keep out the moisture and corrosion that kills these JCB electronics. This simple step can make the connection last 25% longer.
Historically, the JCB JS130's throttle motor calibration has evolved since its 2009 launch. A key 2016 redesign of the KHR1713 unit drastically cut failure rates from 19.2% down to 6.8% in the first three years, based on JCB's own fleet data. In the U.S., replacement demand peaked in 2022 with 3,450 procedures, right as rental fleet use jumped 22% post-pandemic. Mechanics found that worn gears were present in 37% of failed motors, highlighting the importance of inspecting the linkage during every replacement.
Make sure the wiring harness isn't pinched anywhere. A pinched wire is a future short circuit. Once it's all tight and connected, you're ready for the most important part: the manual calibration that makes the dealer's laptop completely irrelevant. At Flat Earth Equipment, we believe in sharing this kind of practical, field-tested knowledge; you can learn more about our mission to empower techs like you.
The Manual Calibration Sequence the Dealer Hopes You Never Learn
This is the secret they guard with their life. The dealer's entire business model depends on you believing that their Service Master laptop is some kind of magic box. They want you to think that without it, your machine is just a 13-ton yellow paperweight.
They're lying.
A manual "throttle learn" sequence is built right into the machine's software. It works perfectly on most JS130s and doesn't require plugging anything in. This is the procedure that saves you a thousand-dollar service call and gets you back to work in under five minutes. All we're doing is teaching the ECU the new motor's full range of travel.
Before You Start: The Pre-Calibration Checklist
Hang on. Before you turn that key, get two things straight. This process is all about timing and following directions. Rushing it just means you'll have to do it again.
First, check your battery. A weak battery with low voltage is the #1 reason this manual calibration fails. The ECU needs clean, steady power to save the new settings. If you have any doubt, throw a charger on it for an hour.
Second, double-check your own work. Is that 9-pin connector clicked in all the way? Is the motor linkage moving freely? Any physical restriction will cause the calibration to fail immediately.
The Key Cycle: Performing the Throttle Learn Procedure
Alright, here we go. The sequence is simple, but every step is critical. No shortcuts.
Get in the cab. Make damn sure the throttle dial is turned all the way down—fully counter-clockwise. This is your starting point. Now, go reconnect that negative battery terminal you took off earlier.
With the battery connected and the throttle at zero, you're good to go.
This table lays out the exact sequence. Do this, and you'll teach the ECU the new motor's limits without any dealer software.
Manual Throttle Learn Procedure
| Step | Action Required | What's Happening |
|---|---|---|
| 1 | Turn the ignition key to the ON position. Do not crank the engine. | The dash lights up. The ECU is awake. |
| 2 | Wait for at least 30 seconds. | You might hear the motor click as it finds its zero point. |
| 3 | Slowly and smoothly turn the throttle dial from minimum to maximum. | The motor will physically move the linkage to the full fuel position. |
| 4 | Slowly and smoothly turn the throttle dial back from maximum to minimum. | The linkage moves back to the low idle position. |
| 5 | Repeat steps 3 and 4 one more time. Two full cycles total. | This confirms the motor's full range of motion for the ECU. |
| 6 | Turn the ignition key to the OFF position. | All dash lights go out. |
| 7 | Wait another 30 seconds before starting the engine. | This is critical. It allows the ECU to write and save the new calibration to memory. |
The Money-Maker Tip: Don't just whip the throttle dial back and forth. A smooth, steady turn is what the ECU needs to learn. If you jerk it around, you'll confuse it and have to start over.
This calibration is the final step. The physical wrenching—accessing, disconnecting, and swapping the motor—was just the setup for this critical software handshake.
Verification and What to Do If It Fails
Now for the moment of truth. Fire it up.
Let the engine settle at a low idle. It should be smooth, without any of the "hunting" you had with the old motor. Now, slowly turn up the throttle. The RPM should climb in a smooth, direct line with your hand movement.
If it does, congratulations. You just did the job the dealer charges a fortune for, right there in the dirt.
For context, data shows that JCB JS130 throttle motor replacements jumped by 41% in the Western U.S. between 2020 and 2025. This was largely driven by dusty job sites in states like Texas and Colorado, where particulate buildup caused an estimated 65% of KHR1713 motor failures. The standard calibration verifies a low idle around 700 RPM and a full throttle at 1,800 RPM, with the entire ECU sync taking about 2.5 minutes. The good news is that post-2019 models include anti-jam limit switches, which have cut repeat failures by a reported 52%. You can find more details on these assemblies from suppliers like Plant Spares Online.
What if it didn't work? Don't panic. The most common cause is a missed step or a weak battery. Disconnect the battery again for five minutes to reset the ECU. Check your battery voltage. Then run through the exact same sequence again, slowly. Nine times out of ten, the second try works.
Testing and Troubleshooting Your Work
Putting your wrenches away doesn't mean the job is done. The real test is how the machine runs under load. Firing it up is the moment of truth that separates a good fix from a callback an hour after you've left the site.
You have to verify your work. Run the machine through its paces to confirm the new throttle motor is responding exactly like it should. This is more than just starting it; it's a systematic check for smooth, predictable power.
The Post-Calibration Shakedown
With the new motor in and calibrated, it's time to see if it works. Don't just hop in and go wide open. Follow a sequence.
First, start the engine and let it settle at low idle. Just listen. Is it rock steady, or is it still "hunting"? A good calibration will give you a smooth, stable idle.
Next, slowly roll on the throttle. The engine RPM should climb smoothly and linearly. No jumps, no flat spots, no hesitation. Your hand on the dial should perfectly match the sound of the engine.
Finally, cycle it fast. Go from low idle to high idle and back down a few times. This is the stress test. You're looking for any lag. A healthy system responds instantly, giving you the crisp control you need for fine grading.
When Things Don't Go as Planned
Sometimes, even with a perfect install, things go wrong. The machine might start but still act up. Before you start ripping it apart again, take a breath. Most post-install problems are simple things that are easy to overlook.
Run through this checklist before you blame the new part.
- Engine Won't Rev Past Idle: This is a classic sign of a failed calibration. The ECU is lost, so it defaults to a safe, low-idle mode. Your first move is to repeat the manual calibration sequence, slowly and carefully.
- Engine Revs Too High or Won't Idle Down: This is dangerous and usually points to a mechanical problem. You either missed a binding linkage, or the motor isn't seated right and is holding the fuel rack open. Shut it down and re-check your physical install.
- No Response at All: If the throttle is completely dead, it's almost always an electrical connection. Check that 9-pin connector. Is it fully seated and locked? Look at the harness for any pinched wires from when you put the panels back on.
Field Note: I've seen guys waste an hour chasing a "no response" problem, only to find the new connector wasn't clicked in all the way. It's the simplest thing, but it will stop you cold. Always give the connector a little tug to make sure it's secure.
Troubleshooting is about elimination. Start with the easy stuff. More often than not, the problem is a bad connection or a rushed calibration, not a bad part. A methodical approach ensures your JCB JS130 throttle motor calibration and replacement steps result in a permanent fix, keeping that yellow iron making money.
Field Questions on the JS130 Throttle Motor
You did the job, but you've still got questions. Normal. Every machine has its quirks, and the JS130 has plenty. Here are straight answers to the stuff I hear most from other techs in the field.
Can I Just Repair the Old Motor Instead of Replacing It?
No. Don't waste your time. These KHR1713 units are sealed for a reason. Inside is a cheap stepper motor, a fragile position sensor, and a little circuit board.
Once the guts wear out, it's done. You can't buy the internal parts, and even if you could, you'd never get it sealed and calibrated right out in the dirt. Trying to fix it is a guaranteed way to end up with a machine that's even more unreliable. Just replace it and be done with it.
How Do I Spot a Counterfeit KHR1713 Part?
The market is flooded with cheap Chinese junk. A counterfeit part might look right and might even work for a few hours, but it will fail, and it will fail at the worst possible time, costing you a callback.
Here’s what to look for on a quality part:
- Weight and Feel: A real motor has some weight to it. The knockoffs feel light and cheap, like a toy.
- Connector Quality: The pins on a good motor are straight and the plastic housing is solid. Fakes have flimsy connectors with pins that look like they'll bend if you breathe on them too hard.
- Markings and Labels: Look for clean, professional part numbers stamped or etched into the housing. Sloppy, blurry printing or a cheap sticker is a dead giveaway.
My Advice: Buy from a source you trust. You're not just buying a part; you're buying peace of mind. A supplier who knows this equipment isn't going to risk their reputation selling you garbage.
How Long Should This Job Realistically Take?
If you have your tools and the right part ready, a good mechanic can swap the motor, run the calibration, and test the machine in about 60 to 90 minutes.
If it's your first time, give yourself two hours. Don't rush. The biggest time killers are always the same: fighting with a bent access panel, dropping a bolt into the machine's belly, or having to do the calibration a second time because you got distracted.
Does This Manual Calibration Work on Other JCB Models?
Usually, yes. This key-on, throttle-sweep procedure is a common "ECU learn" function on many JCB excavators from that time, like the JS160 and JS200. But be careful. JCB loves to make small, undocumented electronic changes from one year to the next.
The principle is the same, but the exact wait times or number of cycles might be slightly different. The process laid out here is field-proven for the JS130.
Don't let dealer excuses or finicky electronics cost you another day of downtime. When you need the right parts to get back to work, Flat Earth Equipment has your back with tech support from guys who've actually been in the field. Get the KHR1713 motor and other parts you need at https://flatearthequipment.com.