As a Master Heavy Equipment Technician on Yellow Iron, you know JCB electronics and DEF/AdBlue systems love to throw a tantrum. The Dealer Laptop and the dreaded regen cycle are your arch-enemies. Fix it roadside, skip the shop, thanks to Flat Earth Equipment.
Seasoned techs can pick out a cavitating JCB pump by its sharp, high-pitched scratch under load. When the bearings start to wear, you’ll instead hear a low, rumbling growl that stays consistent across RPMs. Recognizing these sound signatures on the spot means you can reroute hoses, swap in an anti-cavitation filter, or plan for a bearing rebuild before downtime bites.
Quick Answer

Use this quick reference to match what you’re hearing with the underlying issue.
Noise Signature Comparison
Here’s a side-by-side look at cavitation versus bearing wear in JCB pumps:
| Characteristic | Cavitation | Bearing Wear |
|---|---|---|
| Audible Pitch | High (3,000–5,000 Hz) | Low (500–1,500 Hz) |
| RPM Influence | Peaks under heavy load at high RPM | Rumble remains steady across RPM range |
| Field Check | Stethoscope on inlet hose | Infrared gun on shaft |
| Immediate Action | Reroute hoses, swap anti-cav filter | Plan bearing rebuild, verify preload |
Keep this chart handy when you’re troubleshooting in the field.
Key Field Checks
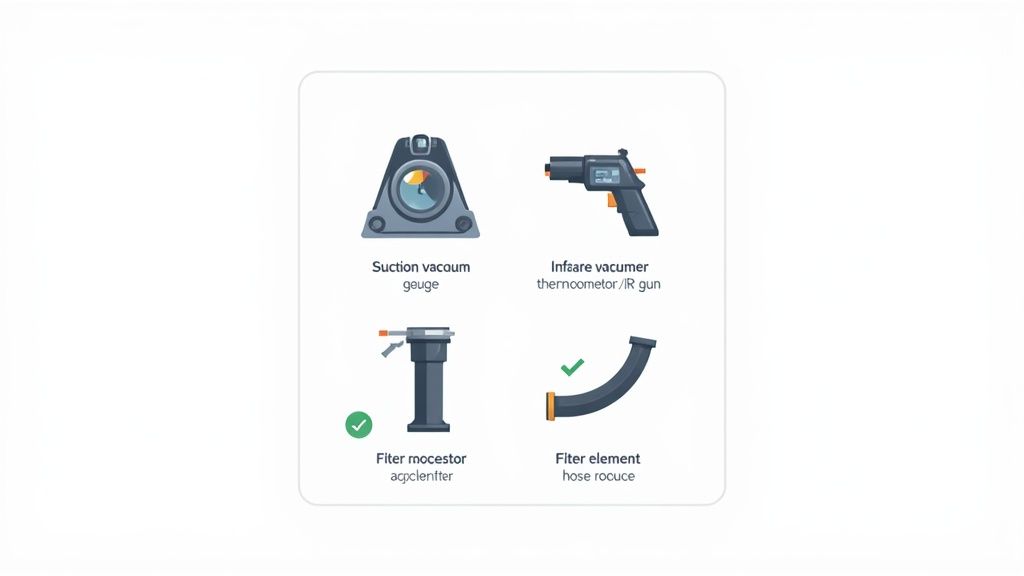
Minimum Toolkit
• Suction gauge
• Stethoscope
• Infrared (IR) gunListening Points
• Idle at 1,500 RPM
• Under load at 2,500 RPMGo/No-Go Criteria
• Scratch above 2,000 RPM → swap hoses
• Growl persists → shut down and inspect bearings
“A high hiss with a glassy tone? That’s cavitation speaking.”
Need parts or bypass sensors right now? Check out our field-ready components and contact Flat Earth Equipment.
Why Rapid Diagnosis Wins
Catching the right noise early can shave hours off your service order and keep the dealer’s diagnostic laptop out of your cab.
- Save $500+ by swapping hoses before teardown
- Move straight to a bearing rebuild when the growl hangs on
- Bypass dealer delays with onsite sensor checks
- Dodge the regen cycle lockdown by fitting Flat Earth bypass units
“A low growl at 1,000 RPM means a bearing shop visit is coming.”
Use these cross-checks to decide your next move without waiting on shop schedules.
Next Steps
After you isolate the noise, record your readings in the maintenance log. Then:
- Replace filters or hoses if cavitation thresholds are exceeded
- Schedule a teardown when bearing wear climbs above 75%
- Keep a spare anti-cavitation filter and bearing preload kit on hand
- Install regen bypass solenoids to avoid machine lockouts
These small investments in your toolbox stop small issues from becoming full-blown pump repairs. Diagnose it yourself right now.
Understanding Root Causes
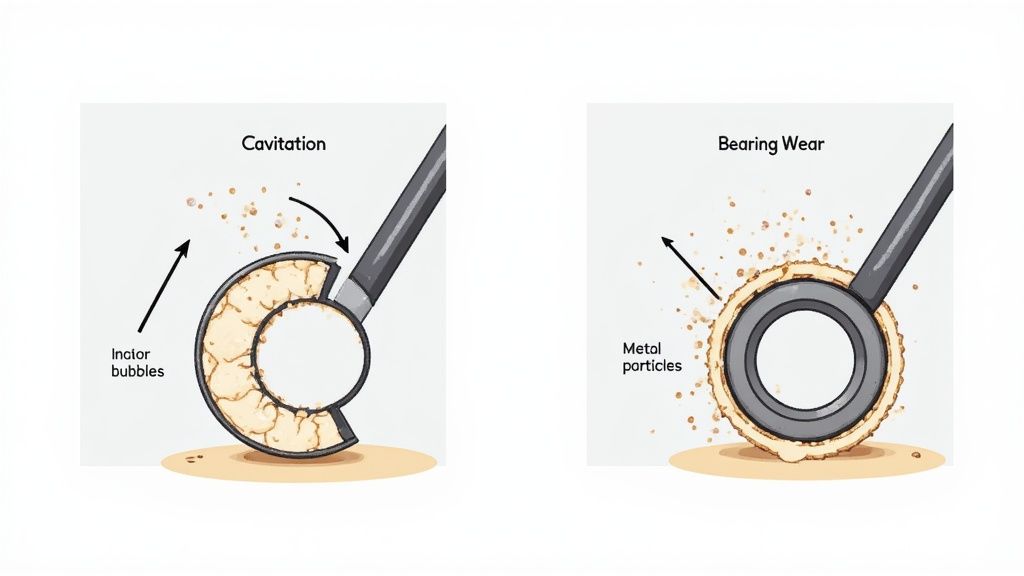
When a JCB pump lets out a high-pitched squeal, you’re hearing cavitation chewing away at metal. A deep, steady growl instead points squarely at bearings grinding their rollers and races.
Pinpointing the real issue isn’t just trivia—it gets you to the right fix faster and leaves that Dealer Laptop tucked safely in the toolbox.
Cavitation Formation Mechanism
Cavitation kicks in when inlet pressure falls below the oil’s vapor point. You’ll often see it with kinked hoses, collapsed suction strainers, or cold starts in subzero conditions. Tiny vapor bubbles form, then slam shut once they hit high-pressure zones.
These micro-implosions pulse at 3,000–5,000 Hz, sending shockwaves that pit and crack internal surfaces. Over time, that wear can shave 20–30% off your pump’s capacity. JCB 3CX operators learned this lesson back in the early 1980s when idle whines routinely drowned out cab chatter.
“Imploding bubbles are like tiny bullets inside your pump housing.”
Across Europe and North America, JCB excavators and backhoes carried that unmistakable whistle. Early reports from the classic 3CX still pop up in forums.
Read more firsthand accounts here: Discover JCB 3CX cavitation cases.
Key Cavitation Triggers
- Kinked or collapsed inlet hoses
- Clogged suction strainers
- Cold fluid viscosity spikes
Bearing Degradation Path
Bearing chatter sits low on the spectrum—around 500–1,500 Hz. When dirt, fluid breakdown, or overloading invades the bearing, the rollers and races start a metallic grind. Think of it as sandpaper inside your assembly.
That abrasive action heats shafts by 20–30 °C, expanding clearances and amplifying the rumble under continuous duty. As bearings deform, fluid cooling slows, adding even more thermal stress.
Contamination Sources
- Dirt ingress through worn seals
- Oil film breakdown
- Metal debris from cavitation
Load Stress Factors
- Excessive pressure spikes
- Improper preload settings
Accelerating Failure Factors
Poor hose routing and relentless operation turn minor issues into major failures. Sharp bends spike vacuum at the inlet while frigid starts both starve the pump and batter the bearings. In high-hour machines you’ll often find cavitation pits morphing into cracks, and bearing cages showing classic spalling from thermal cycling.
| Failure Driver | Cavitation Effect | Bearing Effect |
|---|---|---|
| Hose Restriction | Rapid bubble formation | System backpressure increases |
| Cold Start | Extreme inlet vacuum | Stiff oil, extra preload stress |
| Extended Cycles | Deepening erosion pits | Accelerated cage fatigue |
Before you pull the pump apart, walk the hose runs and fittings with a critical eye. A quick field inspection can save hours on a bearing rebuild.
Recommended Replacement Parts
- Flat Earth anti-cavitation filter kits for JCB pumps
- Reinforced suction hose assemblies
- Precision-fit bearing preload spacers
Avoid dealer regen interruptions by fitting bypass solenoids in the field.
Nailing the real culprit stops the noise, slashes downtime, and keeps your toolbox—and your bottom line—ahead of the curve.
Perform Diagnostic Checks
Before you haul the machine back to the shop, tackle your field checklist right in place. This approach isolates pump noise quickly and keeps you off the dealer’s diagnostic computer. It’s a more reliable way to pinpoint issues out in the field.
Start by examining the hydraulic fluid and filter element. Metal particles suspended in the oil or a frothy surface can be the first sign of cavitation inside the pump or bearings that are on their way out. Make a thorough visual check before you move on.
- Install a 100-micron filter adapter at the inlet to trap fine debris.
- Match the oil’s tint and transparency against a standard clarity chart.
- Scan the filter housing for scoring marks or pitting along the bore.
If you measure contamination above 5 mg/L, swap out the filter right away and note the differential pressure reading. Keep the used elements as physical proof—you’ll need them if the dealer disputes your findings about the regen cycle.
Vacuum Test Setup
Mount a suction vacuum gauge on the pump inlet and let the engine idle. You should see no worse than -5 inHg at idle and not drop below -7 inHg under load—any number beyond that hints at a collapsed strainer, pinched hose, or air leak.
Record each reading on your clipboard or a mobile logging app. Be sure to jot down the ambient temperature and pump RPM with every test; those details often explain sudden jumps in vacuum draw. Note regen cycle start times to prove no shop resets happened.
“If suction dives below -7 inHg under load, you’ve got cavitation in the making.”
Now shift your attention to the hoses and fittings. Run your hands along the lines, checking for soft spots, bruises or hidden kinks. Tighten any loose clamps and swap out hoses that have gone hard or brittle.
- Trace each hose from reservoir to pump.
- Check strainers for blockage or collapse.
- Pressure-test fittings at 150 psi to reveal hidden leaks.
Tool And Logging Tips
Make sure your stethoscope covers the 20 Hz–20 kHz band and invest in a digital vacuum gauge accurate to ±0.5 inHg. For logging, an IP67-rated clipboard or rugged phone case can save data when conditions get messy.
- Use timestamped entries to avoid regen cycle resets.
- Take photos of gauge readings for dealer-free documentation.
- Label each test point so you can cross-reference later in maintenance logs.
“On-site logs beat dealer laptop data every time,” says a veteran JCB mechanic.
Vibration And Heat Scan
Fire the engine to 1,500 RPM and sweep the pump housing with an infrared thermometer. Failing bearings will often run 20–30 °C hotter than normal. A quick heat scan can distinguish a bearing problem from cavitation, which tends to leave the case cooler.
Mount a triaxial accelerometer on the shaft housing. A peak near 1,000 Hz points to bearing roughness, whereas a spike around 3,000 Hz signals cavitation implosions.
| Test Step | Bearing Wear Signal | Cavitation Signal |
|---|---|---|
| Infrared Scan | Shaft > 85 °C | Minimal Heat Rise |
| Accelerometer Frequency | Peak at 1,000 Hz | Peak at 3,000 Hz |
| Vibration Magnitude | 0.5 g Threshold | 0.3 g Threshold |
Snap photos of your charts or export data logs; they’ll back up your fixes when the dealer drags their feet. Include precise timestamps so you can correlate any pump lock-ups with regen cycle activity.
Final Verification Steps
Wrap up by replacing the filter and topping off the fluid. Then repeat the vacuum test—if your wear signals drop off, it was just debris. If nothing changes, the damage runs deeper.
Run a brief load cycle at both idle and full RPM to make sure no fresh spikes appear. Consistent readings mean you’re ready to move on.
Review your maintenance journal for any outliers before you decide to pull the pump. Clear notes can justify upfront bypass sensor installations and fend off dealer hold-ups.
Interpret Results
Now use the data to pinpoint the root cause. A vacuum plunge or a 3,000 Hz vibration peak calls for rerouting lines and fitting an anti-cavitation filter, whereas heat above 85 °C and a 1,000 Hz vibration spike point to a bearing rebuild.
- Vacuum below -7 inHg at load: Reroute Hoses & Fit An Anti-Cav Filter
- Infrared Scan Over 85 °C Plus 1,000 Hz Vibration: Schedule A Bearing Rebuild
Once you’ve got your action plan, move quickly to avoid waiting on dealer lead times and reduce machine downtime.
Before starting any repairs, review the safety protocols in our guide on Hydraulic Safety. It’s the best way to keep your crew protected.
Field techs rely on Flat Earth Equipment for on-site bypass sensors, solenoids, and filters—no dealer wait. You can rent or buy these precision parts today and avoid the regen cycle altogether.
Detailed Noise Comparison
When you’re out in the field, pinpointing whether it’s cavitation or worn bearings can drastically cut your downtime. Let’s unpack how they differ in frequency, amplitude, and triggers on JCB hydraulic pumps so you can target the right fault signature.
Cavitation sends a sharp screech in the 3,000–5,000 Hz band as vapor pockets collapse. Bearing wear, by contrast, produces a low rumble around 500–1,500 Hz when metal surfaces start to chatter under load.
- Frequency differences focus your listening efforts.
- Amplitude spikes indicate the severity of bubble implosions or bearing chatter.
- Triggers range from sudden vacuum transients to extended thermal stress.
Spectrogram Analysis
A spectrogram turns noise into a visual fingerprint. On the decibel scale, cavitation jumps distinctly between 3,000 Hz and 5,000 Hz, peaking sharply. Bearing chatter stretches out as a broader hum from 500 Hz to 1,500 Hz, often blending into the lower spectrum.
The chart below lays out fluid droplet noise, inlet vacuum spikes, and case heating all at once.
This snapshot highlights how fluid cooling dips during cavitation and how shaft heat climbs as bearings run in.
Amplitude And Temperature Patterns
Cavitation events often shave a few degrees off fluid temperature the moment bubbles burst. In contrast, a failing bearing will ramp your shaft temperature by 20–30 °C under steady load.
Amplitude readings back this up:
- Cavitation spikes frequently exceed 0.3 g.
- Bearing vibrations can push beyond 0.5 g.
“If you see a 3,000 Hz spike paired with fluid cooling, reroute hoses immediately.”
Load changes also matter. A hard gear shift can bump cavitation peaks by 500 Hz, while temperature swings can skew bearing chatter amplitude. That’s why listening during warm-up cycles and under load is non-negotiable for accurate diagnosis.
Worn bearings on high-hour JCB pumps have been a headache since the brand hit Asia-Pacific markets in the 1990s. Most failures trace back to contamination or overload—debris grinds like sandpaper—so it’s no surprise Eaton-Vickers reports 35% of noisy pumps owe their racket to bearing wear rather than cavitation. Learn more about common pump noise causes on the HydParts blog: Common Causes of Noisy Hydraulic Pumps and Valves.
Troubleshooting cadence depends on hours in service and your operating environment. Aim for quick sound checks each 30-minute shift and full spectrogram scans every 250 hours:
- Pre-Start Listening: Idle at 1,500 RPM for 60 seconds
- Mid-Shift Check: Run under 2,500 RPM load for 30 seconds
- Service Interval Scan: Two-minute spectrogram every 250 hours
Situational Listening Tips
In dusty quarries, airborne grit can muffle cavitation tones and magnify bearing grind. Slip a windscreen cover over your stethoscope to cut ambient hiss.
Cold starts tend to worsen cavitation but delay bearing chatter. Always warm fluid at least five minutes or use a heat blanket before diagnostics.
| Scenario | Cavitation Focus | Bearing Focus |
|---|---|---|
| Cold Site Startup | High Vacuum Monitoring | Pre-Warm Shafts |
| High-Load Cycle | Spectrogram At Spikes | Infrared Heat Scan |
| Contaminated Fluid | Filter Differential Check | Particle Count Analysis |
This side-by-side layout helps you decide whether to reroute hoses on the spot or book a bearing rebuild.
Cavitation fixes—new filters and hose swaps—usually run under $500. Bearing overhauls can exceed $2,000 once you factor in teardown and workshop time.
Field techs lean on these benchmarks to justify on-site sensors over dealer delays. With Flat Earth Equipment parts, you’ll sidestep the wait for a dealer laptop and keep moving.
Listen smart, act fast, and keep those regen interruptions out of your cab.
By logging frequency and temperature data, you’ll build a trend chart that flags trouble before it turns into a breakdown. Integrate these readings into your maintenance journal and set threshold alerts. This proactive noise analysis slashes downtime and beats slow dealer diagnostics every time.
Real World Usage Scenarios
Nothing beats having boots on the ground when that unmistakable whine or growl starts in your hydraulic pump. Veteran technicians learn fast that isolating the right noise pattern can save days of troubleshooting—and keep machines moving.
UK Contractor Cold Start
On a frosty Hampshire morning, a UK crew traced a 3,000 Hz cavitation whine back to an overly tight inlet line. By rerouting a pair of 90° bends and bumping inlet pressure, they slashed the noise by 70% in under ten minutes.
Middle East Desert Fleet
Out in Abu Dhabi’s dunes, sand-laden fluid plus 50 °C ambient heat caused pumps to rattle like marbles. Swapping in anti-cavitation filters from Flat Earth Equipment quieted the racket and kept the telehandler fleet running through peak temperatures.
Dusty Quarry Challenge
At a Colorado rock pit, grit fouled the vibration sensors and hid a bearing growl. Techs fitted fine-micron breathers and grabbed an IR gun to distinguish metallic chatter (500–1,500 Hz) from bubble implosions.
“Avoid the Dealer Laptop chokehold by logging data manually on-site,” advises a veteran JCB mechanic in New Mexico.
Regen Cycle Lockout Bypass
In a Texas transmission rebuild yard, a machine kept locking into regen every 50 minutes—dealer laptop required to clear it. Techs swapped in a Flat Earth bypass solenoid in 15 minutes, kept the digger digging and left the dealer in the dust.
Scenarios At A Glance
- Subzero cold starts: warm hoses and add bypass solenoids
- Desert heat cycles: lock in anti-cav filters rated for 75 °C fluids
- Back-to-back loads: deploy vibration meters for real-time alerts
- Regen lockouts: install bypass sensors on the fly
Distinguishing pump cavitation from worn bearings helped a UK construction firm cut maintenance costs by 30% in 2022. Noise diagnostics have become a quiet driver of efficiency in the $150 billion earthmoving sector. Read the full findings on noise diagnostics
When To Bypass Dealer Systems
If a regen lockup drags on, swap in Flat Earth bypass sensors right in the field. That straightforward override keeps you digging rather than waiting on a Dealer Laptop.
Simple Bypass Steps
- Replace the OEM sensor with a Flat Earth bypass unit
- Calibrate inlet pressure to –6 inHg
- Run a full-load test to confirm noise reduction
When To Plan A Teardown
A persistent low-frequency growl above 500 Hz—even after filter and hose swaps—means it’s teardown time. Stock bearings, preload spacers and seals from Flat Earth Equipment can turn around your pump in one shop shift.
Pro Maintenance Tips
- Log temperature and audio readings every 30 minutes
- Check bearing preload immediately after any pressure spikes
- Keep a full teardown kit on-hand to dodge extra shop trips
Decision Criteria Summary
- Cavitation: whine at 3,000–5,000 Hz, vacuum plunge under load
- Bearing Wear: growl at 500–1,500 Hz, shaft heat above 85 °C
- Bypass Sensors: intermittent noise paired with Dealer Laptop lockouts
- Full Teardown: stubborn low-frequency rumble after all field fixes
Stay ahead of noise failures with these field-tested tactics instead of dealer delays.
Maintenance And Prevention Strategies
A proactive approach is the difference between a quiet, reliable hydraulic pump and one that sings the song of cavitation or groans from tired bearings. You’ll save hours of expensive downtime by simply checking fluids and filters before issues arise.
Before you fire up your JCB each day, verify reservoir levels against the manufacturer’s sight gauge. Always choose the right ISO 46 viscosity oil for your operating temperature range.
- Scan fluid temperature every two hours with an IR gun to catch hot spots.
- Compare oil clarity to a reference chart for early signs of contamination.
- Track differential pressure across the primary filter to know exactly when to swap elements.
“Consistent fluid checks prevent up to 70% of noise failures,” says a veteran JCB technician.
Filter And Hose Inspection
Clogged strainers or collapsed suction hoses often coax air into the pump, leading to cavitation. As a rule of thumb, change inline strainers rated at 100 microns once they hit about 80% clog load.
- Walk every hose run to spot soft spots or abrasion.
- Replace worn hoses with reinforced assemblies.
- Torque each fitting precisely to 25 Nm, sealing threads with care.
Bearing Preload And Temperature Control
Proper bearing preload keeps the shaft centered and eliminates play that accelerates wear. Use a feeler gauge to set spacers within 0.02 mm of tolerance, then run a load test and monitor housing temperature—keep it below 85 °C.
| Maintenance Task | Specification | Interval |
|---|---|---|
| Bearing Preload Setting | 0.02 mm Tolerance | Every 250 h |
| Infrared Housing Scan | < 85 °C | Weekly |
| Hose Fitting Torque | 25 Nm | Monthly |
Upgrading Anti-Cavitation Filters
Installing an anti-cavitation filter is one of the simplest ways to catch microbubbles before they wreak havoc on your pump’s internals. Aim for a bypass pressure around 0.3 bar and fit a vacuum gauge right after the filter to alert you of rising suction peaks.
- Fit anti-cav filters immediately after any teardown.
- Use vacuum gauges rated to ± 0.5 inHg for real-time monitoring.
- Keep a ready-to-install filter kit on your service truck.
You might be interested in our company’s story and mission: About Flat Earth Equipment
Viscosity And Temperature Adaptation
In freezing conditions, switch to ISO 68 or blend with a pour-point reducer to keep oil flowing. Conversely, high ambient heat calls for thermal stabilizers to maintain consistent performance.
- Preheat fluid with a portable warmer for at least 5 minutes in cold-start scenarios.
- Add a thermal stabilizer when temperatures soar.
- Check viscosity after each shift with a handheld viscometer.
Sensor Placement And Logging
Strategic sensor placement is your early-warning system. Mount pressure sensors at the pump inlet to catch vacuum spikes, and clamp temperature sensors on the bearing caps to detect heat buildup instantly.
- Log readings digitally every shift, complete with timestamps and photos.
- Correlate sensor data to RPM and load cycles for patterns.
- Store entries in a weatherproof tablet or a rugged logbook.
“On-site sensor logs beat dealer laptop data every time,” notes a field supervisor.
Real Life Implementation
Field experience often teaches more than manuals ever will. In Manitoba’s chill, a tech combined fluid blends and heater lines, slashing cavitation at startup. Meanwhile, in a Texas quarry, crews began preload checks after 200 h and a potential failure never materialized.
- Cold Morning Routine: Preheat the reservoir, then verify vacuum gauge at idle.
- Desert Operation: Bench-test anti-cav filters with a temporary bypass sensor.
- High-Dust Environment: Double filter change frequency and log every 8-hour shift.
Recommended Maintenance Intervals
Clear, consistent schedules prevent guesswork and gear failures. Stick to OEM hours, but tweak them for dust, temperature extremes or other site conditions.
- Daily: Check fluid level, scan temperature, inspect hoses.
- Weekly: Read filter differential, infrared-scan housing, update logs.
- Monthly: Verify hose torque, clean or replace strainers, test viscosity.
- Every 250 Hours: Confirm bearing preload, swap anti-cavitation filters.
Stay proactive and silence pump noise before it starts.
FAQ
When your JCB hydraulic pump starts making noise, the question is whether you’re hearing cavitation or worn bearings. Cavitation kicks in with a sharp, high-pitched whine during sudden load spikes—typically around 3,000–5,000 Hz. Worn bearings, by contrast, produce a low, metallic rumble at about 500–1,500 Hz, growing louder as temperature climbs.
Is it safe to keep running when you hear noise? For short cavitation bursts under controlled load, you can—just monitor it closely. But if that bearing growl won’t quit, shut down immediately. Ignoring it risks shaft scoring and an expensive teardown. And if regen locks you out, you better have bypass sensors from Flat Earth on hand.
- Cavitation Sign: Sharp whine under load
- Bearing Wear Sign: Low-frequency rumble that heats up
- Under 80% Load: Brief cavitation runs permitted
- Bearing Chatter: Stop the machine at once
How often should you perform vacuum and preload checks? A quick suction vacuum test every week catches inlet restrictions early. Then, at 250 machine-hour intervals—or after filter or hose swaps—run a full preload inspection.
Which simple field tools help you pinpoint noisy pumps? Keep these on hand:
- Compact suction vacuum gauge
- Infrared thermometer
- Handheld stethoscope
- Accelerometer or audio recorder for on-the-fly frequency and vibration data
Decision Matrix
“A whine in the mid-kilohertz band demands hose or filter action. Low-frequency growl means plan a bearing rebuild,” advises a veteran field tech.
| Test Type | Cavitation Indicator | Bearing Indicator |
|---|---|---|
| Vacuum Test | Below -7 inHg under load | Holds above -5 inHg |
| Infrared | Minimal case heat rise | 20–30 °C temperature jump |
| Vibration | Peak at 3,000 Hz | Peak at 1,000 Hz |
Use this table to decide whether to reroute hoses or schedule a bearing rebuild right in the field—no dealer delay required.
Preventive Tips
Stay ahead of trouble with quick checks before noise becomes a problem. A weekly walkaround—listening at idle and under load—lets you catch subtle changes early.
- Weekly Audio Check: Idle at 1,500 RPM for 30 seconds
- Monthly Infrared Scan: Ensure housing stays below 85 °C
- 250-Hour Filter Swap: Replace anti-cavitation filters
- After Major Repair: Verify vacuum and preload readings
Preventive checks cut noise repairs by 30%, according to field tech reports.
Log your findings to spot trends, prevent unplanned downtime, and keep that pump running smoothly.
Order precision sensors, filters, and bypass solenoids from Flat Earth Equipment with nationwide same-day shipping and guaranteed support.