Before you even think about grabbing a wrench for your Genie lift battery replacement, you need to make the single most important decision: picking the right power source. It's a choice that usually boils down to three main contenders: the old-school Flooded Lead Acid (FLA), the hassle-free AGM, or the modern Lithium-Ion battery. Getting this right is crucial for keeping your lift running reliably and efficiently.
Choosing the Right Battery for Your Genie Lift
Picking a battery for your Genie lift isn't just about finding one that fits in the tray. It's about matching the power source to your real-world job demands, your budget, and how much time you have for maintenance. The battery is the heart of your electric lift, and the right choice prevents expensive downtime and helps the machine live a long, productive life. Get it wrong, and you're looking at poor performance, frequent replacements, and costs you didn't plan for.
Decoding Battery Specifications
When you start comparing batteries, you'll run into a few technical terms. Don't let them intimidate you. Understanding what they mean in the real world will help you make a smart decision.
Voltage (V): This is non-negotiable. It has to match your Genie's system, which is typically 24V or 48V. Using the wrong voltage is a fast track to frying your lift's expensive electrical components.
Amp-Hours (Ah): Think of this as the size of the battery's fuel tank. A higher Ah rating means more runtime between charges. That translates to longer, uninterrupted work shifts for your crew.
Deep-Cycle Design: Your lift needs a workhorse, not a sprinter. Unlike a car battery that delivers a quick, powerful jolt to start an engine, deep-cycle batteries are built to provide steady, reliable power over many hours and handle being drained and recharged hundreds of times.
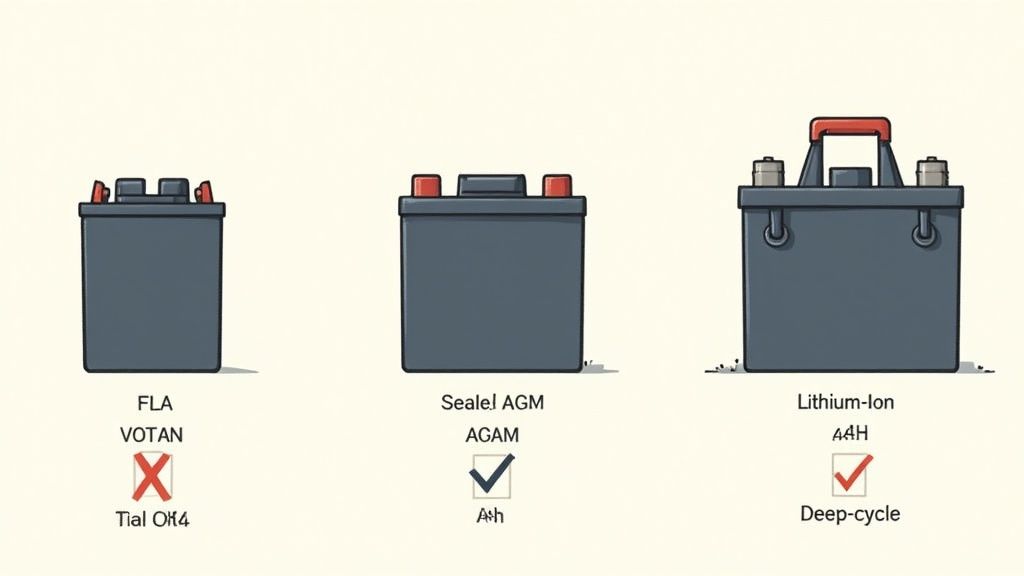
The Main Contenders: Battery Types
Your choice will almost certainly be one of these three. Each has clear pros and cons you need to weigh.
Flooded Lead Acid (FLA) Batteries
These are the traditional, budget-friendly workhorses of the industry. They’re reliable and have been the standard for decades for a good reason. But that low upfront cost comes with a catch: they demand regular maintenance. You'll need to check and top off the water levels with distilled water to avoid permanent damage. They also release gasses during charging, so they must be charged in a well-ventilated space.
Absorbent Glass Mat (AGM) Batteries
AGM batteries are a huge step up from FLA. They're a type of sealed lead-acid battery, which means they are completely spill-proof and maintenance-free. No more watering. This makes them a fantastic choice for fleets where keeping up with maintenance schedules can be a challenge. They also tend to last longer and handle vibrations better than their flooded cousins, though you'll pay a bit more for them initially.
Key Takeaway: For many operators, AGM batteries hit the sweet spot. They give you a maintenance-free experience without the major price jump to lithium-ion, balancing cost, convenience, and performance perfectly.
Lithium-Ion (Li-ion) Batteries
Here we have the latest and greatest in battery technology. Lithium-ion batteries simply perform better in every category. They're lighter, they charge significantly faster, and they last much, much longer—often two to three times longer than lead-acid options. Over the life of the battery, that longevity and efficiency can actually lead to a lower total cost of ownership.
The industry is clearly heading in this direction. Take Genie’s E-Drive lithium-ion batteries, for example—they can slash maintenance costs by an additional 11% compared to traditional FLA batteries. This isn't just a niche trend; it's a market-wide shift. Today, lithium-ion batteries power roughly 70% of new electric articulated boom lifts, while lead-acid's share has fallen to about 25%. The reasons are simple: longer life, faster charging, and lower weight make lifts more efficient on the job site. You can discover more insights about these market shifts and see what it means for the future of aerial lifts.
To make the choice clearer, here’s a simple breakdown of how these technologies stack up against each other.
Genie Lift Battery Technology Comparison
| Feature | Flooded Lead Acid (FLA) | AGM (Absorbent Glass Mat) | Lithium-Ion |
|---|---|---|---|
| Upfront Cost | Low | Medium | High |
| Maintenance | High (Requires regular watering) | None (Sealed design) | None |
| Lifespan (Cycles) | Good (500-1000 cycles) | Better (700-1300 cycles) | Best (2000-5000+ cycles) |
| Charging Speed | Slow | Moderate | Very Fast |
| Performance | Steady decline as discharged | Consistent power delivery | Consistent power until fully discharged |
| Safety | Gassing during charge; risk of acid spills | Spill-proof and sealed | Integrated battery management system (BMS) for safety |
Ultimately, the best battery for your Genie depends on how you use it. If upfront cost is your only concern and you have a solid maintenance routine, FLA is viable. For a hassle-free, reliable option that balances cost and performance, AGM is often the smartest move. And if you’re focused on long-term value, maximum uptime, and top-tier performance, lithium-ion is the clear winner.
Lock It Down: Safety and Tool Prep Before You Start
Before you even think about putting a wrench on a terminal, let's talk about what really matters: setting up a safe workspace. This is the single most important part of the job. Those heavy-duty batteries, especially the classic lead-acid ones, are no joke. They’re filled with corrosive sulfuric acid and can vent explosive hydrogen gas.
Cutting corners here isn’t an option. One slip-up could lead to nasty chemical burns, a serious electrical shock, or worse. A methodical, safety-first approach is about protecting yourself, your crew, and the lift from a very bad day.
First thing's first, completely immobilize the lift. Get it parked on solid, level ground, well away from any open flames, grinders throwing sparks, or welding operations. Turn the key off, pull it out, and stick it in your pocket. Hit the big red emergency stop button, chock the wheels, and put up some warning signs so nobody tries to fire it up while you’re working.
Gearing Up: Your PPE Checklist
Personal Protective Equipment (PPE) isn't a suggestion; it's a requirement. Each piece has a critical job to do.
- Safety Goggles or a Full Face Shield: This is your best defense against an acid splash, which can cause permanent eye damage in a split second. Splash-proof goggles are way better than standard safety glasses for this task.
- Acid-Resistant Gloves: Your regular work gloves won't cut it. You need insulated, heavy-duty rubber or neoprene gloves to shield your hands from both the acid and any accidental electrical shorts.
- Steel-Toed Boots: A single one of these batteries can weigh over 60 pounds. Dropping one is a very real hazard to your feet.
- Long-Sleeved Shirt or Apron: A simple layer to keep accidental drips and splashes off your skin.
This is the absolute minimum gear you should have on. For a deeper dive into job site safety, check out the guides and resources in Flat Earth Equipment's dedicated safety section.
Assembling the Right Toolkit
Having all your tools laid out and ready to go stops you from trying to improvise with the wrong tool for the job—which is how accidents happen. A proper toolkit for a Genie battery swap is more than just a socket set.
- Insulated Wrenches and Sockets: This is a big one. Using tools with insulated handles drastically lowers the risk of bridging two terminals and creating a massive, tool-welding spark.
- Battery Terminal Cleaner: Corrosion is the enemy of a solid connection. A wire brush specifically designed for battery posts and terminals is the perfect tool to scrub away that flaky buildup.
- Digital Multimeter: This is your go-to diagnostic tool. Use it to check the voltage of the old battery pack before you start and to verify the new pack is connected correctly and putting out the right voltage when you’re done.
- Battery Lifting Strap or Carrier: This simple device makes lugging heavy, awkward batteries around much safer. It saves your back and gives you a secure grip, preventing drops.
- Baking Soda and Water: Keep a small bucket of baking soda mixed with water close by. If you do spill some acid, this mixture will instantly neutralize it, making cleanup safe.
Pro Tip from the Field: Before you disconnect a single wire, pull out your phone and take a few clear, well-lit photos of the battery wiring setup. This creates a perfect visual roadmap and can save you a world of frustration when it's time to hook everything back up.
Finally, don't forget about ventilation. This is especially crucial if you're dealing with flooded lead-acid batteries, which release flammable hydrogen gas. Always do this job in a well-ventilated space—outside is best, but a shop with the bay doors wide open works too. If you're stuck inside, get some fans moving to keep the air circulating. Nailing this prep work sets you up for a smooth and successful battery replacement.
Executing the Battery Removal and Installation
Alright, you've got your safety gear on and your tools laid out. This is where the real work begins. A little patience and a methodical approach here will make this job go smoothly. Trying to rush it is a surefire way to cause electrical gremlins or, worse, get yourself hurt.
Before you even think about touching a wrench to a terminal, grab your phone. Take several clear, well-lit pictures of the battery compartment from a few different angles. You want to capture exactly how the positive and negative cables connect and the path they take. This one simple step is your best friend—it’s a perfect visual map for when you put everything back together.
This visual guide breaks down the essential safety flow for any hands-on work with your Genie lift.
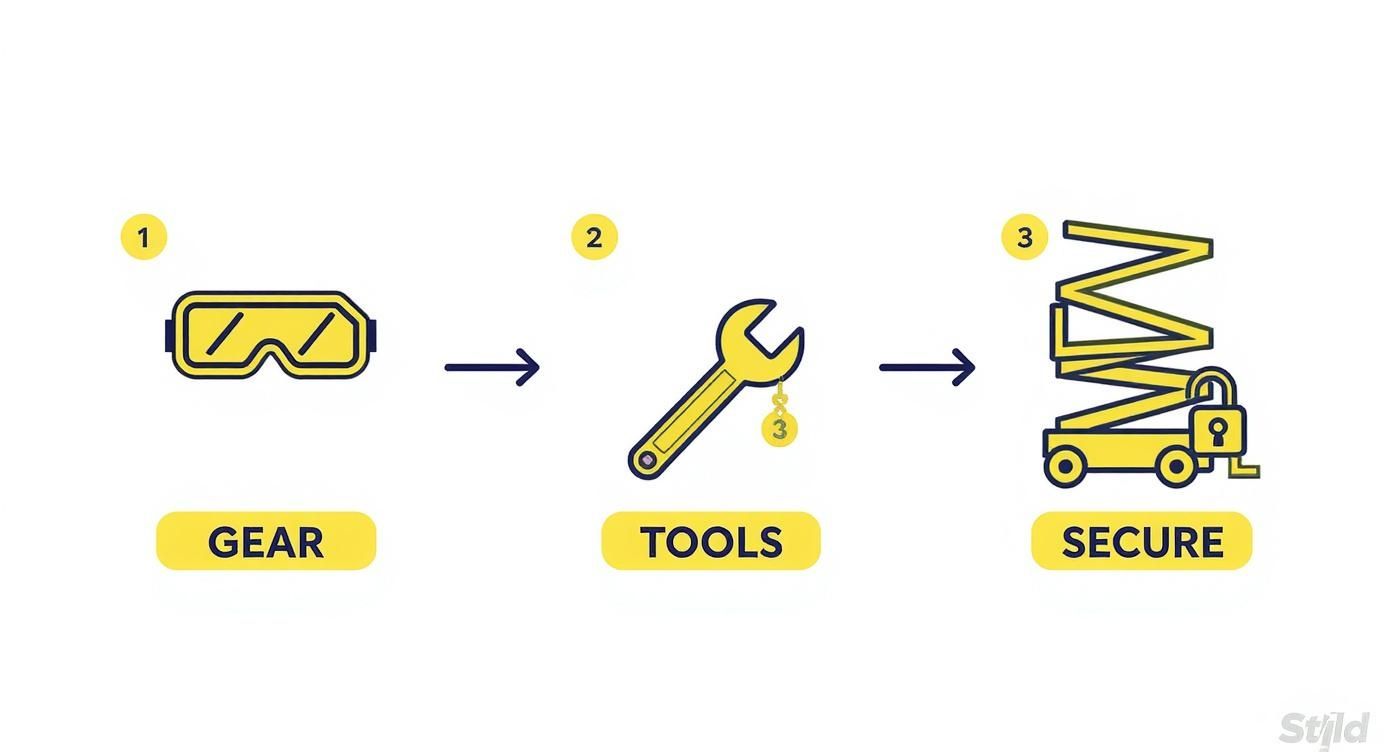
It’s all about being prepared—having the right gear and tools ready before you even start working on the secured lift.
Disconnecting and Removing the Old Batteries
The golden rule of any electrical work is breaking the circuit safely. Always, always start by disconnecting the main negative (-) terminal first. This is the big cable connecting the entire battery bank to the lift's chassis. Use an insulated wrench to loosen the nut, then gently twist and pull the cable clamp off the terminal post. Make sure to tuck it somewhere it can't accidentally flop back and make contact.
With the main ground disconnected, you’re clear to remove the main positive (+) cable. After that, you can move on to the smaller jumper cables linking the individual batteries. Stick to this "negative-off-first" process without fail. It practically eliminates the risk of a big, dangerous spark if your wrench happens to touch the lift’s metal frame.
Once all the cables are off, unbolt any hold-down brackets or straps. Now for the fun part. A single deep-cycle battery can easily weigh over 60 pounds.
Real-World Insight: Whatever you do, don't try to lift a battery by its terminals. They're not handles and can snap right off. Invest in a dedicated battery lifting strap. It gives you a secure, balanced grip that saves your back and prevents you from dropping a heavy box full of acid.
Lift each battery straight up and out of the tray. Set it down carefully on the ground or a pallet, and remember to lift with your legs.
Preparing the Battery Tray and New Batteries
With the compartment empty, it's the perfect time for a little housekeeping. Look closely at the battery tray for any corrosion—it usually looks like a white or bluish powder. If you see any, mix up a paste of baking soda and water and give the area a good scrub to neutralize the acid residue.
After the tray is clean and dry, turn your attention to the new batteries. Even fresh out of the box, the terminals can have a thin film on them from manufacturing. Grab your terminal cleaning brush and give the posts on each new battery a quick scrub until they’re shiny. A clean, bright metal-to-metal connection is critical for good power flow and charging.
Installing and Connecting the New Batteries
Gently place the new batteries into the tray, using your reference photos to make sure they're facing the right way. You want the positive and negative terminals to line up perfectly with your wiring plan. Secure them with the hold-down brackets until they're snug—tight enough not to vibrate, but not so tight you risk cracking the casing.
Now, you'll simply reverse the disconnection process. The order is just as important.
- Reconnect the jumper cables first. Follow your photos to get the series or parallel configuration exactly right. Tighten the nuts securely.
- Next, connect the main positive (+) cable to the correct battery terminal. Make sure it's tight and routed away from any sharp edges.
- Finally, connect the main negative (-) cable to complete the circuit. You might see a tiny, harmless spark as you make this last connection; that’s just the lift's electronics waking up.
Once everything is connected, give each cable a gentle tug to be sure it's tight. Loose connections are a leading cause of poor performance, charging headaches, and even electrical fires. As a final step, apply a thin coat of anti-corrosion spray or dielectric grease to the terminals. This seals out moisture and stops corrosion before it starts, giving your new setup a long, healthy life.
If you hit a snag with the wiring or aren't sure about your specific model, it's always smart to ask an expert. The tech-focused team at Flat Earth Equipment is a great resource; you can get in touch with their support specialists for hands-on advice.
Post-Installation Checks and Initial Power-Up
You've got the new batteries in and all the cables are tight. Nice work. But don't pack up your tools just yet. Skipping the final checks is like rebuilding an engine and never turning the key to see if it actually runs. These last few steps are what separate a professional job from a hopeful guess, making sure your Genie is truly ready for the worksite.
This isn't just about flipping a switch and hoping for the best. It's a quick, systematic check to confirm every connection is solid and the lift’s brain is talking to its new power source. Spending a few extra minutes here will save you from chasing down frustrating electrical gremlins later and give your new batteries the healthy start they need.
The Systematic Function Test
Okay, before you even think about plugging in the charger, it's time for a live fire test. Pop out the emergency stop button and turn the key. The control panel should light up, and you should hear that familiar electronic hum as the lift wakes up. That's your first good sign.
Now, let's run through all the functions. Don't be lazy here; be thorough.
- Platform Controls: Run the platform all the way up and all the way down. Listen for a smooth, steady sound from the hydraulic pump. No stuttering or straining.
- Drive Controls: Test forward, reverse, and steering. The response should be instant. If there's a delay or it feels sluggish, something's not right.
- Safety Features: Make sure the critical stuff works. Check the tilt alarm and the descent alarm to confirm they're active.
If any function feels weak or doesn't engage at all, shut the lift down immediately and double-check your cable connections. Nine times out of ten, a weak or spotty response comes from a loose terminal.
From the Field: A classic rookie mistake is cranking down on the terminal nuts like you're trying to win a strongman competition. This can wreck the lead posts. You're aiming for "snug," not "strained." A good rule of thumb is to tighten until the terminal clamp won't rotate on the post, then give it just another quarter-turn.
Verifying Voltage and Conditioning the Batteries
With the function test passed, grab your digital multimeter for one final, crucial check. Set it to DC voltage and put the probes on the main positive and negative terminals of the entire battery pack. For a 24V system, you're looking for a reading a little bit above 24 volts—usually in the 25-26V range. If it's reading significantly lower, you've either got a bad battery in the pack or something's wired wrong.
Now for the most important part: the initial charge. New batteries, especially traditional lead-acid ones, need a full, uninterrupted "conditioning" charge before you put them to work. Plug the lift's onboard charger into an appropriate outlet and just let it run a full cycle. Most Genie chargers have indicator lights that will tell you when it's done.
I know it's tempting to unplug it early and get the lift back in service, but don't. That first full charge is what equalizes all the cells and sets the foundation for a long, productive life. It's the single best thing you can do to maximize your investment from day one.
Maximizing Battery Life with Smart Maintenance
A new set of batteries for your Genie lift is a serious investment. Protecting that investment starts the second you finish the installation. Getting years—not just months—out of your power source comes down to smart, consistent maintenance habits. This isn't about adding complex procedures to your day; it's about simple routines that prevent the most common causes of premature battery failure.
Think of it like the engine in your truck. You wouldn't skip an oil change, so don't neglect your batteries. Being proactive here dramatically extends their lifespan and, more importantly, prevents the kind of unexpected downtime that can bring a whole job site to a grinding halt.
Cultivating Smart Charging Habits
Nothing impacts your battery’s health more than how you charge it. The number one rule? Avoid deep discharges whenever you can. Running your batteries until the lift barely moves is the fastest way to kill them, period.
As a solid rule of thumb, plug the lift in for a recharge when it hits about a 20% state of charge, or just make it a habit at the end of every shift. This simple step prevents the internal lead plates from degrading too quickly. It's always better for long-term health to perform regular, full charging cycles than to constantly run them into the ground.
Expert Insight: "Opportunity charging"—plugging the lift in during a lunch break—can definitely help get you through a long day. But it's no substitute for a full, uninterrupted charging cycle. Those short boosts are fine, but only a complete cycle properly conditions the battery cells for the long haul.
The Importance of a Clean Environment
Look at your battery terminals—they're the gateway for all power flowing in and out. That fuzzy white or blue buildup you sometimes see is corrosion, and it acts like an insulator, literally choking off the electrical connection. This resistance forces the charger to work harder, generates excess heat, and can stop the batteries from ever reaching a full charge.
A simple cleaning routine makes all the difference:
- Look 'Em Over: Once a month, just give the terminals a quick visual inspection.
- Scrub 'Em Down: See any buildup? Mix a paste of baking soda and water, slather it on, and use a wire brush to scrub away the corrosion. You want to see bright, shiny metal.
- Keep 'Em Clean: Wipe the area clean with a damp cloth, let it dry completely, and then apply a thin coat of anti-corrosion spray or even just petroleum jelly to seal out moisture.
This five-minute task can prevent a world of electrical headaches.
Routine Checks for Flooded Lead-Acid Batteries
If your lift is running on traditional flooded lead-acid (FLA) batteries, there’s one extra step you can't skip: checking the water levels. As the batteries charge, some water in the electrolyte solution naturally evaporates. If that fluid level drops below the top of the lead plates, the plates get exposed to air, causing permanent damage.
At least once a week, pop the vent caps and take a look. If the level is low, top off each cell with distilled water only. Never use tap water; its minerals will coat the lead plates and kill the battery's capacity over time. Just fill enough to cover the plates, leaving a small air gap at the top.
Troubleshooting Common Battery Problems
Even with the best maintenance, issues can pop up. Knowing what to look for can save you a service call.
| Common Symptom | Potential Cause(s) | What to Check First |
|---|---|---|
| Lift Won't Start or is Sluggish | Deeply discharged batteries, loose/corroded terminal, faulty battery cell. | Verify charge level. Check all terminal connections for tightness and corrosion. |
| Batteries Drain Too Quickly | Old batteries at end-of-life, improper charging, parasitic electrical drain. | Ensure a full charge cycle was completed. Test for parasitic draw when lift is off. |
| Charger Won't Activate | Poor connection, tripped breaker at the outlet, faulty charger. | Confirm the charger is securely plugged in at both ends. Check the outlet's circuit breaker. |
This kind of proactive mindset helps you catch small problems before they become big, expensive ones. If you suspect an issue with the charging system itself, a quality, compatible unit is critical. You can explore a range of industrial Genie lift battery chargers to make sure your power system is always ready to work.
Answering Your Top Genie Lift Battery Questions
Even the best guides can leave you with a few lingering questions. When you're in the middle of a battery swap, theory goes out the window, and you need practical answers. Think of this as the advice you'd get from a seasoned tech in the shop—straightforward, no fluff, and based on real-world experience.
We'll cover the big questions we hear all the time, from lifespan expectations to the subtle clues your batteries give you before they fail.
How Long Do Genie Lift Batteries Typically Last?
This is always the first question, and the honest answer is: it depends. If you treat them right with good charging habits, a quality set of deep-cycle lead-acid batteries will give you 3 to 5 years of solid service. If you've invested in a premium lithium-ion pack, you could easily see 7 years or more.
But usage is the biggest factor. A lift that's running hard all day, every day, is going to chew through batteries much faster than one that's only used for light tasks a few times a week.
What Are the Early Warning Signs of Battery Failure?
Batteries almost never die without warning. They'll drop hints that they're getting tired, and catching these early can save you from being stranded mid-job.
Keep an eye out for these classic symptoms:
- Shorter Runtimes: The most obvious sign. A full charge just doesn't get you through the day like it used to.
- Sluggish Performance: Does the lift feel a bit weak or slow, especially when raising the platform with a load? That's a classic sign the batteries are struggling to deliver the necessary amps.
- Endless Charging Cycles: If the charger seems to run forever without shutting off, the batteries likely can't hold a full charge anymore.
- Visible Damage: This is a big one. Any bulging, cracking, or leaking from the battery case is an immediate red flag. A battery in this state is a safety hazard and needs to be replaced now.
Can I Replace Just One Bad Battery?
It’s a tempting thought, especially when trying to manage a tight budget, but swapping just one bad battery in a pack is a classic mistake. You should always replace the entire battery bank at the same time.
When you mix a brand-new battery with older, weaker ones, you create a serious imbalance. The new battery ends up doing all the heavy lifting, trying to compensate for the others, which leads to its own premature death. You'll be back in the same spot in no time, having spent more in the long run.
Key Takeaway: Always perform a complete Genie lift battery replacement. Think of the batteries as a matched set. This guarantees balanced performance, proper charging, and protects your investment by maximizing the service life of the new pack.
The push for reliable power is a huge factor in the equipment industry. The global forklift battery market, which includes power sources for lifts like Genies, is set to grow from $4.8 billion in 2024 to $8.4 billion by 2034. With warehouses making up over 42% of that demand, it's clear how essential battery uptime is. You can read the full analysis on forklift battery market trends to see how the technology is evolving.
Does Cold Weather Affect Battery Performance?
It absolutely does. Cold temperatures can slash a battery's effective capacity by as much as 50%. If you're working in a cold climate, expect shorter runtimes and the need to charge more often during winter. It's just basic chemistry, but planning for it will save you from getting stuck with a dead lift on a frigid morning.
We've put together a quick-reference table to summarize the key takeaways on Genie lift battery health and replacement schedules.
Quick Answers to Common Battery Questions
| Question | Answer / Guideline |
|---|---|
| How often should I replace my Genie batteries? | Lead-acid: 3-5 years with proper care. Lithium-ion: 7+ years. Replace sooner if you notice consistent performance decline. |
| What's the #1 sign my batteries are failing? | Significantly shorter runtimes. If a full charge doesn't last nearly as long as it used to, it's time to start planning for a replacement. |
| Why can't I just replace the one bad battery? | It creates an imbalance. The new battery will overwork and fail prematurely, costing more in the long run. Always replace the full set. |
| Do my batteries need maintenance? | Yes. Regularly clean terminals, check water levels (for flooded lead-acid types), and ensure proper charging cycles to maximize their lifespan. |
This table serves as a handy cheat sheet, but always remember that your lift's specific usage patterns and operating environment are the biggest factors influencing battery life.
When you need the right batteries, chargers, or expert advice for your Genie lift, the team at Flat Earth Equipment has you covered. We deliver precision-fit parts and the technical support you need to keep your fleet in top shape. Get in touch with us at Flat Earth Equipment to find what you need.